Summer Harvest Cooking Video

The best meals always seem to be the spontaneous ones. During summer harvest season, I let the garden inspire my meals. For this lunch, I picked what was ripe, and pulled together a quick and delicious meal for my neighbors. With vegetables this fresh, they don’t need a lot of fuss so I leaned towards simple preparations that allow the natural flavors to shine.

Our meal consisted of a sugar snap pea guacamole, oven-roasted sliced beets, simple marinated grilled chicken with herbs and garlic (served with a pistol sauce that was not covered in the video, but in the recipe below), and a just-picked garden salad with a fresh raspberry vinaigrette. Enjoying the gift of a warm, sunny day we dined by the garden. I think food tastes better outside, especially while sharing stories with friends and a nice bottle of chilled rosé.

Watch the video above to learn more about how I prepared the meal.

You can find the recipes here.

Crostini with Snap Pea Guacamole

Roasted Beets

Grilled Chicken with Pistou Sauce

Garden Salad with Raspberry Vinaigrette

One-Day Artisan Loaf


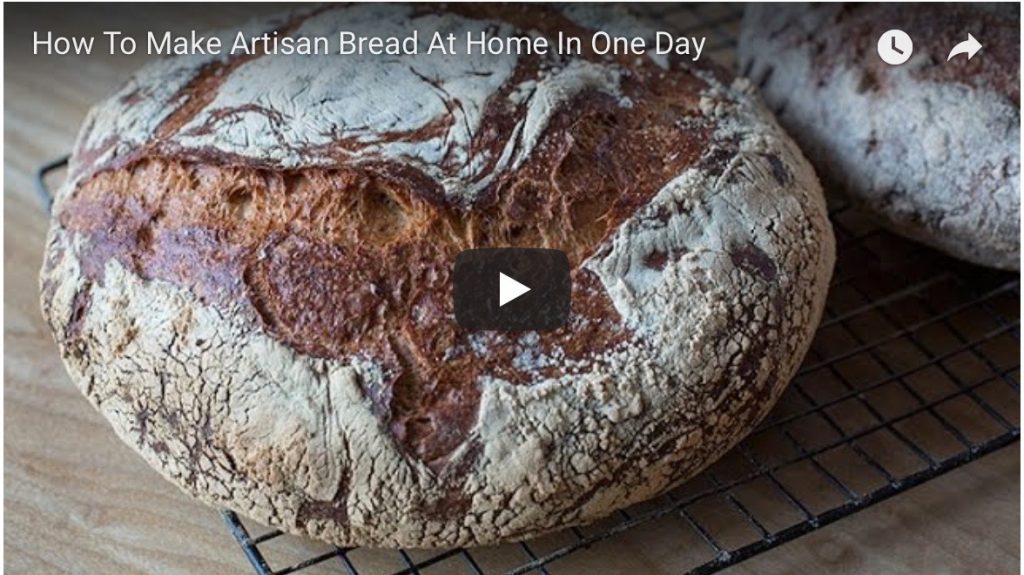
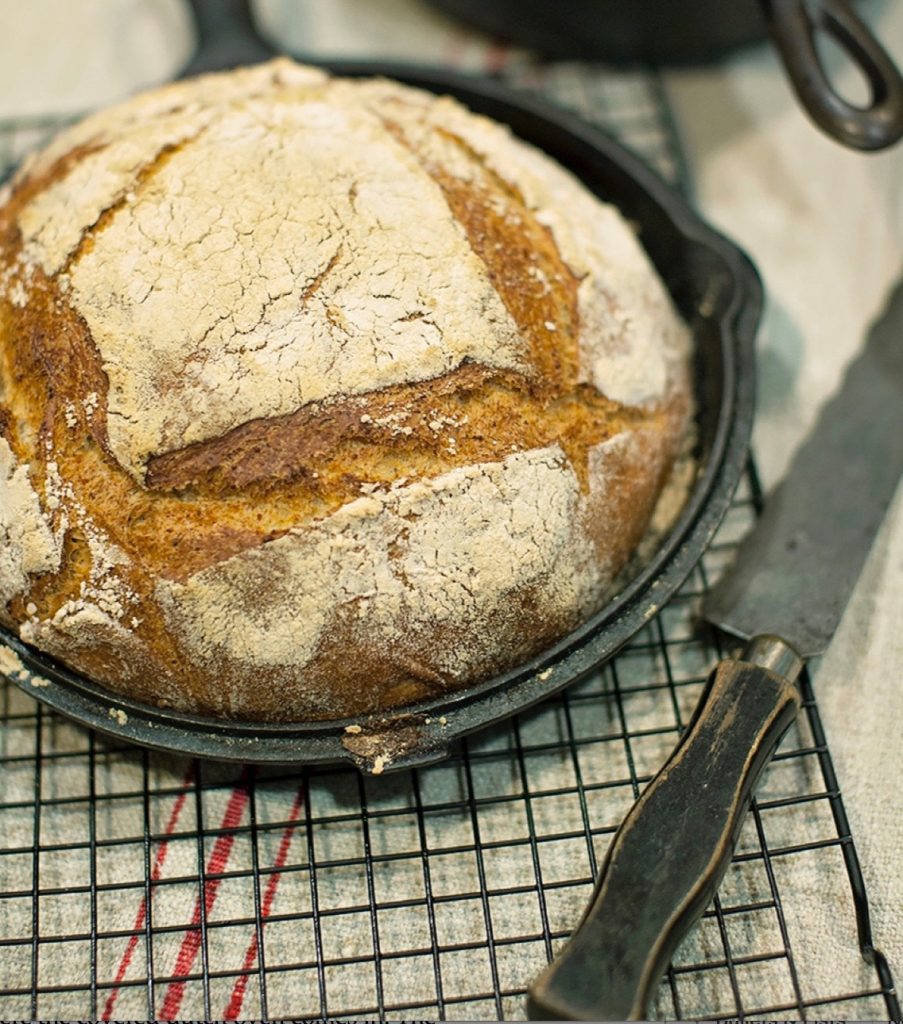
You can make very flavorful artisan bread at home by using a technique that’s somewhat new in the bread-baking world: the no-knead method. I use this technique at home all the time and feel sure it will become a favorite of yours as well. The recipes I make this way don’t call for a homemade starter to build flavor. All you need is time, a heavy dutch oven, flour, yeast, olive oil, and salt.

One of the keys to baking a beautiful artisan loaf is having a humid atmosphere when the bread first hits the oven. The covered dutch oven keeps the inside air moist for the first few minutes of baking, allowing the bread’s soft outer surface to rise before it forms a hard crust. The result is a really beautiful loaf—domed, crusty, caramelized to a deep brown color, and full of complex flavors. I’ve found that baking in a cast-iron pot creates the all-time best results for home bread baking.

Click to enjoy recipes for my One-Day Artisan Loaf, One-Day Artisan Whole Grain Loaf and Pesto Ham & Cheese Sandwich.

Going Greek: Baking with Greek Yogurt

Baking with Greek Yogurt

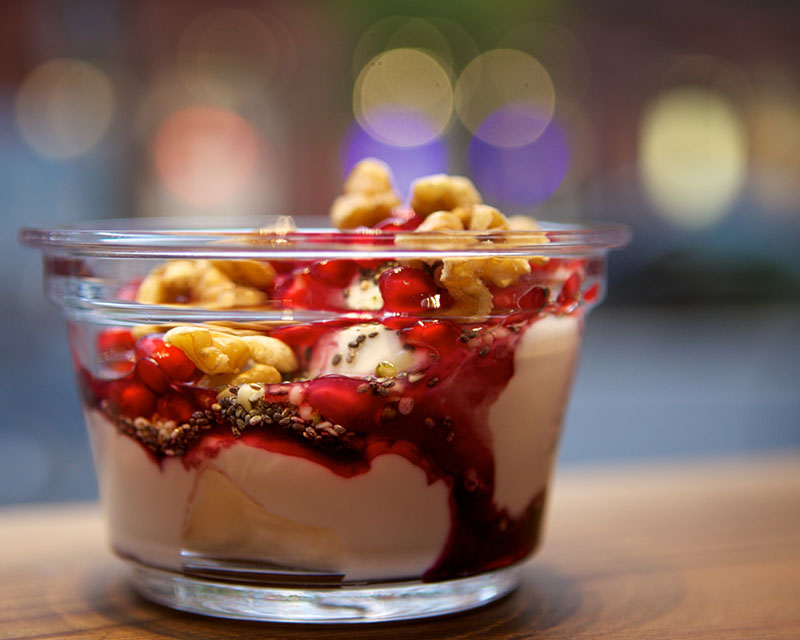
Savoring the benefits of Greek yogurt doesn’t have to end with breakfast. Photo by Meng He.

Greek yogurt has invaded my supermarket, bumping many of the old regular brands off the shelf. It even became a cold war subject in 2014 when Russian President Vladimir Putin refused to allow a shipment of Greek yogurt to reach the United States Olympic team at the winter games in Sochi. Why all the fuss about something as commonplace as yogurt? Was Putin seeking a competitive advantage? Who knows, but Greek yogurt does have health advantages over regular yogurt, with more beneficial probiotic bacteria and a higher protein content. It’s also lower in both natural sugars and sodium. That’s just a bonus. What I like best is its rich flavor and satisfying, creamy mouthfeel. The superior thickness is achieved by straining out the excess whey, giving it that memorable texture and a delicious tang that brings back indelible memories of travels to Santorini and Crete.

Recently the Washington State Dairy Council asked us to develop a recipe featuring Greek yogurt. So we tweaked our Fruit & Yogurt Tart recipe to include the ingredient and now we’re wondering how we ever lived without it. Inspired, we experimented and adjusted other recipes too. We’re now serving our housemade Granola Parfait over a silky dollop of honeyed Greek yogurt and fresh berry compote. We’re also scooping it into batters for some of our cakes and tarts, substituting it for other fats. It enhances textures, creating a finer, more consistent crumb, and adding moisture. Carrying flavor much like butter does, with the perk of extra protein. Judge the results for yourself by trying a slice of our Budapest Coffee Cake or Lemon Sour Cherry Coffee Cake, a sturdy but tender treat that doesn’t just go with breakfast, at least at my house.

When you’re picking up Greek yogurt, to eat or for baking, be sure the label lists only milk and active cultures as ingredients. Some companies add powdered milk protein, starches, and gums to thicken it. This shortcuts the lengthy straining process and the extra milk it requires, saving money in production. Quality is the sacrifice. So grab some plain Greek yogurt and try the recipe below for my Fruit & Greek Yogurt Tart. Or experiment like we did, replacing some or all of the butter or sour cream in your favorite recipes. However it turns out, you’ll discover that once you go Greek, at least with yogurt, you’ll never go back.

 – Leslie Mackie

Fruit & Greek Yogurt Tart

Click here to print this recipe!

Ingredients

Pre-rolled 9” pie shell or one recipe for Flaky Pie Dough (see note below)
3 eggs
3/4 cup plus 2 tablespoons sugar
2 tablespoons pure vanilla extract
2 cups plain (unflavored) Greek low-fat yogurt
1/2 cup unbleached all-purpose flour
1-1/2 cups fresh seasonal fruit
1/3 cup sliced raw almonds
1 tablespoon powdered sugar

Makes a 9-inch tart

1. Preheat oven to 400°F. Locate a 9” glass pie pan, aluminum pie tin or 2” fluted tart pan.

2. Place chilled pie shell into the pan, line it with parchment paper, and weight with rice or baking beans. Bake for 30 minutes or until shell is golden brown. Remove rice or beans and set aside. Reduce oven temperature to 325°F.

3. In the bowl of a stand mixer place the eggs, sugar and vanilla. With a whisk attachment on medium speed, whip for 3 to 5 minutes or until the mixture becomes light in color and texture.

4. With the mixer on low speed add in the yogurt. Lower the bowl and scrape down the sides to make sure it is well combined. With the mixer on low speed add the flour gradually to avoid forming lumps. Scrape bowl again to ensure everything is well combined.

5. Pour prepared custard into the pre-baked shell leaving a 1/4-inch border at the edge of the crust. This is to prevent the custard from spilling over the edge when the fruit is added. Scatter berries or sliced fresh fruit over the top of the tart and sprinkle sliced almonds around the edge of the tart.

6. Place the tart on the center rack of the oven and bake for approximately 1 hour, or until the tart is set in the center.  Check the tart at 30 minutes and rotate for even baking.

7. Remove the tart from the oven and set aside to cool for 1 hour or chill in the refrigerator before serving. Dust with powdered sugar for presentation.

Note: For an absolutely delicious, foolproof pie crust, use our Flaky Pie Dough recipe, then proceed as follows: Place two-thirds of the prepared dough on a floured work surface and begin rolling out the pie dough to 1/8-inch thickness, creating a 15-inch circle (save remaining dough for other uses). Fold pie dough in half and lift into the baking pan, allowing for a 2-inch border beyond the rim. To create the pie rim, fold the pie dough border up and into itself, overlapping with the cut edge visible to the inside of the tart, making a 1/2-inch standing crust. Crimp the edge all around the pie pan and then chill in freezer for 20 minutes. Continue following instructions in Step 2.

Umeboshi Pizzettas: East Meets West

Umeboshi It’s cherry blossom season! Our city is graced with those treasured pops of pink every spring, but do you know the history behind Seattle’s blossom-filled trees? As a token of the friendship between Japan and Washington, Japan’s former Prime Minister Takeo Miki gave Seattle 1,000 cherry blossom trees on May 8, 1976.

Every year since, we have celebrated this bond during the Seattle Cherry Blossom & Japanese Cultural Festival. From April 24 through April 26, our diverse community will gather at Seattle Center to learn about Japanese culture through music, fellowship, and (our favorite) food.

We’re excited to contribute our own special homage to this year’s festivities, an Umeboshi Pizzetta. Inspired by Tazue Sasaki, Cherry Blossom Festival committee chair and a regular guest of our café, this pizza is the perfect blend of Japanese and Italian culture. Tazue and her husband Yutaka loved ordering our pizzettas when they were on our menu and thought the flavors of the cheese and dough would nicely contrast the tartness of umeboshi, Japan’s ubiquitous pickled plum.

Leslie Mackie and Jane Cho put their heads together and came up with a delightful combination of umeboshi, Parmesan and Swiss cheese, sesame seeds, and olive oil on a freshly baked crust. You can taste our Umeboshi Pizzetta at the Cherry Blossom festival this weekend.

If you would like to try your hand at making umeboshi pizzas at home, click here for a wonderful pizza dough recipe straight from our More from Macrina Cookbook. But, use the umeboshi sparingly. While delicious, a little bit goes a long way.

Valentine’s Day Brunch: Cherry Brioche French Toast

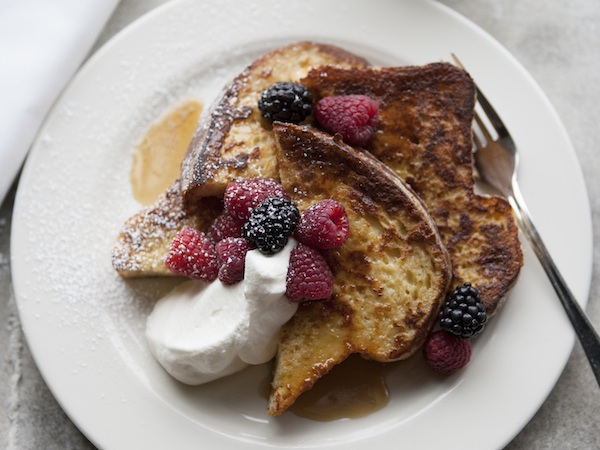
Cherry Brioche French Toast

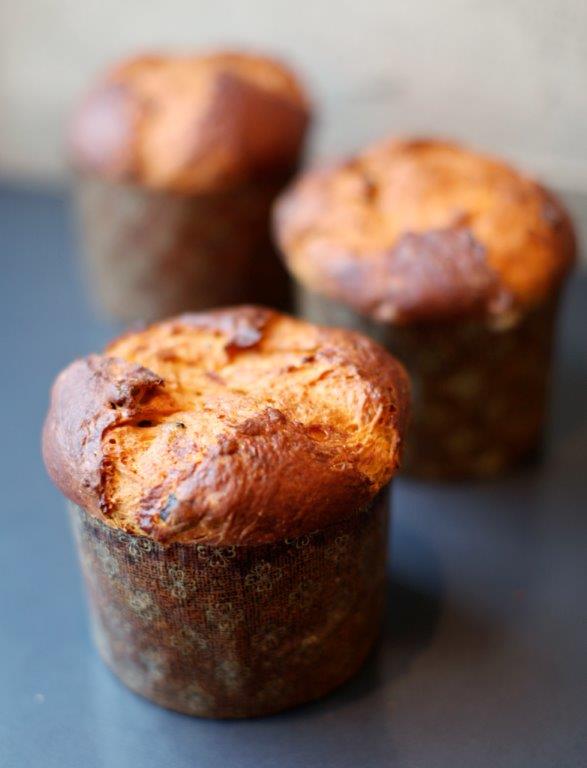
Instead of scrambling to find a last-minute Valentine’s Day dinner reservation, whip up a delicious brunch for your Valentine – or your favorite single friends. Our Mini Cherry Brioche is only available for a limited time and it makes a wonderful French toast. Topped with warm maple syrup and rich brandy whipped cream, it’s a sweet way to start the day whether you’re happily single or blissfully coupled.

Cherry Brioche French Toast
Click here to print this recipe!

Ingredients

For the brandy whipped cream:
1/2 cup heavy cream
1 tablespoon brandy
1 tablespoon sugar
1/2 teaspoon pure vanilla

For the French toast:
5 eggs
1 teaspoon pure vanilla
2 tablespoons brown sugar
1/2 cup heavy cream
1/4 teaspoon cinnamon
1/4 teaspoon nutmeg
*1 Mini Cherry Brioche
1 tablespoon vegetable oil
1 tablespoon butter

*Available in our cafés.

Serves 2

Preparing the brandy whipped cream:
In a medium bowl, place the cream, brandy, sugar and vanilla. Mix with a whisk or hand-mixer until the mixture holds its shape, about 2 minutes. Set aside until ready to use.

Preparing the French toast:
1. In a medium bowl, place the eggs, vanilla, brown sugar, cream, cinnamon and nutmeg and whisk to combine. Pour custard into a shallow baking pan.

2. Cut the brioche into 1-inch thick slices. Dredge each slice in the custard, making sure all sides are evenly coated.

3. In a large sauté pan over medium heat, warm the vegetable oil and butter. Lay the brioche slices in the pan and cook until both sides are golden brown.

4. Divide French toast slices among 2 plates. Serve with a drizzle of pure maple syrup and a dollop of brandy whipped cream.

Queso Fundido Recipe: A Winning Game Day Dip

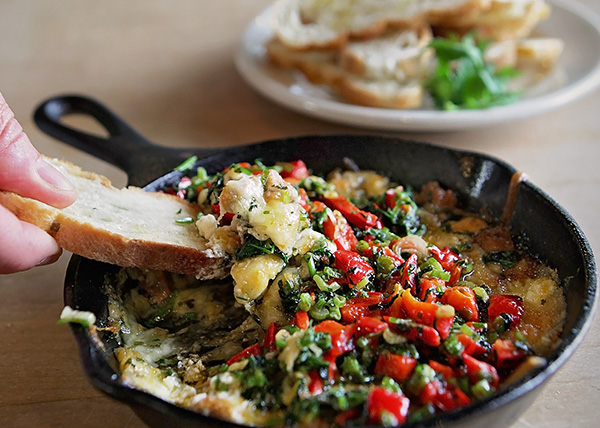
Queso Fundido Recipe

Bring some sizzle and spice to your game day party with our Queso Fundido recipe! This popular Mexican appetizer is the perfect snack for football season, and it’s easy to customize to your crowd’s taste. Turn up the heat with roasted jalapeño or make it vegetarian-friendly by swapping the chorizo for sautéed mushrooms. Serve it with our Crostini instead of chips or slather it on warm tortillas. Your guests will be cheering for more!

Queso Fundido
Click here to print this recipe!

Ingredients

4 ounces chorizo, casings removed
6 ounces Jack cheese, shredded
4 ounces mozzarella, shredded
5 ounces goat cheese
1 cup cilantro, chopped
1 Hungarian pepper, poblano chile or red bell pepper, roasted
2 tablespoons unsalted butter
1 clove garlic, chopped
3 scallions, chopped Salt and pepper to taste

Makes 6 servings

1. Preheat oven to 375°F. Brush a 9-inch baking dish with oil. In a skillet over medium heat, saute chorizo until thoroughly cooked. Remove from heat and crumble or dice once it has cooled. Set aside.

2. In a medium bowl, combine the Jack, mozzarella and goat cheese, then mix in the chorizo and 1/3 cup of cilantro.

3. Place the cheese mixture into the prepared baking dish and bake for 20 to 25 minutes, until the cheese is melted and golden brown.

4. Peel the roasted pepper, remove the seeds, and dice into 1/2-inch pieces. Melt the butter in a saute pan over medium heat. When the butter begins to froth, add the garlic, remaining cilantro, and scallions. Saute until the garlic is fragrant but not browned. Add the diced pepper and season to taste with salt and pepper.

5. Layer the sauteed vegetable mixture over the cheese and serve immediately.

12 Days of Cookies: Day 12, Ginger Molasses Cookies

Ginger Molasses Cookies

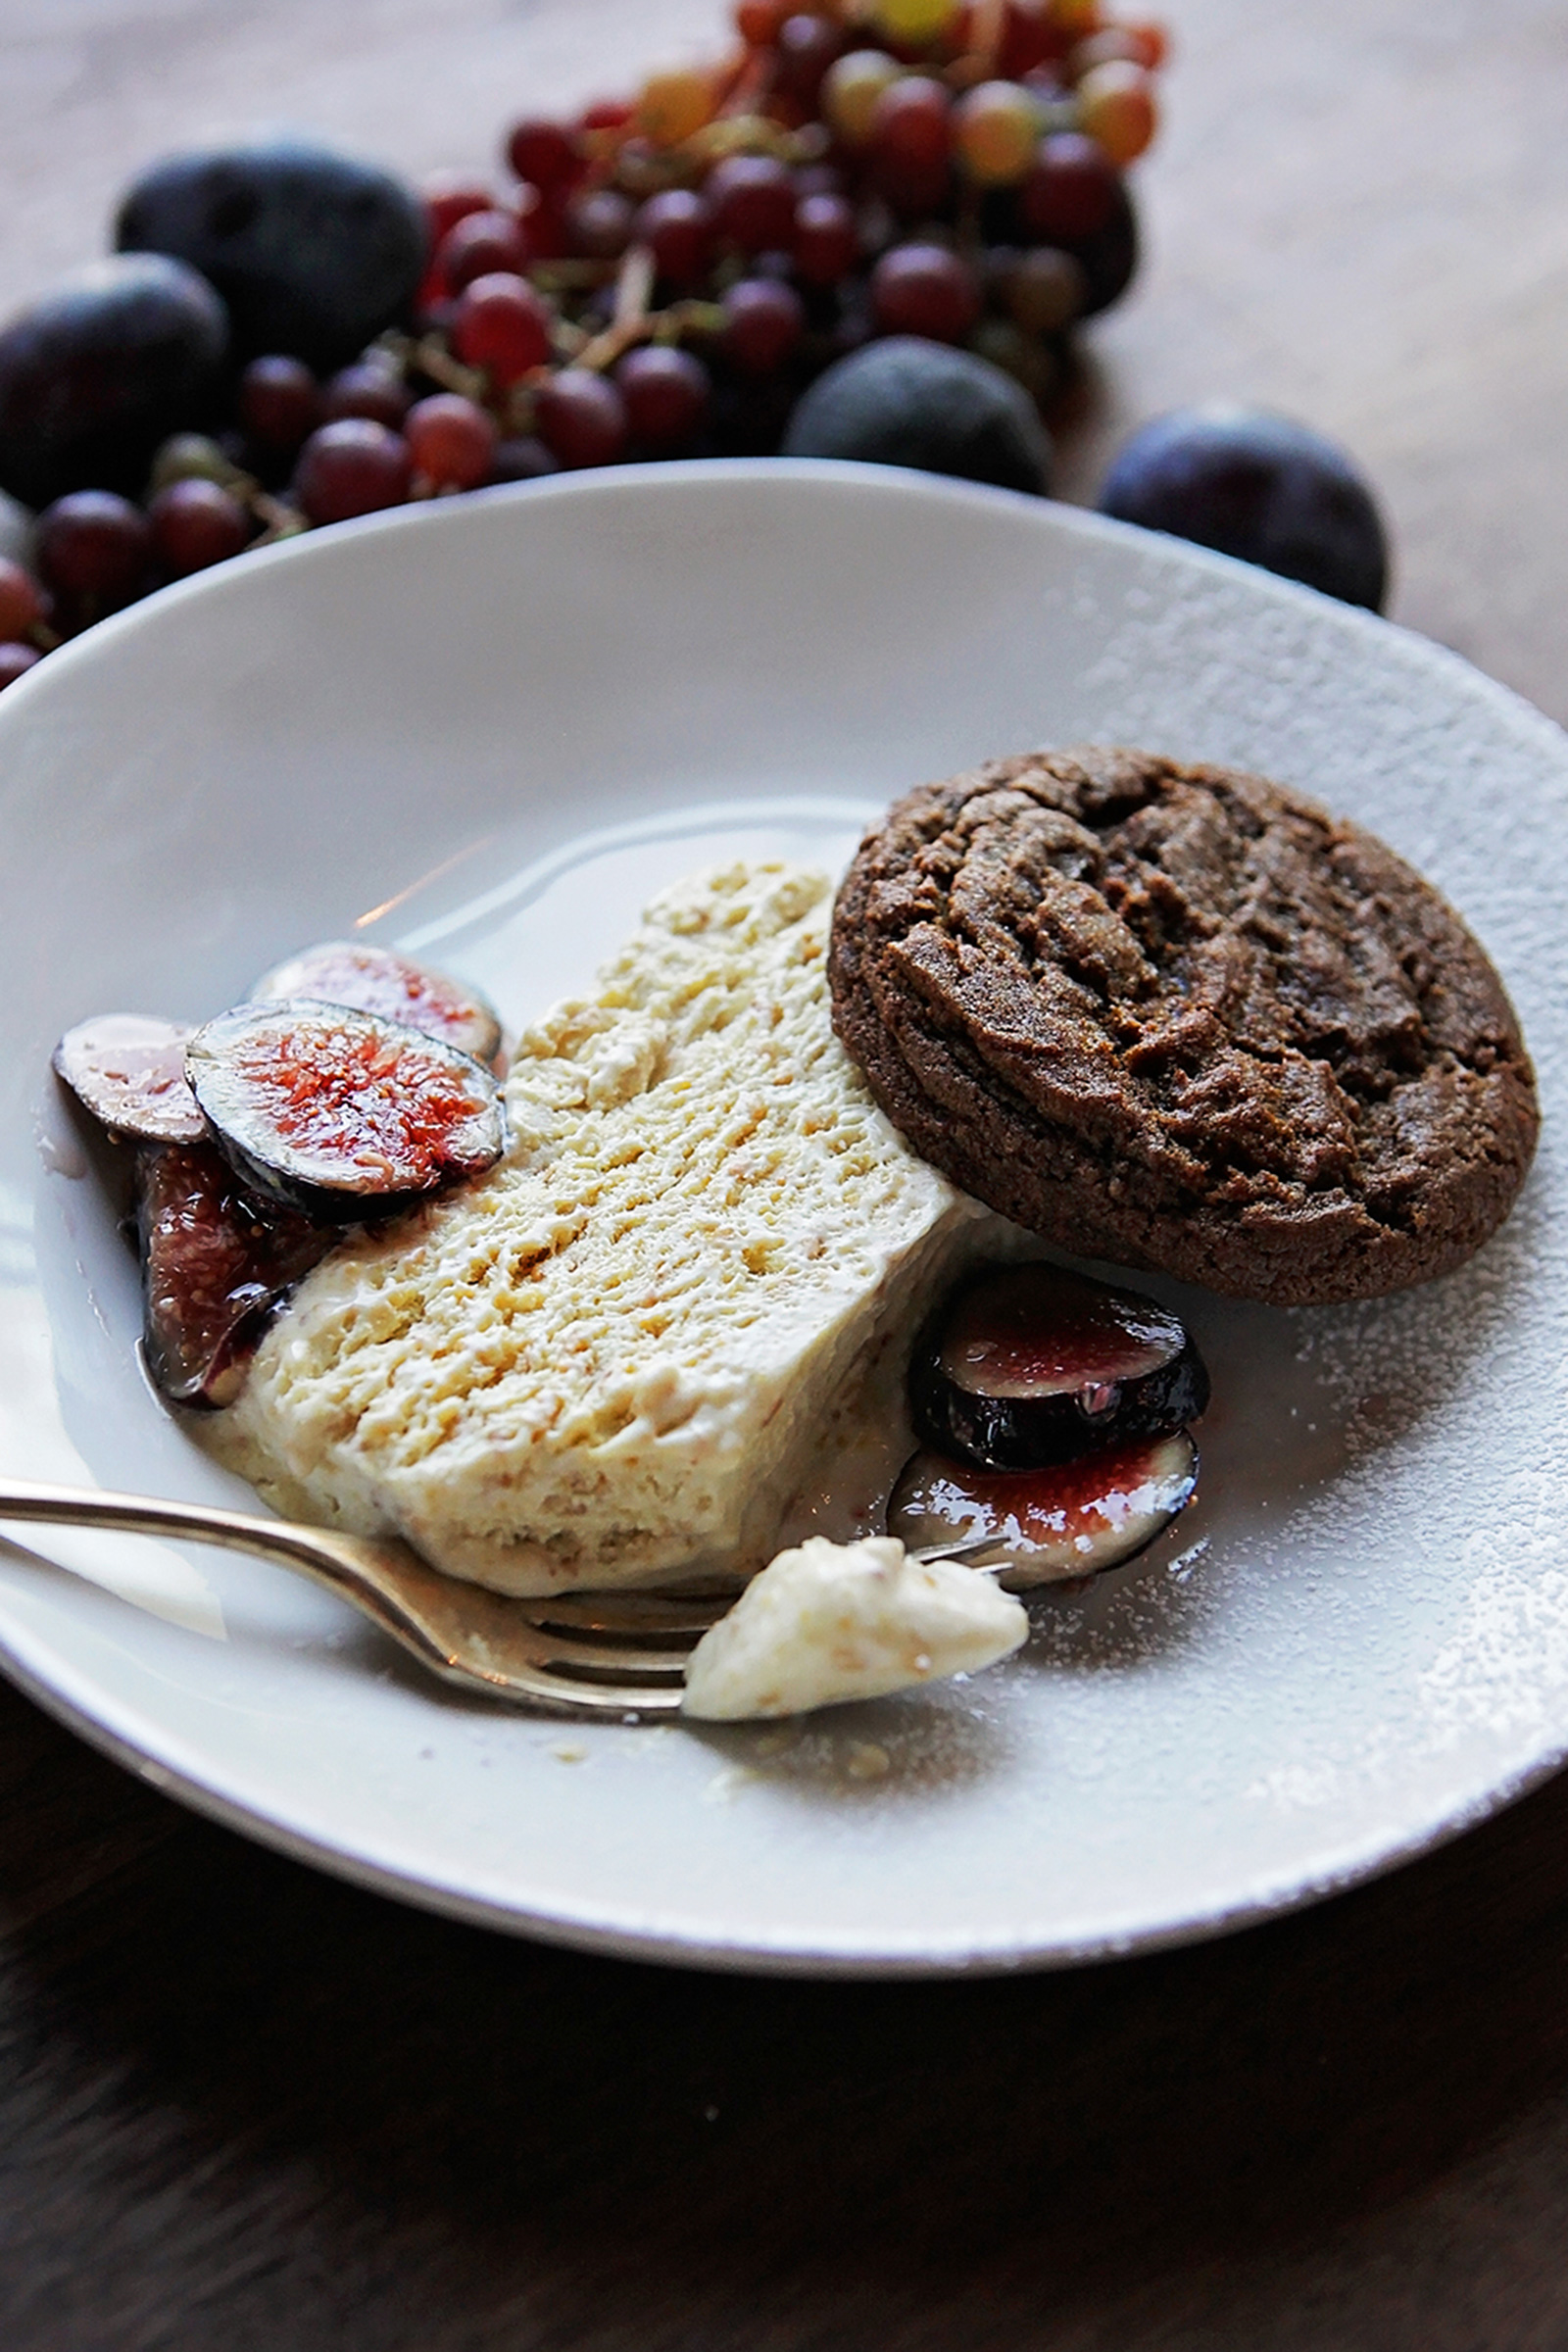
As Leslie says, ginger has a natural warming quality that’s perfect for this time of year. With its recipe closely mirroring that of gingerbread, conventional wisdom tells us that the Ginger Molasses Cookie is a miniature version of the sweet and spicy cake.

Fresh ginger and a texture that perfectly balances chewy and crisp are what make these cookies exceptionally good. Follow along with Leslie as she prepares our Ginger Molasses Cookies in this video!

Ginger Molasses Cookies
Click here to print this recipe!

Ingredients

2 1/4 cups unbleached all-purpose flour
1 1/2 teaspoons baking soda
2 teaspoons cinnamon
1 1/2 teaspoons ground cloves
1 teaspoon salt
1/2 cup vegetable shortening, room temperature
6 tablespoons unsalted butter, room temperature
1 1/2 cups light brown sugar
2 eggs
2 teaspoons peeled and chopped ginger
1/3 cup dark molasses
1 cup granulated sugar

Makes 16 cookies

1. Combine flour, baking soda, cinnamon, ground cloves, and salt in a medium bowl. Mix with a whisk until evenly distributed and set aside.

2. Combine shortening, butter, and brown sugar in the bowl of your stand mixer. Using the paddle attachment, mix on medium speed for about 5 minutes, until the mixture is smooth and pale in color. Add 1 egg and mix until incorporated. Scrape down the sides of the bowl. Add remaining egg and scrape down the sides of the bowl again. Add ginger and molasses and mix on low speed for 1 minute. The mixture may look as if it’s separating, but have no fear. It will come together once the dry ingredients are added. Remove the bowl from the mixture and scrape down the sides of the bowl again.

3. Using a rubber spatula, fold half of the flour mixture into the dough. After the flour is fully incorporated, fold in the rest of the flour mixture and continue folding until all of the flour has been absorbed. Scrape down the sides of the bowl and cover it with plastic wrap. Chill in the refrigerator for at least 1 hour. At this point the dough can be formed into cookies or stored in the refrigerator for up to 4 days.

4. Preheat oven to 325º F. Line 2 rimmed baking sheets with parchment paper and pour granulated sugar into a pie pan or shallow bowl.

5. Scoop dough out of the bowl (I like to use an ice cream scoop) and roll the dough into small balls. Toss each of the balls in granulated sugar until evenly coated, then place on a baking sheet, leaving space between each ball. Slightly flatten each ball of dough with the palm of your hand to keep the balls from rolling around.

6. Place 1 sheet of cookies in the refrigerator while baking the other sheet.

7. Bake cookies, 1 sheet at a time, on center rack of oven for 12 to 14 minutes each. To help the cookies bake evenly, rotate the baking sheet every 4 minutes or so. The finished cookies will be golden brown and slightly puffed up but will collapse while they cool. Let cool on the baking sheet for 15 minutes. The cooled cookies can be stored in an airtight container for up to 3 days.

12 Days of Cookies: Day 10, Swedish Overnights

Swedish Overnights

No Scandinavian Christmas celebration would be complete without Swedish Overnights. Also called Swedish Heirloom Cookies, Swedish Overnights share similar ingredients to Mexican Wedding Balls. These cookies can be dusted with powered sugar, or in this case, colorful sprinkles for a festive touch. Leslie inherited this recipe from her mother’s family and she loves baking these cookies every Christmas. We hope you enjoy them, too.

Check out our video to follow Leslie’s simple step-by-step instructions for preparing these cookies!

Swedish Overnights
Click here to print this recipe!

Ingredients 

8 ounces (2 sticks) unsalted butter, at room temperature
1 cup powdered sugar, sifted
1 egg, separated
1 teaspoon pure vanilla extract
2 1/4 cups unbleached all-purpose flour
1 cup finely chopped walnuts
Crystal sugar in your favorite colors

Prepare this dough 1 day before baking.
Makes 3 dozen cookies

1. Combine butter and sugar in the bowl of your stand mixer. Using the paddle attachment, mix on low speed for about 30 seconds. Increase speed to medium and mix for another 5 to 7 minutes, or until the mixture is smooth and pale in color. Add the egg yolk and vanilla extract and mix for about 30 seconds. Scrape down the sides of the bowl with a rubber spatula and mix for another 30 seconds, making sure egg and vanilla are thoroughly incorporated. Remove bowl from mixer and scrape down the sides of the bowl again.

2. Using a rubber spatula, fold half of the flour into the dough. After the first batch is fully incorporated, fold in the other half and continue folding until all of the flour has been absorbed, 1 to 2 minutes.

3. Pull dough from the bowl and onto a floured surface and divide it in half. Roll each half into a log about 1 1/2 inches thick, and place the logs on separate pieces of parchment paper. (The parchment paper needs to be at least 4 inches longer than the logs.) Brush the logs with the egg white, then scatter half of the walnuts over each log. Roll the logs back and forth until they are completely coated in nuts. Roll each log up within its parchment paper. Finish by twisting the ends of the paper to create a seal. Chill logs in the refrigerator over night.

4. Preheat oven to 325ºF. Line 2 rimmed baking sheets with parchment paper.

5. Unwrap the logs and using a sharp knife, cut them into 1/2-inch-think coins. Place the cookies on the prepared baking sheets, leaving 1 inch between each cookie. Brush the top of each cookie with a tiny bit of water and sprinkle festive sugar crystals on top.

6. Bake on center rack of oven, 1 sheet at a time, for 20 to 25 minutes. To help the cookies bake evenly, rotate the baking sheet every 4 minutes or so. The finished cookies will be golden brown on the edges and pale in the center. Let cookies cool completely on the baking sheet. They can be stored in an airtight container for up to 1 month at room temperature.

12 Days of Cookies: Day 5, Festive Gingerbread People

Gingerbread Recipe

Did you know gingerbread people have a noble history? The story goes that Queen Elizabeth I had her chef make gingerbread people in each guest’s likeness for a royal dinner party.

Half the fun of gingerbread people is decorating them, isn’t it? We always start out with simple icing outlines and dots for facial features, but after a few have been finished, we start drawing on sassy shirts and flowing skirts or groovy surfer shorts and sunglasses. Invite your friends over – kids and grownups alike – and jump-start the season with a cookie decorating party of your own!

Festive Gingerbread People
Click here to print this recipe!

Ingredients

3 1/3 cups unbleached all-purpose flour
2 teaspoons baking soda
2 teaspoons cinnamon
2 teaspoons ground allspice
1/4 teaspoon cayenne pepper
1 3/4 cups light brown sugar
3/4 cup solid vegetable shortening, room temperature
2 eggs
1/4 cup honey
1/3 cup molasses
2 tablespoons peeled and grated ginger

Click here for our Quick & Easy Cookie Icing recipe and decorating tips!

1. Sift the flour, baking soda, cinnamon, allspice and cayenne into a medium bowl. Mix with a spoon until the ingredients are evenly distributed.

2. Place the sugar and shortening in the bowl of your stand mixer. Using a paddle attachment, mix on low for about 30 seconds to start bringing the ingredients together. Increase the speed to medium and continue mixing for 5 to 8 minutes, or until the mixture is smooth and pale in color. Add the eggs one at a time, making sure each egg is fully incorporated before adding another. Add the honey, molasses and ginger and mix on medium for about 30 seconds. Scrape down the sides of the bowl with a rubber spatula and mix for another 30 seconds to make sure the ingredients are evenly distributed. Remove the bowl from the mixer and scrape down the sides one more time.

3. Fold half of the dry ingredients into the batter with a rubber spatula. After the first batch is incorporated, fold in the rest of the dry ingredients and continue folding just until all of the flour has been absorbed.

4. Using a rubber spatula, scrape the dough from the bowl onto a large piece of plastic wrap. Dust your hands with a little flour and pat the dough into a block, then wrap it tightly in the plastic wrap and chill in the refrigerator for 1 to 2 hours.

5. Preheat the oven to 325°F. Line 2 rimmed baking sheets with parchment paper.

6. Place the chilled dough on a floured work surface and roll it out 1/2-inch thick. Using a 6-inch cookie cutter, make as many gingerbread people as you can and place them on the prepared baking sheets. These cookies will spread out a little bit during baking, so leave a 2-inch space between each cookie. Roll the scraps of dough into a ball and roll it out again. You should be able to cut a few more cookies from the dough.

7. Bake the cookies, 1 sheet at a time, on the center rack of the oven for 20 to 25 minutes. To help the cookies bake evenly, rotate the baking sheet every 5 minutes or so. Let them cool completely before decorating. These cookies can be made 2 or 3 days before a decorating party and stored in an airtight container.

12 Days of Cookies: Day 3, Mexican Wedding Balls

Snowball Cookies

Mexican Wedding Balls, Snowball Cookies, Russian Tea Cakes… Whatever the name, one thing is certain: These cookies will make spirits bright! The snow-white, powdery appearance makes it a favorite for cookie swaps and festive desserts. The cookies were dubbed Mexican Wedding Balls because of their common use as cheery wedding favors.

The secret to making truly scrumptious, melt-in-your-mouth Mexican Wedding Balls is using high-quality butter and pure vanilla extract. Check out our video to follow Leslie’s simple step-by-step instructions for preparing these cookies!

Mexican Wedding Balls
Click here to print this recipe!

Ingredients

1 1/2 cups whole almonds
12 ounces (3 sticks) unsalted butter, room temperature
1/3 cup granulated sugar
1 tablespoon pure vanilla extract
3 1/4 cups unbleached all-purpose flour
2 cups powdered sugar, sifted

Makes 3 dozen cookies

1. Preheat oven to 350°F.

2. Scatter almonds on a rimmed baking sheet and toast on center rack of oven for approximately 10 minutes, or until golden brown. Let cool, then finely chop and set aside.

3. Combine butter and sugar in the bowl of your stand mixer and using the paddle attachment, mix on low speed for about 30 seconds. Increase speed to medium and mix for another 5 to 7 minutes, or until the mixture is smooth and pale in color. Add vanilla extract and mix for about 30 seconds, making sure vanilla is fully incorporated. Remove the bowl from the mixer and scrape down the sides of the bowl.

4. Place almonds and flour in a medium bowl and toss together. Using a rubber spatula, fold half of the dry ingredients into the bowl of batter. After the first batch is fully incorporated, fold in the other half and continue folding until all of the dry ingredients have been absorbed, 1 to 2 minutes. Cover bowl with plastic wrap and chill in the refrigerator for 1 hour.

5. Preheat oven to 325°F. Line 2 rimmed baking sheets with parchment paper.

6. Scoop small amounts of dough out of the bowl (I like to use a small ice cream scoop), and roll the dough into 1 1/2-inch balls. Place the balls on the prepared baking sheets, about 1 inch apart, pressing them down lightly to create a flat bottom on each cookie. Chill in refrigerator for about 2 hours.

7. Back on center rack of oven, 1 sheet at a time, for 15 to 20 minutes, or until the cookies just start to color. To help the cookies bake evenly, rotate the baking sheet every 4 minutes or so. Let the cookies cool slightly on the baking sheet, then toss them in powdered sugar. Lay the sugar-coated cookies on a clean baking sheet to finish cooling. Finally, after the cookies are fully cooled, toss them in powdered sugar once again. They can be stored in an airtight container for up to 1 month at room temperature.