Recipe of the Month: Eggnog Crumble Coffee Cake

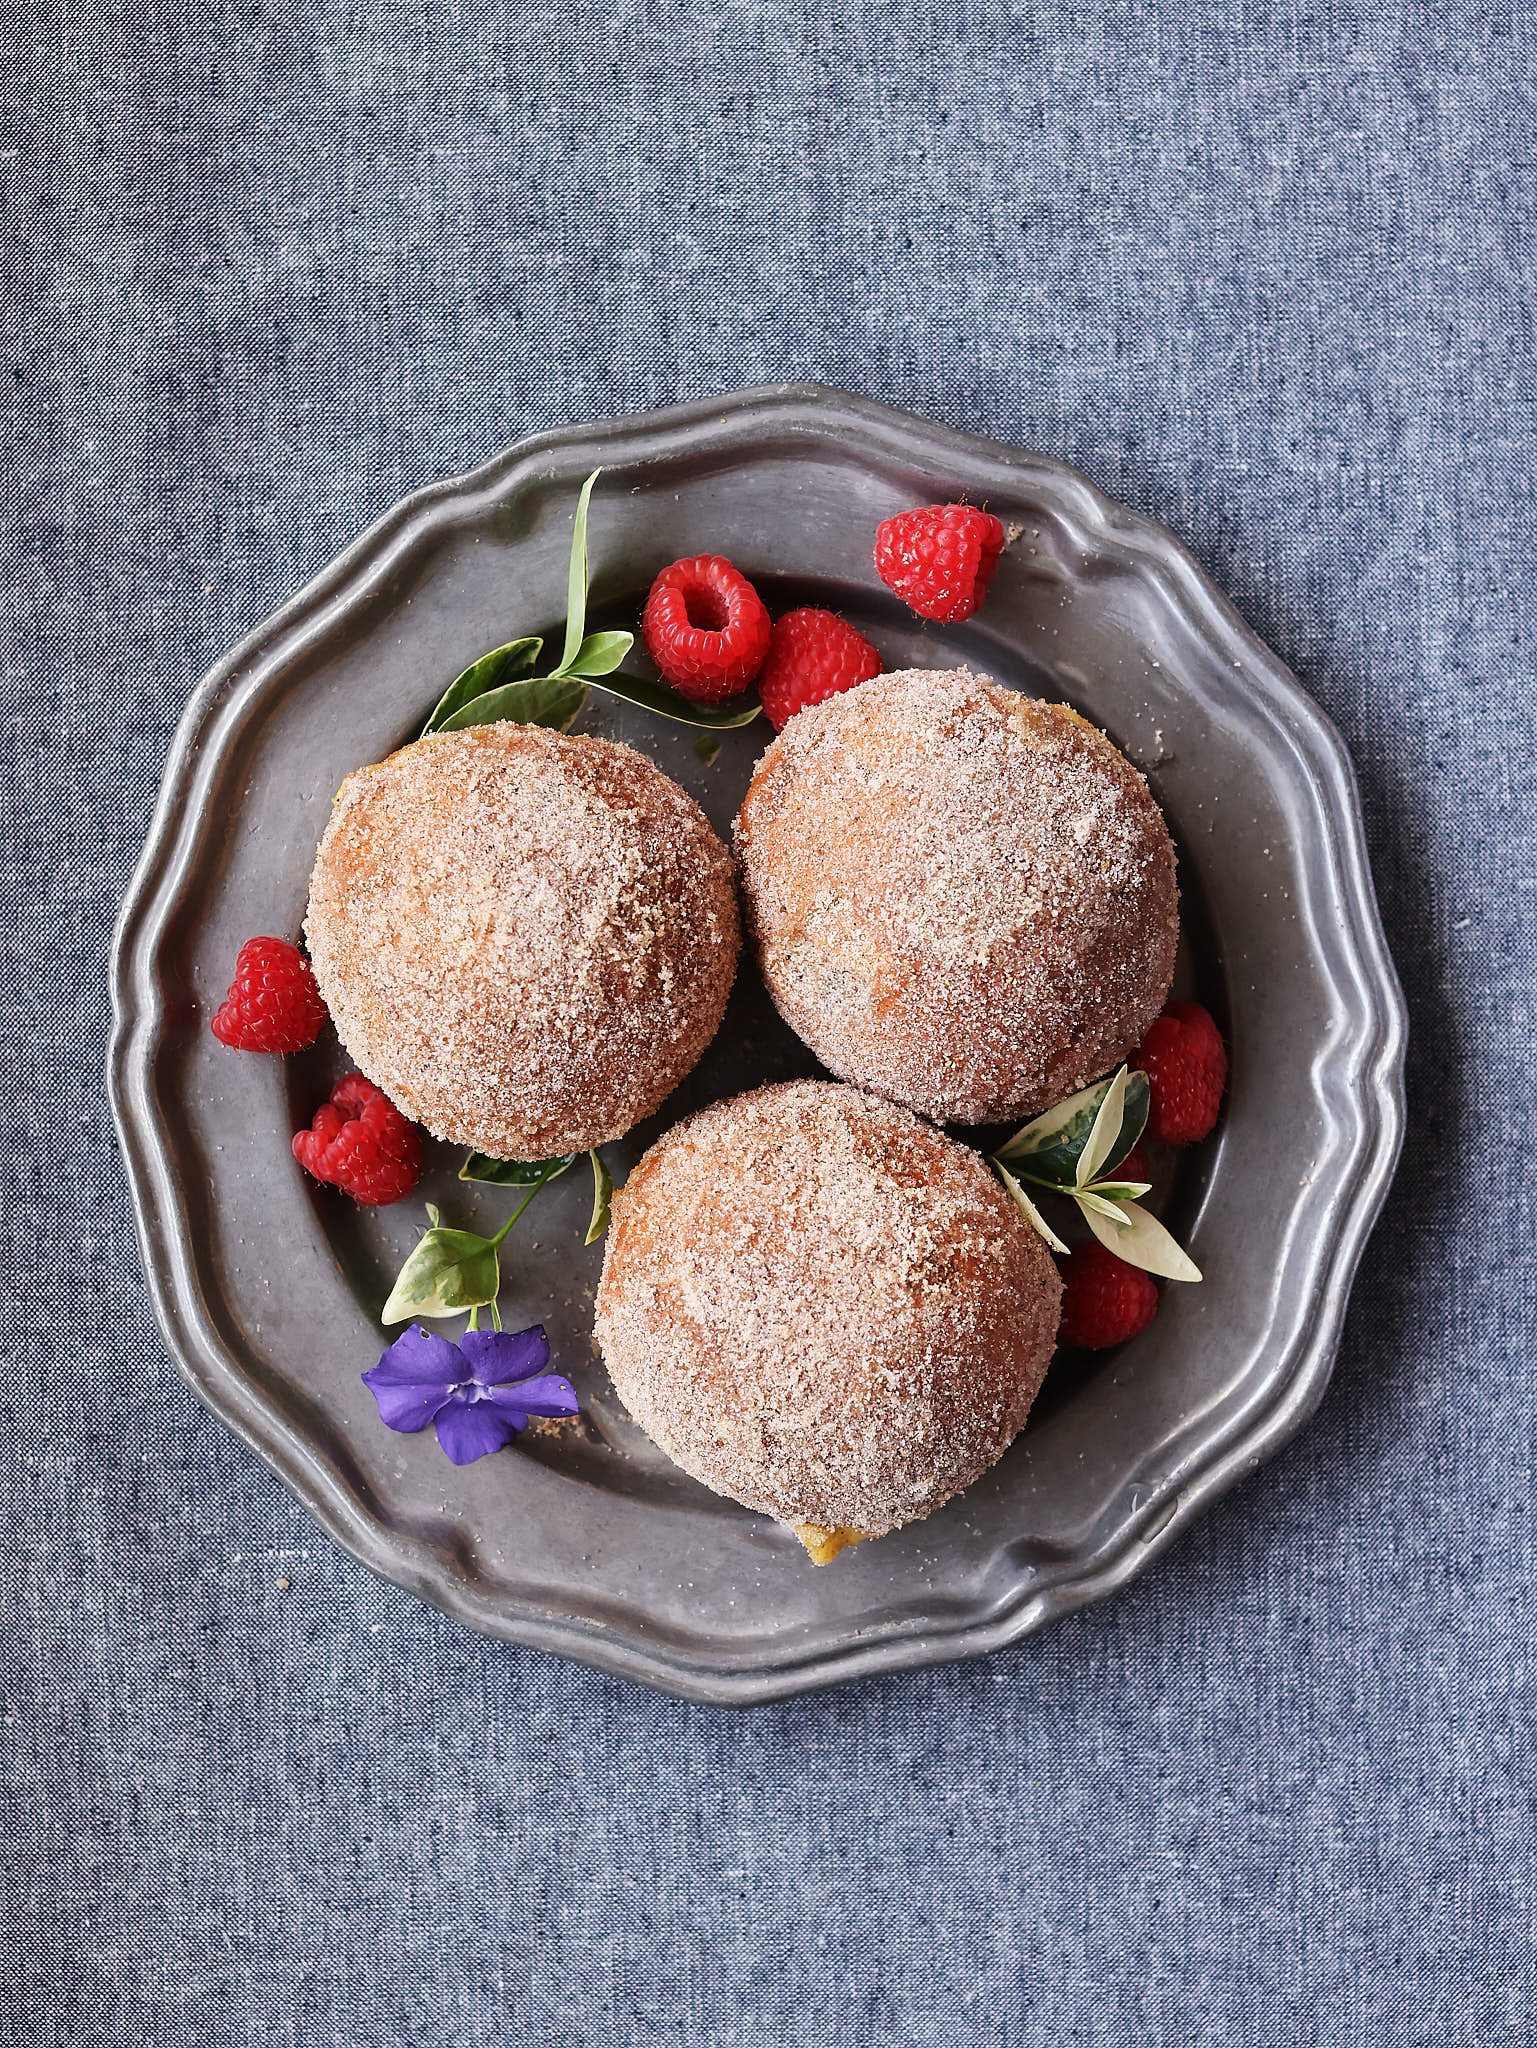
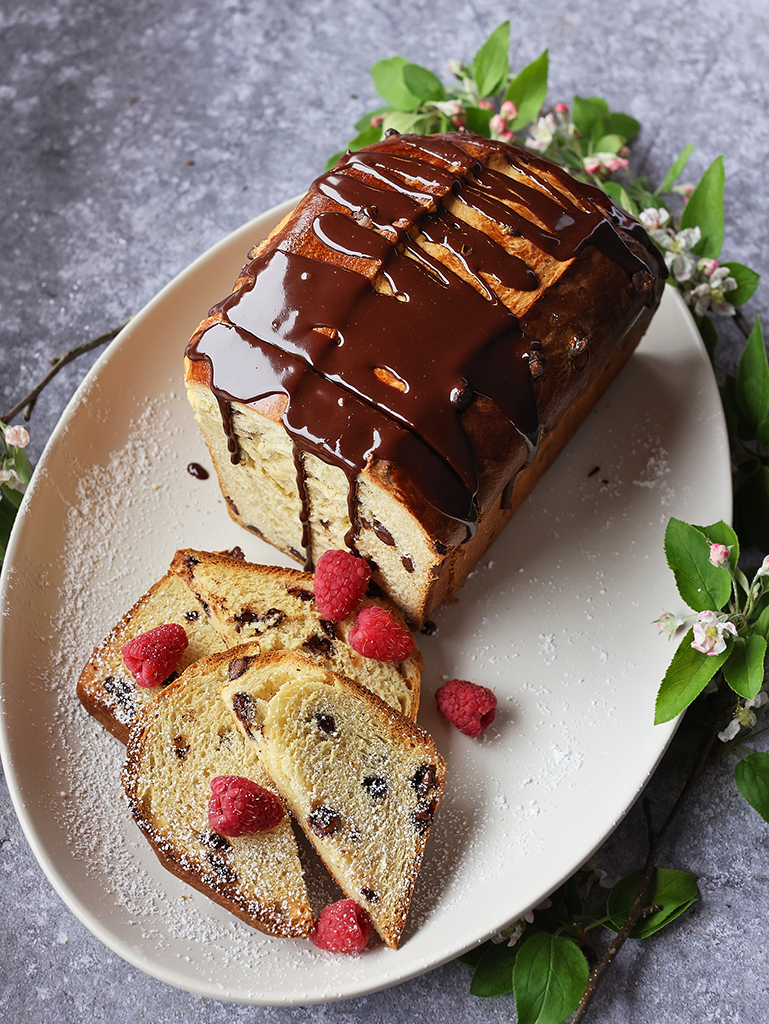
In the same way that pumpkin flavors are everywhere come late September, eggnog calls out the festive spirit of the winter holidays. This coffee cake is my twist on pound cake — spiked with rum and warm spices, topped with a crisp streusel. I like to make it for Christmas morning or holiday parties, especially with a mug of hot buttered rum or a glass of eggnog.

Printable PDF of this recipe here.

Makes one 9-inch x 5-inch pan loaf

Streusel Crumble

⅓ cup unbleached all-purpose flour

¼ cup granulated sugar

½ tsp cinnamon, ground

½ tsp nutmeg, ground

2 Tbsp unsalted butter

2 tsp rum or brandy

Coffee Cake

2¼ cup unbleached all-purpose flour

2½ tsp baking powder

½ tsp salt

½ tsp nutmeg, ground

½ tsp cinnamon, ground

¼ tsp cloves, ground

2 sticks unsalted butter, room temperature

1 cup granulated sugar

¼ cup brown sugar

1 Tbsp pure vanilla extract

1 Tbsp rum or brandy

2 eggs

1½ cups eggnog

Preheat oven to 350°F. Line a 9-inch x 5-inch loaf pan with parchment paper, allowing the ends to extend above the sides of the pan. Set aside.

Streusel Crumble  

In the bowl of a stand mixer fitted with the paddle attachment, combine all the streusel ingredients. Mix on medium-low speed until the mixture is combined and has a coarsely crumbled texture. Transfer to a separate bowl and set aside.

Coffee Cake

In a medium bowl, sift together the flour, baking powder, salt, nutmeg, cinnamon, and cloves. Set aside.

In the stand mixer bowl, add the butter, granulated sugar, and brown sugar. Mix on medium speed for 3–5 minutes until fluffy. Add the vanilla extract and rum or brandy, mixing for an additional minute.

Add the eggs one at a time, mixing well after each addition and scraping down the sides of the bowl to be sure everything is incorporated.

On low speed, alternate adding the sifted dry ingredients and the eggnog to the batter in three additions. Mix until just incorporated. Scrape the sides of the bowl as needed.

Scoop the batter into the prepared loaf pan, smoothing the top. Sprinkle the streusel crumble evenly over the batter. Bake for 45–50 minutes, or until golden brown and a toothpick inserted into the center comes out clean.

Let cool for 1 hour. Lift it out using the parchment paper and enjoy!

Note: This coffee cake can be made in advance and frozen for up to 1 month, or wrapped tightly and kept at room temperature for up to 1 week.

Chicken Apricot Curry with Turmeric Rice and Lentils 

With the holidays just ahead, I find myself craving the warmth and depth of a good curry. The sultry spices and layered flavors bring balance to the richness of the traditional holiday meals. Reach into your spice drawer for turmeric, cumin, cinnamon, garam marsala, and cayenne. The flavor is built up with sautéed onions, garlic, fresh ginger, sautéed tomatoes and coconut milk. It’s delicious right from the pan, but I often double the recipe because it’s just as good reheated, making it a lifesaver on those busy nights when you get home late.  

Printable PDF of this recipe here.

Makes 4 servings

Chicken Curry

3 Tbsp olive oil (neutral oil or clarified butter also work)

6 to 8 chicken thighs, skinless

¾ cup yellow onion, medium dice

1 cup cherry tomatoes, halved

2 Tbsp fresh ginger, finely diced

1 Tbsp garlic, finely diced

1 tsp ground turmeric

½ tsp ground cumin

¼ tsp ground cinnamon

¼ tsp cayenne pepper (or black pepper for a milder version)

1 tsp garam marsala

¾ cup dried apricots, diced

¾ cup chicken stock

1 (13½ oz) can coconut milk

1 cup cilantro, coarsely chopped, divided

¼ cup fresh lime juice (about 1 lime)

Turmeric Rice

2 Tbsp olive oil

⅓ cup yellow onion, medium dice

1 tsp garlic, finely diced

¼ tsp ground cumin

¼ tsp ground turmeric

½ cup basmati rice

½ cup red lentils

1 tsp kosher salt

2½ cups water

Chicken Curry  

Preheat oven to 375°F. 

Season the chicken thighs with salt and pepper. In a cast-iron or oven-safe casserole pan over medium-high heat, add 2 Tbsp of the olive oil and sear the chicken thighs, alternating sides for 5 to 6 minutes until golden brown. Remove the thighs and set aside. 

Reduce heat to medium and add the remaining 1 Tbsp of oil to the pan. Add the onion and sauté for 2 minutes, until translucent. Stir in the tomatoes and cook for another 2 minutes, letting them soften and release their juices. 

Add the ginger, garlic, turmeric, cumin, cinnamon, cayenne, and garam masala. Stir and cook for 2 minutes, allowing the spices to bloom. 

Stir in the apricots and return the chicken thighs to the pan. Pour in the chicken stock and bring to a simmer for 5 to 8 minutes. Mix in the coconut milk and half the cilantro. Transfer the pan to the oven and cook, uncovered, for 18 to 20 minutes, until the chicken is cooked through and the sauce has thickened. 

Remove from the oven and stir in the remaining cilantro and lime juice. Taste and adjust seasoning with kosher salt, if needed. 

Turmeric Rice

While the chicken is cooking, start your rice.  

In a medium saucepan, heat the olive oil over medium heat. Add the onion, garlic, cumin, and turmeric. Sauté for about 2 minutes, until the onions are translucent. 

Stir in the rice and lentils, coating it in the oil and spices. Add the water and salt, and bring to a simmer. Partially cover with a lid and cook for 16 to 17 minutes, until the rice is tender. Fluff with a fork, cover, and keep warm until ready to serve. The lentils will dissolve but add a nice richness to the rice. 

Serve the chicken thighs with the turmeric rice and lentils, spooning plenty of sauce over the rice. I like to serve this with sautéed spinach or green beans. A dollop of raita is also a great addition to this dish.  

*Note: Macrina’s Piadina Bread, grilled and brushed with olive oil, makes a nice accompaniment. Please note that our Piadina Bread is not carried regularly but can be special ordered from your local Macrina Café two days in advance.

Recipe of the Month: Pumpkin Praline Cheesecake

Pumpkin Praline Cheesecake


Use what the world gives you, and in October it’s pumpkins! Inspired by the rustic simplicity of Basque cheesecake, this Pumpkin Praline Cheesecake is a new favorite of mine. Spiced with cinnamon, ginger, and nutmeg, and topped with a crunchy pecan, pepita, and sesame praline, it’s a dessert that feels both familiar and fresh. It has a great balance of tangy cream cheese and sweet pumpkin, and a dynamic contrast in textures between the velvety cheesecake and crunchy caramel praline top.

While it’s a natural fit for fall, don’t be surprised if it finds a place on your Thanksgiving table, as it will on mine. I love offering a dessert buffet with our traditional maple apple pie and chocolate walnut tart, alongside new favorites like this one.

Printable PDF of this recipe here.

Makes one 9-inch cake; Serves 6-8

Cheesecake

24 oz cream cheese, room temperature

1¼ cups granulated sugar

¼ cup brown sugar

1 (15 oz) can of pumpkin puree

1 cup plain kefir (or buttermilk)

1 Tbsp vanilla extract

¼ cup unbleached all-purpose flour

1 tsp ground cinnamon

¾ tsp ground ginger

¼ tsp ground nutmeg

¼ cup kosher salt

4 eggs


Praline Sauce

½ cup granulated sugar

½ cup water

½ cup heavy cream

⅓ cup pecans, toasted and coarsely chopped

2 Tbsp pepitas (pumpkin seeds), toasted

1 Tbsp sesame seeds, toasted

¼ tsp kosher salt

Cheesecake  

Preheat the oven to 400°F. Line a 9-inch x 3-inch cake pan with two pieces of parchment paper, allowing the ends to extend above the sides of the pan. Set aside. 

In the bowl of a stand mixer, combine cream cheese, granulated sugar, and brown sugar using the paddle attachment. Mix for 3 to 4 minutes. 

In a medium bowl, combine the pumpkin puree, kefir and vanilla extract. Set aside. 

In another medium bowl, combine flour, cinnamon, ginger, nutmeg, and salt. Add this to the pumpkin mixture and stir well. 

Add the seasoned pumpkin mixture to the stand mixer and combine for 1 minute. Scrape down the sides to incorporate all the ingredients. 

Add eggs one at a time, mixing on medium-low speed, let each egg fully incorporate before adding the next. 

Pour the batter into the prepared cake pan and place it on a rimmed baking sheet. Bake on the center rack for 55 to 60 minutes, until the top is deeply browned and the center is set. 

Cool at room temperature for 30 minutes, then refrigerate for another 30 minutes to allow the filling to set. Cover the cake with plastic wrap, invert onto a flat plate, remove the parchment, and invert again onto a presentation plate. 

Praline Sauce

While the cheesecake chills, make the praline sauce. Combine sugar and water in a small saucepan over medium heat until the sugar dissolves. Brush down the sides of the pan with a water-dampened pastry brush to prevent crystals from forming. 

Once the sugar starts to turn golden brown, swirl the pan gently to ensure even browning. Add the heavy cream — expect a burst of steam — and wait for it to subside before whisking the sauce together. 

Stir in the pecans, pepitas, sesame seeds, and salt. 

Pour the sauce over the center of the cheesecake and chill before serving to set the praline. 

Serving

This cheesecake is best served chilled and topped with a dollop of lightly sweetened whipped cream. Since it will keep for up to a week in the refrigerator, it’s a great make-ahead dessert for when guests are coming to dinner. 


Pumpkin Praline cheesecake, a latte, and flowers.

Recipe of the Month: Pear Walnut Buckwheat Cake

Pear_Walnut_Buckwheat_Cake

This cake is one of my favorites because it’s simply delicious. When I have good pears — and really, there is nothing much better than a ripe pear — I make this frequently because it’s simple to prepare and elegant in presentation. I use gluten-free ingredients. Buckwheat flour is naturally gluten-free, and Bob’s Red Mill’s gluten-free flour is readily available at most supermarkets. If you didn’t know the ingredients, you’d never guess by taste alone that it was gluten-free.

Nocino is a traditional Italian brandy made from green walnuts. Combined with melted butter, it makes a distinctive, flavorful glaze that complements the sweetness of the pears. You can find it at most stores that carry liquor. If you’re up for an island adventure, my Vashon neighbor Steven Buffington makes the best Nocino right next door to my farm. It’s labeled Shawnee Hill Farm and is available on Vashon at the Ruby Brink restaurant, the Burton Store, or the Vashon Wine Shop. Come visit us this fall!

Printable PDF of this recipe here.

Makes one 9-inch cake; Serves 6-8

1 cup walnuts, roasted and coarsely chopped

¼ cup buckwheat flour

1¼ cup Bob’s Red Mill Gluten Free 1-to-1 Baking Flour

¾ tsp baking powder

¾ tsp baking soda

½ tsp kosher salt

12 Tbsp (1½ sticks) unsalted butter, room temperature

1 cup granulated sugar

2 eggs

2 Tbsp Nocino, divided

½ cup + 2 Tbsp sour cream

2 ripe pears, peeled, cored and sliced ¼-inch thick

1 Tbsp salted butter, room temperature

¼ cup walnuts, raw and coarsely chopped

Sweetened whipped cream, for serving

Preheat oven to 350°F. Brush oil on a 9-inch by 2-inch cake pan, and line with a parchment base and 2-inch collar. If you have a hard time getting the parchment to stick, add a little more oil to the pan. Set aside.

In a medium bowl, combine the roasted walnuts, buckwheat flour, gluten-free flour, baking powder, baking soda and salt. Set aside.

In the bowl of a stand mixer combine the unsalted butter and sugar. Using the paddle attachment, cream for 3 to 4 minutes. Scrape the contents from the side of the bowl to combine evenly.

Add the eggs one at a time, waiting until each is fully incorporated before adding the next. You can’t scrape the bowl too often! This is the key to the best cakes! Add 1 Tbsp of the Nocino and mix well.

Add the flour mixture and sour cream in 3 additions, alternating between both. Mix until well combined.

Remove the bowl from the stand mixer and scoop the dough into the prepared cake pan. Smooth the top with an offset spatula. Begin laying out the sliced pear slices around the perimeter of the cake pan in a shingle-like pattern to create a full circle. Fill in the center with smaller slices, all in one direction.

Melt the butter in a pan over medium heat. Once melted, remove from the heat and add the remaining Tbsp of Nocino. Be aware that Nocino is a high-proof brandy and may ignite when added to the hot pan and butter. Let the flames subside or cover with a lid. Swish the two ingredients together and brush the mixture over the pear slices. Finish by sprinkling the raw walnuts around the border of the pan.

Bake for 55 to 60 minutes, or until golden brown and a toothpick inserted into the center comes out clean. Let cool for 45 minutes. Invert the cake from the pan, remove parchment, and place on your presentation plate. Serve at room temperature with sweetened cream — and a shot of Nocino! Enjoy!

Recipe of the Month: Blueberry Buckle Cake

‘Tis the season for fresh blueberries! A buckle is a cross between a tea cake and a crisp — softer and with more fruit than a tea cake, and more buttery cake than a crisp. The crisp almond topping makes it a true buckle. I can’t think of a better summertime cake to be enjoyed al fresco at parties. This recipe features blueberries, but feel free to use blackberries, raspberries, or a mix of all three. Buckles are easy to make and best soon after baking. Enjoy!

Printable PDF of this recipe here.

Makes one 9-inch cake; Serves 6-8

Crisp Topping
4 Tbsp (½ stick) unsalted butter, room temperature
¼ cup granulated sugar
¼ cup brown sugar
¼ cup cake flour
⅓ cup sliced raw almonds

Cake
2 cups cake flour, unbleached King Arthur Flour
1¾ tsp baking powder
½ tsp star anise, ground
½ tsp kosher salt
8 Tbsp (1 stick) unsalted butter, room temperature
¾ cup granulated sugar
2 eggs
½ tsp almond extract
¾ cup whole milk
3 cups fresh blueberries

Crisp Topping

Place all ingredients in a stand mixer bowl. Using the paddle attachment, mix on low speed for 3 to 4 minutes until the butter is incorporated and the mixture has a coarse texture. Set aside.

Cake

Preheat oven to 350°F.

Prepare a 9-inch cake pan by brushing it with oil and lining it with a parchment base and 2-inch collar around the sides. The oil helps keep the parchment securely in place.

In a medium bowl, sift together the cake flour, baking powder, star anise, and salt. Set aside.

In the bowl of a stand mixer fitted with a paddle attachment, cream the butter and granulated sugar on medium speed for 2 to 3 minutes, until light and fluffy. Scrape down the sides and bottom of the bowl with a spatula to be sure everything is incorporated.

Add the eggs one at a time, beating well after each addition. Mix in the almond extract. Scrape down the bowl and paddle as needed.

Alternate adding the flour mixture and milk in three parts, ending with the milk. Mix until just combined. Remove the bowl from the stand mixer and gently fold in the blueberries to avoid smashing them and turning the batter blue.

Scoop the batter into the prepared cake pan, smoothing the top with an offset spatula. Evenly sprinkle the crisp topping over the batter.

Bake for 50 to 55 minutes, or until the top is light golden brown and crisp. Check for doneness by inserting a toothpick or metal skewer; it should come out clean.

Allow the cake to cool for 10 minutes in the pan, then invert it onto a plate and remove the parchment paper. Then invert the cake again onto your presentation plate. Dress it up with fresh berries and flowers, or keep it simple with a dusting of powdered sugar.

Recipe of the Month: Backyard Pizza


I call this backyard pizza because you can make the entire recipe on your BBQ or in your outdoor pizza oven, which are becoming increasingly popular. Cooking outdoors on these long summer evenings is the best. This hand-mixed dough can be used within 8 hours, but it’s best after resting for 24 to 48 hours. The extra time allows the flavors to develop and makes the dough much easier to roll out. Enjoy!

Printable PDF of this recipe here.

Makes four 8 oz dough balls

¾ cup milk (or water to make it vegan)

¾ water, warm (approx. 80°F)

1½ tsp sugar

2 tsp dry active yeast

2 Tbsp extra virgin olive oil

2¾ cups unbleached all-purpose flour

¼ cup whole wheat flour

2 tsp kosher salt

Semolina for sprinkling on the pizza peel (if using)

Extra flour for dusting

Your favorite pizza toppings

Extra virgin olive oil for finishing

Leslie’s Topping Recommendations:

Marinara sauce, fresh sliced mozzarella, pepperoni, and Mama Lil’s peppers.

Pesto, sliced prosciutto, burrata cheese, and fresh basil.

Olive oil base, green olive tapenade, roasted cherry tomatoes, roasted zucchini, and goat cheese.

In a medium bowl, whisk together the milk, warm water, sugar, and yeast, until the yeast dissolves. Let it sit for 3 minutes to bloom the yeast. Add the olive oil, flours, and salt, and mix using a wooden spoon for 2 to 3 minutes. The aim is to dissolve all the lumps of flour and mix until all the liquid is absorbed. To clean up the shaggy mixture, perform a “four direction turn.” First, wet your hands. Grab a 4-inch section of dough from the far edge of the bowl and stretch it 5 to 6 inches upwards, laying it over the center mass of dough. Rotate the bowl 180 degrees and repeat the stretch from the opposite side. Continue this process for the remaining two directions. Finally, place your fingers under the mass of dough and invert it. The dough should form a ball-like shape, though it will not be smooth.

Cover with plastic and let sit at room temperature for 2 hours. Do another “four direction turn,” finishing by inverting the mass of dough, re-covering it with plastic, and allowing it to rest at room temperature for 1 more hour. Finally, refrigerate it for 3 hours (or more) before rolling it out. This allows the flavors to develop and the gluten to relax, making it easier to roll out.

Brush olive oil on a rimmed sheet and set aside. Pull the refrigerated dough onto a lightly floured work surface. Shape it into a square and cut it into 4 equal pieces. The dough may be sticky, so lightly dust your hands with flour and pull the four corners of the dough pieces into the center. Invert the dough and roll it in a circular motion to form a ball. Place the 4 dough balls onto the oiled rimmed baking sheet, leaving a 2-inch space around each ball. Brush their tops with olive oil, cover with plastic, and refrigerate again. They need to chill for a minimum of 45 minutes but will improve in flavor and become easier to work with if you use them 24 to 48 hours later.

Remove the dough balls from the refrigerator and allow them to rest at room temperature for 30 minutes before using. Simultaneously, preheat your pizza oven or BBQ for 30 minutes. Grab a dough ball and flatten it on a floured surface. Lift the dough, letting it stretch under its own weight while maintaining a thicker 1-inch border for the pizza rim. Rotate the dough in a circular motion. The base should be thin, about 8 inches wide, without any holes. If holes develop, pinch them together. You’ll soon master the technique: cup your hands, place them on the center of the dough, and rotate it in a circular motion on the work surface until you have an evenly thick, round disk.

If you’re grilling your pizzas, oil the grill first to prevent the dough from sticking. Carefully lift the stretched dough and place it on the preheated grill at 450°F. Bake for 2 minutes until the rim rises. Use a spatula to release the dough from the grill and flip it over. Grill for an additional 3 to 4 minutes. The second side will be the pizza top and won’t gain more color after it’s topped and returned to the grill. Top the crust with pizza sauce (if using), cheese, and your favorite toppings. Reduce the grill heat to 350°F and return the topped pizza to the grill for another 2 to 3 minutes, until the cheese is melted. The base crust will be delightfully crispy.

If you’re using your oven or a backyard pizza oven, preheat it to 450°F. Sprinkle semolina on your pizza peel to prevent sticking. Flatten the dough as described earlier, then top with pizza sauce (if using), cheese, and your favorite toppings. Gently shake the peel to ensure the pizza isn’t sticking, then transfer it onto the preheated brick base. Baking time will vary depending on your oven’s intensity, so watch for the crust to brown and the cheese to bubble. You may need to rotate the pizza for even cooking. Remove the pizza when the crust is golden brown.

Before serving, add a drizzle of extra virgin olive oil to the top. Serve the pizzas with a big garden salad and a bottle of wine. Enjoy!


Recipe of the Month: Mother’s Day Cake

This cake is inspired by the Norwegian cake known as verdens beste, “the world’s best.” The story behind it is almost as good as the cake itself. In the 1930s, Hulda Ottestad, a café owner in Harstad, a town on Norway’s largest island, Hinnøya, bought two recipes from a Danish pastry chef. She transformed one of them into what’s known today as Kvæfjordkake. Over the years, the cake’s popularity surged, and in 2002, it was crowned Norway’s National Cake. I’d never baked a sponge cake and meringue in the same pan and was intrigued. I tried several variations, settling on the following recipe, which uses sweetened whipped cream in place of custard. The luscious combination of sponge cake, almond meringue, berries and cream comes together with surprising ease, making it a great addition to any Mother’s Day brunch!

Printable PDF

Makes 8 servings.

Cake Layer
8 Tbsp (1 stick) unsalted butter, room temperature
2/3 cup granulated sugar 1
tsp lemon zest
1 tsp vanilla extract
1 cup King Arthur cake flour (or a gluten-free equivalent like Bob’s Red Mill GF One-to-One Baking Flour)
1 tsp baking powder
4 egg yolks (reserve egg whites for the meringue)
1/3 cup milk

Meringue Layer
4 egg whites
1/4 tsp salt
1/4 tsp cream of tartar
1 cup + 2 Tbsp granulated sugar
2/3 cup sliced raw almonds

Cream Filling
3/4 cup heavy whipping cream
2 Tbsp granulated sugar
1/2 cup fresh strawberries, 1/2-inch dice

Garnish
2 Tbsp powdered sugar
12 whole strawberries

Cake Layer
Preheat the oven to 325°F. Prepare a 9-inch square baking pan by brushing it with neutral flavored oil and lining it with a 12-inch square piece of parchment paper.

In the bowl of a stand mixer fitted with the paddle attachment, cream the butter and sugar together for 3 to 5 minutes until light and fluffy. Add the lemon zest and vanilla extract, mixing well to combine.

Sift together the flour and baking powder. With the mixer running at low speed, gradually add the sifted ingredients to the butter mixture, mixing until you have a smooth paste.

In a separate bowl, whisk the egg yolks and milk together. With the mixer set to medium speed, gradually add the egg yolk mixture to the batter in three additions, mixing for 30 seconds after each addition. Use a spatula to scrape down the sides of the bowl, ensuring all ingredients are well combined.

Pour the cake batter into the prepared baking pan.

Meringue Layer
Clean and dry the mixer bowl. Using the whisk attachment, beat the egg whites on medium-high speed. Sprinkle in the salt and cream of tartar. Once the egg whites become foamy, gradually add the sugar, and continue to whisk on high speed for 5 to 8 minutes, or until the meringue becomes shiny and holds firm peaks.

Scoop the meringue onto the top of the cake batter, smoothing it so it covers the cake. Sprinkle the sliced almonds evenly over the meringue.

Bake for 35 to 40 minutes, or until the meringue is dry to the touch and almonds are golden brown.

Let cool for 15 minutes. Run a paring knife around the edges of the pan to loosen the cake. Carefully lift the cake out of the pan using the overhanging parchment paper and place it on a wire rack to cool completely.

Cream Filling
Clean and dry the mixer bowl. Fit the stand mixer with the whisk attachment and whip the heavy cream on medium-high speed. Gradually add the sugar and continue to whip until the cream is firm but not curdled in texture.

Fold the diced strawberries gently into the whipped cream. Keep the mixture chilled until you’re ready to assemble the cake.

Assembly
When the cake has completely cooled, remove the parchment liner and cut the cake in half, to make two 4½-inch x 9-inch pieces.

Place one piece of the cake, almond-side down, on your serving plate. Spread the strawberry whipped cream evenly over this layer. Top with the second cake half, almond-side up. Chill the assembled cake for 30 minutes to firm it up for slicing.

Using a serrated knife, gently cut the cake into 1½-inch slices, taking care not to squeeze out the filling. Before serving, dust the top of each slice with powdered sugar and garnish with fresh strawberries. Enjoy!


Coffee Cream Tartlets

Coffee sweetened with cream was the inspiration behind this tartlet that will appeal to fans of tiramisu. A rich pastry cream infused with espresso is cradled in tartlets made with our flaky pie crust over a chocolate base and topped with Bavarian cream. The flavors of the silky pastry cream and the buttery crust contrast nicely with the bittersweet flavors of the coffee and chocolate, a divine combination. Not only do they present elegantly, but they can be made ahead of time, and chilled until it’s time to serve them.

Printable PDF of this recipe here.
Makes 4 tartlets.

1 disk flaky pie dough
4 egg yolks
½ cup + 1 Tbsp sugar, divided
2 Tbsp + 1 tsp cornstarch
3 tsp vanilla, divided
1¼ cups milk
¼ cup espresso or very strong coffee
¾ cup heavy cream
½ cup semi-sweet chocolate chips
12 coffee beans

Crust
Roll out pie dough disk into a 16-inch x 20-inch rectangle about ¼-inch thick. Using a 6½-inch plastic lid as a guide, cut out 4 circles. Place each circle into a 4½-inch tart shell, folding any overhang onto the rim. Crimp the edge of each tartlet and chill in the refrigerator for 1 hour.

Preheat the oven to 375°F. Line each tartlet with a 7-inch square of parchment paper, pressing it into the dough. Fill each with pie weights. Place the tartlet shells on a rimmed baking sheet and bake for 20 to 25 minutes, or until the rim is golden brown and the base is dry when pie weights and parchment are removed. If the base still looks wet, return to the oven for a few more minutes. Let cool completely.

Pastry Cream
In a medium bowl, whisk together the yolks, ½ cup sugar, cornstarch and 1½ tsp vanilla until well combined. Set aside.

In a medium saucepan, heat the milk until it comes to a boil. Gradually ladle the hot milk into the egg mixture, whisking constantly to combine. Then, pour the mixture back into the saucepan.

Over low heat, cook the mixture until it thickens, being careful not to let it boil. Remove from heat.

Strain two-thirds of the mixture through a mesh strainer into one clean bowl, and the remainder into another.

Stir the brewed espresso (or strong coffee) into the larger amount of pastry cream. Cover both bowls with plastic wrap and chill for 20 minutes.

To make the Bavarian cream, whip the heavy cream with the remaining 1 Tbsp sugar and 1½ tsp vanilla to a medium firmness. Pour in the small bowl of chilled pastry cream and gently fold in to combine. Cover and chill for 20 minutes.

Assembly
Set up a double boiler by adding 1-inch of water to a small saucepan and fitting a small stainless bowl on top. Melt the chocolate chips in the bowl, stirring with a spatula. Remove from the heat.

Brush the melted chocolate onto the interior base of the baked tartlet shells and refrigerate for 5 minutes to set. Reserve extra chocolate for garnishing.

Divide the coffee pastry cream evenly between the 4 tartlet shells and smooth the surface with a spatula. Top each tartlet with the Bavarian cream, creating a dome shape.

Garnish the tartlets with chocolate stripes by dipping a fork in the remaining melted chocolate and dripping it over the tartlets. (You could also use pastry bag with a fine tip to stripe the tartlets with chocolate.)

Top each tartlet with 3 coffee beans. Chill until ready to serve. The tartlets will keep for up to 4 days in the refrigerator.


Shrimp & Crab Salad Sliders for the Big Game

Macrina’s slider rolls, either brioche or potato, are the perfect bun for sliders. Of course, there are many great fillings. But for the big game, you want to bring your A-game. These Shrimp and Crab Salad Sliders are a guaranteed winner, especially with fresh Dungeness coming in from Washington’s Pacific coast. You can make the salad in advance and refrigerate it. Before serving, butter the insides of the rolls and sauté them to caramelize the bread and warm it through.

Makes 12 sliders

Shrimp & Crap Sliders for the Big Game

6 cups water
2 Tbsp kosher salt
1¼ tsp crushed red pepper flakes, divided
1 lb frozen shrimp, 16–20 size, (deveined, shell on)
8 oz fresh crab meat, cooked
2 ribs celery, medium dice
2 tsp capers, chopped
3 tsp fresh tarragon, finely chopped
3 tsp shallots, finely chopped
½ cup mayonnaise
2 Tbsp fresh lemon juice
12 Macrina Brioche Sliders or Rustic Potato Sliders
Butter, softened

In a medium saucepan, add the water, salt and 1 tsp crushed red pepper flakes. Bring to a boil. Add the frozen shrimp and return to a boil, cooking for 3–4 minutes or until the shrimp are just cooked through.

Strain the shrimp and transfer to a bowl. Quickly cover with ice cubes to stop the cooking process. Toss and let cool for 10 minutes.

Peel the shrimp and coarsely chop them in ½-inch pieces

In a medium bowl, add the diced celery, capers, tarragon, shallots, remaining ¼ tsp crushed red pepper flakes, mayonnaise and lemon juice. Mix well. Add the crab and chopped shrimp. Stir to combine.

Cut the slider rolls in half horizontally and brush with butter. Pan sauté the interiors to caramelize the bread and warm it through. Divide the shrimp and crab salad between the slider roll bottoms and add a top each one. Serve with your favorite chips or green salad.

Enjoy!


Recipe of the Month: Hazelnut Raspberry Linzer Cookies

This is our Valentine’s Day version of the beloved Linzer cookie, made with ground hazelnuts rather than almonds. These shortbread cookies are great just as they are — tender, delicately sweet, with a subtle, nutty flavor and a hint of cinnamon — but with the raspberry, they’re divine. We cut these into heart shapes and make them into beautiful window cookies. In addition to the raspberry hearts, you’ll also wind up with smaller, chocolate-rimmed hearts. We like heart-shaped cookies all year long but feel free to adapt the shapes to any occasion or even enjoy the hazelnut shortbread in its pure, unadorned form. At the Macrina cafés, we are selling a Hazelnut Shortbread Cookie Mix, which is very similar and will make it quick and easy for you to make this impressive cookie.

Printable PDF of this recipe here.
Makes nine 3 1/2 inch cookies + nine smaller cookies.

Hazelnut Raspberry Linzer Cookies

½ cup light brown sugar
¼ cornstarch
1¾ cup unbleached all-purpose flour (or substitute Bob’s Gluten-Free All-Purpose Flour)
1 tsp ground cinnamon
½ tsp salt
½ cup hazelnuts, toasted and finely ground
8 oz (2 sticks) unsalted butter, chilled and cut into ¼-inch pieces
1½ tsp pure vanilla extract
½ cup raspberry jam
¼ cup powdered sugar
½ cup semisweet chocolate chips
½ cup red and white crystal sugar

Line 3 rimmed baking pans with parchment paper. Set aside.

In a stand mixer with a paddle attachment, combine brown sugar and cornstarch on low speed for about 1 minute to remove lumps. Add flour, cinnamon, salt, and ground hazelnuts. Mix until combined.

With the mixer running, gradually add cubed butter and blend until the mixture resembles coarse crumbs. Add the vanilla extract and mix for another minute to allow the dough to come together.

On a lightly floured surface, press the dough into a 10-inch square. Divide in half and roll out each half to a 1/4-inch thickness, ensuring evenness. Cut out 9 large hearts from the first half for the bases and place them on one prepared baking pan.

From the second rolled-out half, cut out an equal number of large hearts. Then, using a smaller heart cutter, remove the centers to create heart frames. Place these frames on the second baking pan, and the small heart cutouts on the third pan.*

Chill the baking pans in the refrigerator for 1 hour.

Preheat oven to 350°F.

Bake cookies for 15 to 20 minutes until golden brown. Let cool to room temperature.

To assemble the cookies, spread raspberry jam on the heart bases. Lightly dust the heart frames with powdered sugar and place one on top of each jam-covered base.

Melt chocolate chips in a water bath, double boiler or microwave. Dip the edge of smaller heart cookies in the chocolate and then in the crystal sugar. Allow them to set up on parchment paper.

Enjoy making someone feel special with these delicious cookies for Valentine’s Day — or any day!

*Note: Any dough scraps can be brought together in a ball, re-chilled, and rolled out again for extra cookies!