From Seed to Loaf: Growing Your Own Wheat 

Now in her second season of growing wheat on her farm, Leslie Mackie shares the challenges and joys of her experience. 

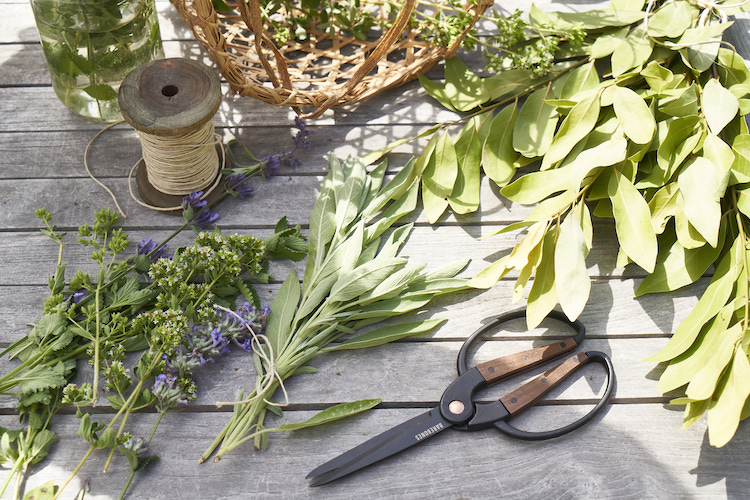
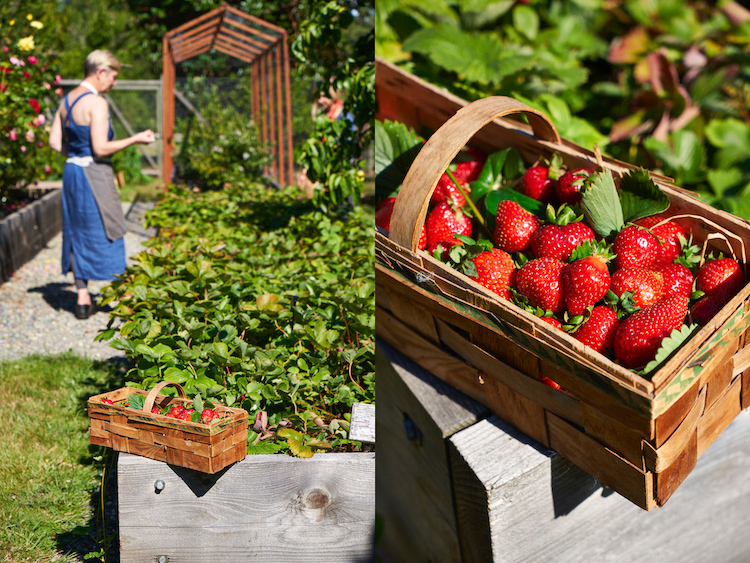
Baking was my first love, but gardening is not far behind. To me, they go hand in hand. So when someone suggested I put the two together and grow wheat on my Vashon Island farm, I thought, why not? I dreamed of making wholegrain bread from wheat I grew myself. Last year, I planted my first crop. Regular readers of this blog will recount my post on just how hard I worked to yield a mere twelve pounds of wheat. So, you ask, why go through that again? 

Well, Im nothing if not persistent. In fact, baking teaches you persistence. Great bread and pastries are the result of recipes developed by failing better with each new version until you finally sink your teeth into a loaf that tastes just like you dreamed it would. 

Armed with the long list of lessons learned with my first crop, I cleaned up the two-acres I had tilled for wheat. When you hear about the wheat farms in Eastern Washington that measure in the thousands of acres, two doesnt sound like much. But when youre doing much of the work by hand, it looks pretty intimidating. 

Id been monitoring the weather all April, waiting for a period of rain. Last year, Id gotten my seeds in the ground too late. This year I was on it early. But the weather has its way with farmers, as theyll readily tell you. On this side of the mountains, one thing you can usually count on in April is rain. Not this year! Wed been having a historically dry month. Fortunately, near the end of April, still in my optimal planting window, a storm system was rolling in from the Pacific. 

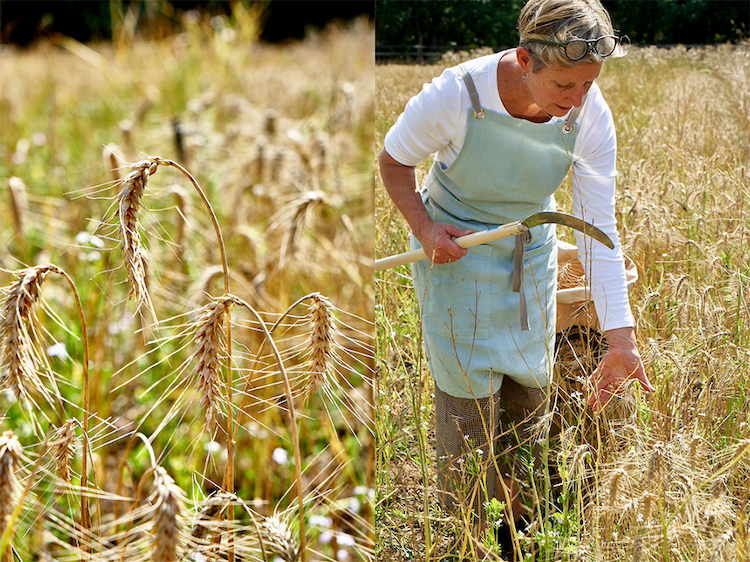
I had bags of Bow Edison wheat seeds, a hybrid heritage grain developed by Dr. Stephen Jones at the Bread Lab in Mount Vernon that grows well in this climate. I hauled them out to the field and began casting. You cannot imagine the tranquility of casting the wheat seeds over the freshly tilled earth. Even the birds seemed to celebrate, carrying on with their song. Then the mild wind picked up, the warm sunlight faded, and sprinkles of rain pocked the dry soil. 

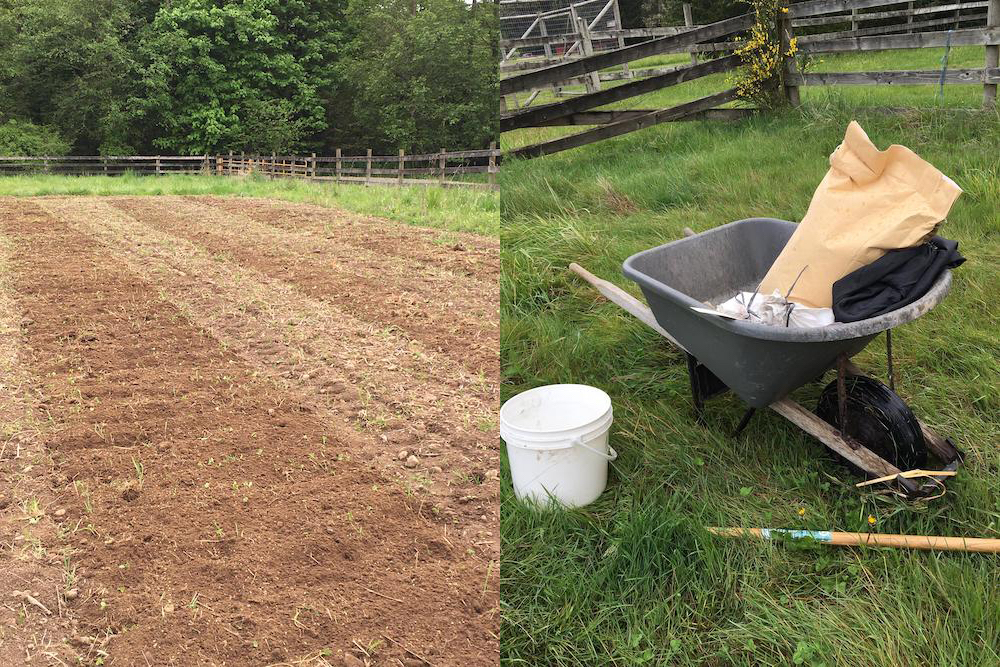
After spreading the seed, I still had to rake them into the soil. Even though I was soon tired, I kept at it for three hours in ever heavier rain. Finally, I clomped my way back to my mudroom. Safe to say, it earned its name. I looked out at the field, exhausted but utterly satisfied knowing the seeds will germinate properly with the three days of rain ahead. After that, a dry spell. The sun would warm the soil and begin the growth. 
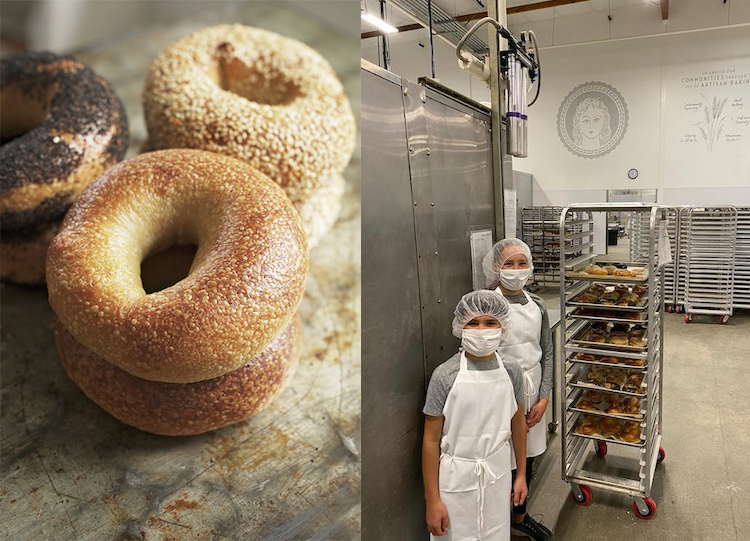
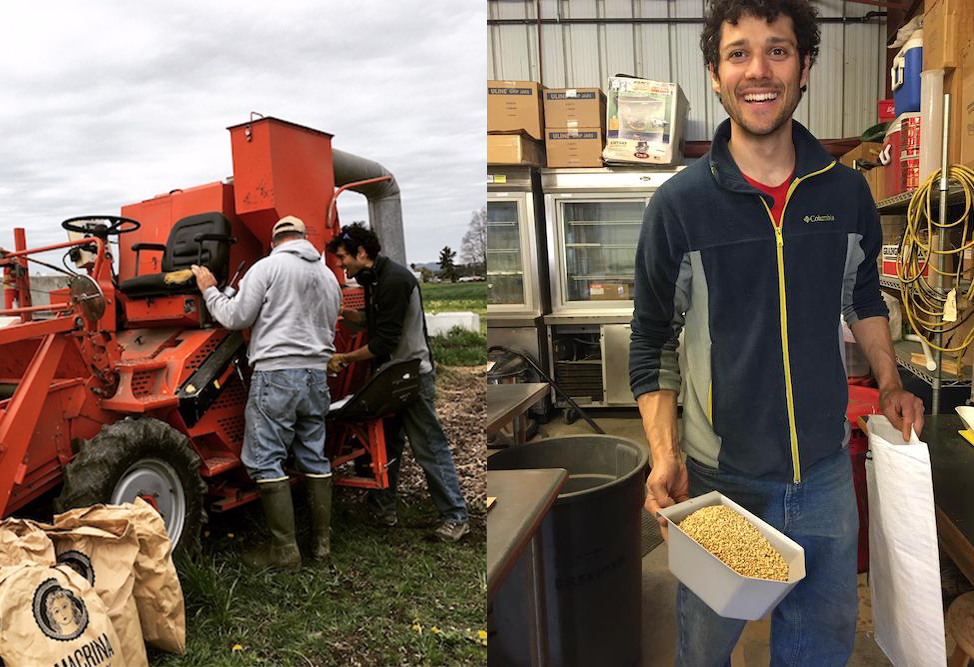
With this years crop in the soil, I drove up to the Bread Lab with the wheat Id harvested last year. Steve Lyon, a senior scientific assistant at the Bread Lab, had promised to help me process it. With the help of an intern from Italy, Steve ran my wheat through an old combine of theirs. Separating the kernels by hand is a prolonged process. Doing it, you understand very quickly how threshing came to be synonymous with spending lots of energy to produce very little. But with the aid of the combine, it didnt take long for Steve and his assistant to turn my bags of wheat stalks into 10 pounds of clean kernels. To me, it looked like a bag of gold! 

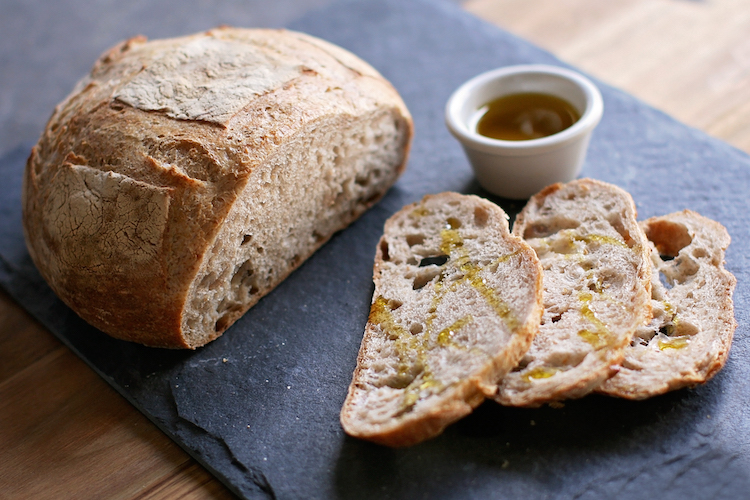
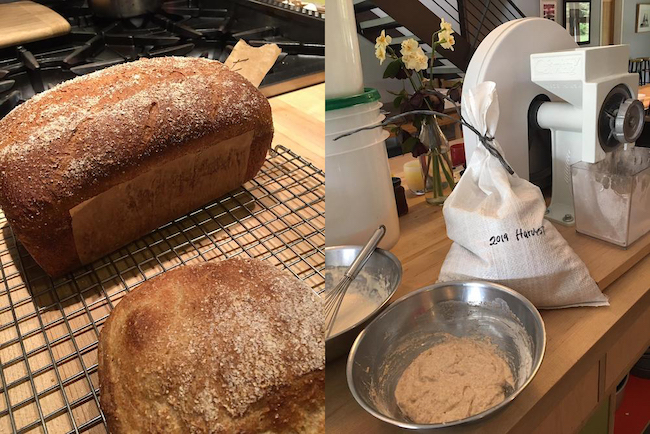
Finally, I made my first loaves with wheat Id grown myself. As it goes with baking, the first loaf wasnt perfect. Id milled the wheat too coarsely. A finer grind and the second loaf turned out much better—but still not perfect. The flavor was amazing, but the texture wasnt quite right. So, on to the third loaf, with further refinements. 

If it was easy, I might get bored. Passion projects like this, and continuing to learn about this amazing grain and what you can do with it, are what make me thrilled to still be baking bread more than 25 years after opening Macrina. 

Leslie 

Macrina’s Organic MadRy Sourdough Bagels

People obsess over bagels. Try suggesting that you’ve found the best bagel in a crowded room, and you’re sure to spark a fierce debate. New York has the best bagels, someone will say. Another will say Philly. Another Montreal. The one thing almost everyone can agree on though, is that not much compares to a great bagel. 

For years, our customers have been requesting bagels. Much as we would have liked to satisfy their demand, we didn’t have a bagel recipe we loved—until now. Our new bagels are the result of an obsession. Over the last two years, Macrina Bakery’s president, Scott France, has been tinkering with the recipe, refining it, and testing bagel samples. Our MadRy Organic Sourdough Bagels are hand-rolled, given a slow, cool 24-hour ferment, and have just a hint of rye, which adds to their depth of flavor. The caramelized crust has a glossy sheen and the airy interior has a tight, springy crumb that balances the mild tang of sourdough with just enough malty sweetness. 

The naturally-leavened bagels will launch in the cafés on Thursday, May 21, and will be available for wholesale on Thursday, May 28. They will come in four flavors: plain, sesame, poppy, and sea salt. 

In the many months Scott has been developing these bagels, his kids, Madeline and Ryan, who love bagels, became his steady audience, helping him refine the texture and strike the right balance in the bagel’s complex flavors. Hence the name, MadRy. 

All of our ingredients come from the PNW: The organic high-protein flour comes from just north of the border, the organic barley malt powder comes from Skagit Valley Malting, and the organic rye flour comes from Fairhaven Mill in nearby Burlington. We start with a significant percentage of organic sourdough starter and a smidge of yeast. After an initial rise, we handroll them and give them a full day’s cool ferment. The depth of flavor you’ll taste in these bagels comes from the natural leavening and that hint of rye. The whiff of sourdough you get when you tear one open comes from the starter. 

We were careful not to let the flavor dominate but wanted it to be distinctive. “It should make sense when you taste the bagel that the name has sourdough in it,” Scott says. “But if you tasted it without knowing the name, someone intimately familiar with sourdoughs would recognize it, but if you didn’t, you might wonder just what that mild tang was. 

The bagels are available individually or as four-packs. Please drop into one of our cafés and try one! It’s a really great bagel. 

Spring Gardening

Planning my next garden begins almost as soon as I’m pulling the last of the late fall produce. What would I like more of? Are there new vegetables to introduce? More dahlias? As I’m ordering seeds, I imagine the dinner parties my garden will help supply. What I never imagined in all the planning is that I’d be planting the seeds in a time of such uncertainty and fear, at a time when I can’t even invite friends over.

From the age of 22, I have always tended some type of garden. It started with multiple herb pots on window ledges. Eventually, I graduated to amending soil along parking strips, eking the most out any sunny area, often removing grass or overgrown scrubs to create a garden bed. No matter how small the garden, it’s always given me a sense of security. I’ve also found, that amid all the busyness and stress of starting and operating a busy bakery, gardening forced me to slow down. Even if only for part of an hour, the time in the garden steadied me with its stillness.

This year, with all the swirling anxiety, I need that stillness more than ever. With my hands in the dirt—planting seeds, weeding, or harvesting—I’m literally connected to the earth. It takes my overstimulated mind away from the media and gives me a reprieve from wanting to solve all the world’s problems. While I garden I dream of dinner parties I don’t yet know I’ll be able to have, but it helps to think of my friends gathered on a summer evening on my garden patio. Hopefully, it will happen.

One of the first crops I always get in is my sugar snap peas. Then I lay out the summer mix. I don’t rush to get everything in—even now that I live on six acres on Vashon and have had to start thinking more like a farmer than an urban gardener. Pacing things and considering what I’m likely to eat in abundance, mainly so I don’t get overwhelmed by all the work. I also plant crops like lettuce and kale in stages by seeding new crops once a month to keep the supply going all summer.

To keep things manageable, I fenced off my property to concentrate most of my garden and “garden life” to just under two acres. That’s still a lot, compared to my city apartments, but I enjoy it. My dogs and chickens roam the fenced area. Bushes of berries and a grape arbor help form a kind of outdoor architecture. Roses and Dahlia’s for cutting provide beauty and a long patio for entertaining extends from my house into the garden.

I use my raised garden beds for a rotation of summer vegetables, herbs, and fruit. I intermingle flowers throughout. Not only does it add beauty to a leafy garden, but they can help provide shade to plants like arugula that will bolt in full sun. They also help with pollination, attracting those ever-important bees.

Despite all my planning, when the summer abundance arrives, I build dinners from what’s available. If I’ve planted well, I always have a steady supply of herbs and varieties of lettuce ready for picking.

To make watering more manageable, I added a simple irrigation system and a timer to help water the raised beds. On hot days, I’m often inclined to give them a bit more water, but it helps take the anxiety out of letting the garden get too dry.

When things begin to grow, it’s important to visit your gardens often. Not only does it leave me with that inner-stillness I mentioned, but it’s important to remember that the more you harvest, the more new growth you get. This goes for flowers as well.

Every year there comes a time when I wish I’d planted something differently, but I’m always grateful for what I have. More importantly, the slow, quiet work and the planning for lovely meals and gatherings, and the promise of growth and beauty fills me with hope and serenity. This year, I need that more than ever.

If you’ve got the space, even just a balcony, get a few pots going. Planting a seed in good soil and carefully tending it shows us the natural power of transformation. And when the time comes, nothing tastes better than homegrown herbs and vegetables. Your long-awaited dinner party will have a meal full of vibrant, just-picked flavor and your quiet satisfaction at the journey you and your seeds have made from a time of anxiety to one of renewal.

How to Make a Natural Starter 

Many of us have been spending a lot more time at home lately. Some of us are looking to distract and engage in crafts to take breaks from the anxiety of the outside world.

Kneading and baking homemade bread is one way. It is tactile, rhythmic, and delivers great rewards along with its calming properties. If you’ve already started exploring baking bread, how about taking your bread to the next level by making your own natural starter? You may not keep the starter up forever, but it will make some of the best homemade loaves you’ve ever tasted.

Of course, you can make bread using a packet of dried yeast, but harnessing the power of a natural starter is a transformative experience. In fact, it was a natural starter that helped transform Macrina from a dream into bakery. No exaggeration. In 1991, Leslie Mackie was preparing for her annual harvest party, an autumn gathering of food lovers in which everyone brought food made from their gardens. Leslie decided she’d bake bread for the event with a natural starter made from grapes grown in her garden. She crushed the plump red grapes and added them to a mix of flour and water. After several days of love and regular feeding, the starter was alive and kicking. The loaf that she developed for that party was a hit and ultimately became our house bread, Macrina Casera. Now, more than 25 years later, we are still feeding that same starter every day and baking hundreds of loaves. Casera’s mild sour flavor is derivative of those grapes, that fortuitous backyard fermentation.

It was this loaf that helped Leslie decide to open Macrina Bakery in 1993 and the same loaf that put Macrina on the regional map in 1994 when the Casera won second place in a Sunset Magazine sourdough competition.

We now have several other starters that we use for various breads, like the starter we developed from grapes from Hightower Cellars Vineyard Cabernet Sauvignon that we use in our Pane Francese. When we were collaborating with PCC on a whole wheat baguette, Scott Owen, PCC Markets Grocery Merchandiser, said, “Macrina’s collection of sourdough starters is incredible.” We like to think so and carefully feed and nurture them daily to keep them vigorous—they’re the heart of our naturally-leavened breads.

There are many ways to make a natural starter. Here’s our favorite way:

Start with fresh grapes. Discard any unfavorable grapes. Wash to remove any debris. Weigh out 1½ lbs and wrap them in cheesecloth.

Weigh out 2 lbs of all-purpose flour and 3 lbs water at 75°F. Combine the water and flour and mix until smooth.

Squeeze the wrapped grapes over the bowl to release their juice into the flour mixture. Submerge the grape sachet in the bowl. Let the bowl sit uncovered at room temperature for a full day. After 24 hours have elapsed, discard the grape sachet.

Your starter will now have life. The natural yeasts from the grapes are doing their work. Stir the starter at least once a day for a few days until you see bubbles on the surface. Once this happens, you need to begin feeding it. Mix another 2 lbs of flour and 3 lbs of water together and then add it to your starter. Mix well and allow it to sit out another full day.

You should have a vigorous starter. Choose a recipe for naturally leavened bread (you can find the recipe for our Macrina Casera in the Macrina Bakery and Café Cookbook) and taste the magic you’ve created!

From this point on, you’ll need to feed your starter like a pet. Feed it with a mix of equal parts flour and water. Hopefully, you’ll be using it frequently, so it’s easy to remember. If the starter gets too large, discard half of it. If liquid begins gathering on top, you can move it into the refrigerator to slow the fermentation.

Enjoy!


May Recipe of the Month: Mother’s Day Cake

This simple chocolate cake is my favorite. The base layers are our moist Mom’s Chocolate Cake. The right balance of espresso and chocolate make the mocha mousse unforgettable, and the dark chocolate ganache adds flavor and elegance. Garnish it with raspberries or chocolate shavings and you’ll have a beautiful homemade cake to surprise your mother with at her celebration.

Ingredients

Makes one 9-inch cake

Cake

2 eggs

¾ cup whole milk

⅓ cup canola oil

2 tsp pure vanilla extract

1¾ cups granulated sugar

1½ cups all-purpose flour

¼ cup cocoa powder

1 tsp baking soda

¾ tsp salt

¾ cup boiling water

9-inch cardboard cake circle

Mocha Mousse

¾ cup semisweet chocolate chips

¼ cup brewed espresso (or very strong coffee)

4 Tbsp unsalted butter

2 cups whipping cream

½ cup powdered sugar, sifted

Ganache Glaze

2 cups whipping cream

1 cup bittersweet chocolate chips

1 cup semisweet chocolate chips

Directions

Cake

Preheat the oven to 325°F. Brush the sides and bottom of a 9-inch round cake pan with canola oil. Line the base with a parchment circle. Dust the oiled edges with flour to prevent sticking.

In a medium bowl, whisk the eggs, milk, canola oil and vanilla. Set aside.

Sift the sugar, flour, cocoa powder, baking powder, baking soda and salt into a stand mixer bowl. Using the paddle attachment, mix on low speed for 1 minute to combine the ingredients. Add the egg mixture in three additions, scraping the bottom and sides of the bowl between. After the third addition, the mixture should be smooth.

With the mixer on low speed, add the boiling water in a slow stream, taking approximately 30 seconds. Increase speed to medium and mix for an additional minute.

Pour the batter into the prepared cake pan.

Bake on the center rack for 30 to 35 minutes. When finished, the top will be set and the sides should pull slightly away from the edges. Let cool for 1 hour.

To remove the cake, run a knife around the edge of the pan, then invert it gently onto a piece of parchment. After the cake has completely cooled, cut it horizontally into three equal layers. Set aside.

Mocha Mousse

In a medium saucepan, melt the semisweet chocolate chips, espresso and unsalted butter. Remove from the heat. Let cool to room temperature.

In a stand mixer bowl, whip the cream to a soft peak using the whisk attachment. Add the sifted powdered sugar. Continue whipping until the mixture forms medium firm peaks.

Remove the bowl. In three additions, fold in the cooled chocolate mixture. Set aside.

Ganache Glaze

In a medium saucepan, bring the whipping cream to a boil. Turn off the heat and add the chocolate chips. Whisk to make a smooth glaze. Let cool to room temperature (it will thicken slightly).

Assembly

Sprinkle a little sugar onto the 9-inch cake circle (or cardboard cut to size and covered with aluminum foil). Top with the first cake layer and spread with one third of the mousse. Repeat this process with the second layer. Then cover with the last layer of cake. Make sure the sides line up and the top layer is flat. Adjust if needed. Then spread the last third of the mousse evenly over the top and sides until it is smooth. Chill the cake for 30 minutes.

Place a 9-inch cake pan upside down on a rimmed baking sheet. Center your chilled cake on the inverted cake pan. Pour half the ganache over the top of the cake so that it is covered evenly. Allow the excess to spill over the sides. Add remaining glaze to the sides and smooth for a nice presentation. The chilled cake should allow you to model the glaze to a smooth surface.

Garnish as you like. Sugar sprinkles, flowers, fresh fruits, berries and chocolate shavings are some of our favorites. Enjoy!