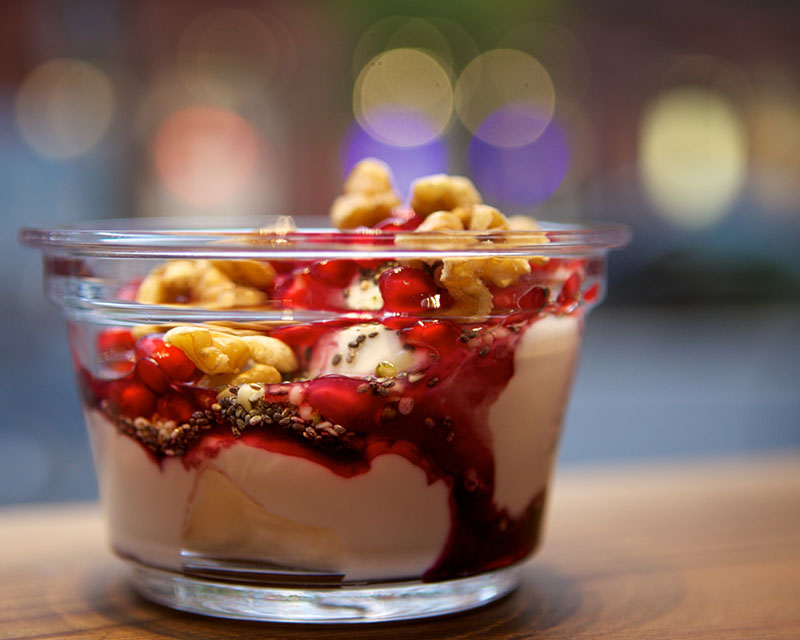
Savoring the benefits of Greek yogurt doesn’t have to end with breakfast. Photo by Meng He.
Greek yogurt has invaded my supermarket, bumping many of the old regular brands off the shelf. It even became a cold war subject in 2014 when Russian President Vladimir Putin refused to allow a shipment of Greek yogurt to reach the United States Olympic team at the winter games in Sochi. Why all the fuss about something as commonplace as yogurt? Was Putin seeking a competitive advantage? Who knows, but Greek yogurt does have health advantages over regular yogurt, with more beneficial probiotic bacteria and a higher protein content. It’s also lower in both natural sugars and sodium. That’s just a bonus. What I like best is its rich flavor and satisfying, creamy mouthfeel. The superior thickness is achieved by straining out the excess whey, giving it that memorable texture and a delicious tang that brings back indelible memories of travels to Santorini and Crete.
Recently the Washington State Dairy Council asked us to develop a recipe featuring Greek yogurt. So we tweaked our Fruit & Yogurt Tart recipe to include the ingredient and now we’re wondering how we ever lived without it. Inspired, we experimented and adjusted other recipes too. We’re now serving our housemade Granola Parfait over a silky dollop of honeyed Greek yogurt and fresh berry compote. We’re also scooping it into batters for some of our cakes and tarts, substituting it for other fats. It enhances textures, creating a finer, more consistent crumb, and adding moisture. Carrying flavor much like butter does, with the perk of extra protein. Judge the results for yourself by trying a slice of our Budapest Coffee Cake or Lemon Sour Cherry Coffee Cake, a sturdy but tender treat that doesn’t just go with breakfast, at least at my house.
When you’re picking up Greek yogurt, to eat or for baking, be sure the label lists only milk and active cultures as ingredients. Some companies add powdered milk protein, starches, and gums to thicken it. This shortcuts the lengthy straining process and the extra milk it requires, saving money in production. Quality is the sacrifice. So grab some plain Greek yogurt and try the recipe below for my Fruit & Greek Yogurt Tart. Or experiment like we did, replacing some or all of the butter or sour cream in your favorite recipes. However it turns out, you’ll discover that once you go Greek, at least with yogurt, you’ll never go back.
– Leslie Mackie
Fruit & Greek Yogurt Tart
Click here to print this recipe!
Ingredients
Pre-rolled 9” pie shell or one recipe for Flaky Pie Dough (see note below)
3 eggs
3/4 cup plus 2 tablespoons sugar
2 tablespoons pure vanilla extract
2 cups plain (unflavored) Greek low-fat yogurt
1/2 cup unbleached all-purpose flour
1-1/2 cups fresh seasonal fruit
1/3 cup sliced raw almonds
1 tablespoon powdered sugar
Makes a 9-inch tart
1. Preheat oven to 400°F. Locate a 9” glass pie pan, aluminum pie tin or 2” fluted tart pan.
2. Place chilled pie shell into the pan, line it with parchment paper, and weight with rice or baking beans. Bake for 30 minutes or until shell is golden brown. Remove rice or beans and set aside. Reduce oven temperature to 325°F.
3. In the bowl of a stand mixer place the eggs, sugar and vanilla. With a whisk attachment on medium speed, whip for 3 to 5 minutes or until the mixture becomes light in color and texture.
4. With the mixer on low speed add in the yogurt. Lower the bowl and scrape down the sides to make sure it is well combined. With the mixer on low speed add the flour gradually to avoid forming lumps. Scrape bowl again to ensure everything is well combined.
5. Pour prepared custard into the pre-baked shell leaving a 1/4-inch border at the edge of the crust. This is to prevent the custard from spilling over the edge when the fruit is added. Scatter berries or sliced fresh fruit over the top of the tart and sprinkle sliced almonds around the edge of the tart.
6. Place the tart on the center rack of the oven and bake for approximately 1 hour, or until the tart is set in the center. Check the tart at 30 minutes and rotate for even baking.
7. Remove the tart from the oven and set aside to cool for 1 hour or chill in the refrigerator before serving. Dust with powdered sugar for presentation.
Note: For an absolutely delicious, foolproof pie crust, use our Flaky Pie Dough recipe, then proceed as follows: Place two-thirds of the prepared dough on a floured work surface and begin rolling out the pie dough to 1/8-inch thickness, creating a 15-inch circle (save remaining dough for other uses). Fold pie dough in half and lift into the baking pan, allowing for a 2-inch border beyond the rim. To create the pie rim, fold the pie dough border up and into itself, overlapping with the cut edge visible to the inside of the tart, making a 1/2-inch standing crust. Crimp the edge all around the pie pan and then chill in freezer for 20 minutes. Continue following instructions in Step 2.