12 Days of Cookies: Day 5, Festive Gingerbread People

Gingerbread Recipe

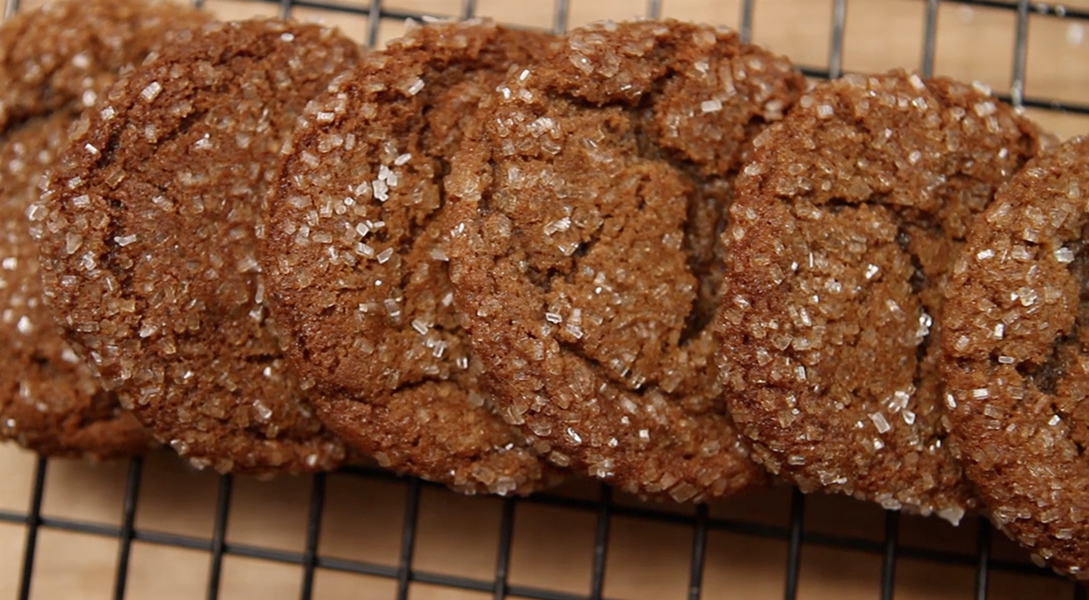
Did you know gingerbread people have a noble history? The story goes that Queen Elizabeth I had her chef make gingerbread people in each guest’s likeness for a royal dinner party.

Half the fun of gingerbread people is decorating them, isn’t it? We always start out with simple icing outlines and dots for facial features, but after a few have been finished, we start drawing on sassy shirts and flowing skirts or groovy surfer shorts and sunglasses. Invite your friends over – kids and grownups alike – and jump-start the season with a cookie decorating party of your own!

Festive Gingerbread People
Click here to print this recipe!

Ingredients

3 1/3 cups unbleached all-purpose flour
2 teaspoons baking soda
2 teaspoons cinnamon
2 teaspoons ground allspice
1/4 teaspoon cayenne pepper
1 3/4 cups light brown sugar
3/4 cup solid vegetable shortening, room temperature
2 eggs
1/4 cup honey
1/3 cup molasses
2 tablespoons peeled and grated ginger

Click here for our Quick & Easy Cookie Icing recipe and decorating tips!

1. Sift the flour, baking soda, cinnamon, allspice and cayenne into a medium bowl. Mix with a spoon until the ingredients are evenly distributed.

2. Place the sugar and shortening in the bowl of your stand mixer. Using a paddle attachment, mix on low for about 30 seconds to start bringing the ingredients together. Increase the speed to medium and continue mixing for 5 to 8 minutes, or until the mixture is smooth and pale in color. Add the eggs one at a time, making sure each egg is fully incorporated before adding another. Add the honey, molasses and ginger and mix on medium for about 30 seconds. Scrape down the sides of the bowl with a rubber spatula and mix for another 30 seconds to make sure the ingredients are evenly distributed. Remove the bowl from the mixer and scrape down the sides one more time.

3. Fold half of the dry ingredients into the batter with a rubber spatula. After the first batch is incorporated, fold in the rest of the dry ingredients and continue folding just until all of the flour has been absorbed.

4. Using a rubber spatula, scrape the dough from the bowl onto a large piece of plastic wrap. Dust your hands with a little flour and pat the dough into a block, then wrap it tightly in the plastic wrap and chill in the refrigerator for 1 to 2 hours.

5. Preheat the oven to 325°F. Line 2 rimmed baking sheets with parchment paper.

6. Place the chilled dough on a floured work surface and roll it out 1/2-inch thick. Using a 6-inch cookie cutter, make as many gingerbread people as you can and place them on the prepared baking sheets. These cookies will spread out a little bit during baking, so leave a 2-inch space between each cookie. Roll the scraps of dough into a ball and roll it out again. You should be able to cut a few more cookies from the dough.

7. Bake the cookies, 1 sheet at a time, on the center rack of the oven for 20 to 25 minutes. To help the cookies bake evenly, rotate the baking sheet every 5 minutes or so. Let them cool completely before decorating. These cookies can be made 2 or 3 days before a decorating party and stored in an airtight container.

12 Days of Cookies: Day 3, Mexican Wedding Balls

Snowball Cookies

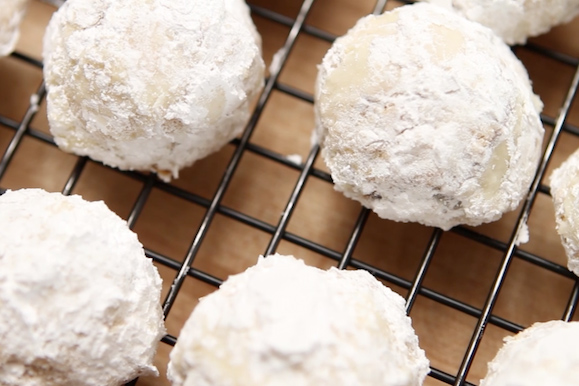
Mexican Wedding Balls, Snowball Cookies, Russian Tea Cakes… Whatever the name, one thing is certain: These cookies will make spirits bright! The snow-white, powdery appearance makes it a favorite for cookie swaps and festive desserts. The cookies were dubbed Mexican Wedding Balls because of their common use as cheery wedding favors.

The secret to making truly scrumptious, melt-in-your-mouth Mexican Wedding Balls is using high-quality butter and pure vanilla extract. Check out our video to follow Leslie’s simple step-by-step instructions for preparing these cookies!

Mexican Wedding Balls
Click here to print this recipe!

Ingredients

1 1/2 cups whole almonds
12 ounces (3 sticks) unsalted butter, room temperature
1/3 cup granulated sugar
1 tablespoon pure vanilla extract
3 1/4 cups unbleached all-purpose flour
2 cups powdered sugar, sifted

Makes 3 dozen cookies

1. Preheat oven to 350°F.

2. Scatter almonds on a rimmed baking sheet and toast on center rack of oven for approximately 10 minutes, or until golden brown. Let cool, then finely chop and set aside.

3. Combine butter and sugar in the bowl of your stand mixer and using the paddle attachment, mix on low speed for about 30 seconds. Increase speed to medium and mix for another 5 to 7 minutes, or until the mixture is smooth and pale in color. Add vanilla extract and mix for about 30 seconds, making sure vanilla is fully incorporated. Remove the bowl from the mixer and scrape down the sides of the bowl.

4. Place almonds and flour in a medium bowl and toss together. Using a rubber spatula, fold half of the dry ingredients into the bowl of batter. After the first batch is fully incorporated, fold in the other half and continue folding until all of the dry ingredients have been absorbed, 1 to 2 minutes. Cover bowl with plastic wrap and chill in the refrigerator for 1 hour.

5. Preheat oven to 325°F. Line 2 rimmed baking sheets with parchment paper.

6. Scoop small amounts of dough out of the bowl (I like to use a small ice cream scoop), and roll the dough into 1 1/2-inch balls. Place the balls on the prepared baking sheets, about 1 inch apart, pressing them down lightly to create a flat bottom on each cookie. Chill in refrigerator for about 2 hours.

7. Back on center rack of oven, 1 sheet at a time, for 15 to 20 minutes, or until the cookies just start to color. To help the cookies bake evenly, rotate the baking sheet every 4 minutes or so. Let the cookies cool slightly on the baking sheet, then toss them in powdered sugar. Lay the sugar-coated cookies on a clean baking sheet to finish cooling. Finally, after the cookies are fully cooled, toss them in powdered sugar once again. They can be stored in an airtight container for up to 1 month at room temperature.

12 Days of Cookies: Day 2, Quick & Easy Cookie Icing

Royal Icing

Decorating sugar cookies can be a fun way to wile away a chilly afternoon with friends. Don’t despair if your little cookie canvasses aren’t perfect works of art. With a little practice, you’ll be icing cookies like our pastry chefs. In the meantime, rest assured that these cookies taste delicious no matter what – especially if you followed our tips for baking the perfect batch!

Quick & Easy Cookie Icing
Click here to print this recipe!

Ingredients

1 cup powdered sugar
1 tablespoon filtered water
Food coloring

Makes enough icing to decorated 6 to 8 six-inch cookies

1. Place powdered sugar in a medium bowl and add water. *Stir to combine until the mixture is smooth and all the sugar is dissolved. Add just a couple of drops of food coloring and mix well. You can always add more food coloring until the desired color is reached. Cover the bowl with plastic wrap and store at room temperature for up to 1 day.

2. Repeat the steps above to create more colors.

3. Fit your pastry bags with the desired piping tips. A fine tip is perfect for drawing detailed decorations and making outlines. A wider tip can be used to fill in spaces. Using a rubber spatula, fill each bag with a different frosting color. Gather the frosting near the tip so no air will escape the tip as you are decorating. When icing the cookies, make sure the piping tip is not touching the cookie, but rather hovering over the cookie. One way to cover the whole cookie with a glaze of icing is by putting on a latex glove, dipping your finger into the icing and painting the cookie with your finger.

4. While the icing is wet, add embellishments to the cookie by topping with colored sprinkles or crystal sugar. Once the icing has set, gently tap the cookie to get rid of extra sprinkles and sugar.

5. After all the cookies have been decorated, let them sit for 2 hours at room temperature, so the frosting can set.

*If your icing is too thick, stir in more water, 1/2 teaspoon at a time, until the desired consistency is reached; if too thin, continue stirring, or mix in more powdered sugar, 1 teaspoon at a time, until the desired consistency is reached.

Holidays 101: Superb Side Dishes

Turkey gets all the glory on Thanksgiving Day, but no plate is complete without a spoonful of stuffing, tendrils of scrumptious salad, and a beautiful basket of bread. We have some savory side dishes that are so good, they might just steal the spotlight.

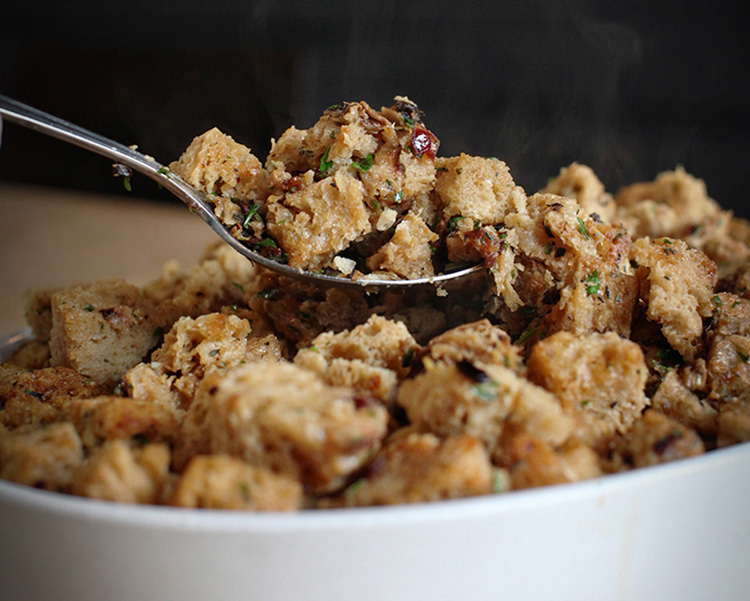
Holiday Porcini Stuffing

Holiday Side Dishes

Our Holiday Porcini Stuffing Mix starts with handmade bread that’s dried in-house, then combined with cranberries, savory porcini mushrooms, and a blend of sautéed veggies. With enough stuffing to fill a 14-pound bird, you’re sure to satisfy the entire group – and hopefully have a little leftover for turkey sandwiches. Pick up a package, complete with recipe, at any of our cafés.

Sweet Potato & Delicata Squash Gratin

Holiday Side Dishes

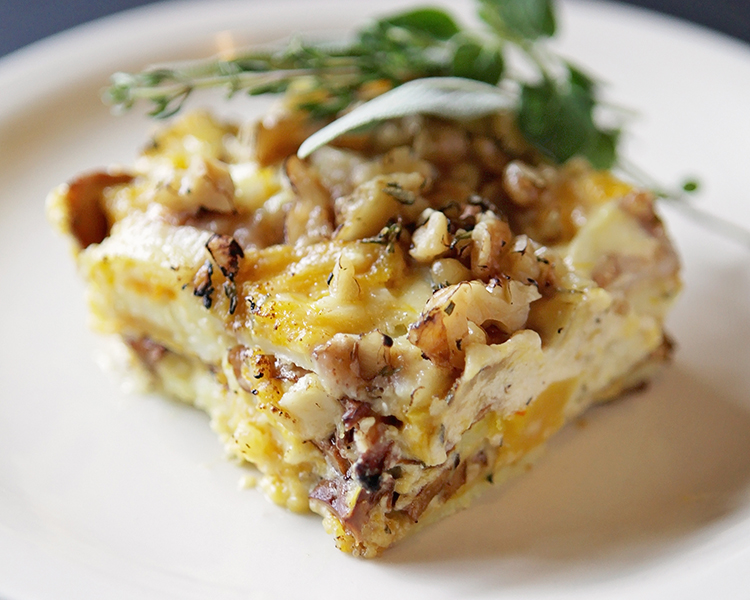
This rich and creamy side dish is a must-have at your holiday table. The combination of sweet potatoes, delicata squash, roasted mushrooms and chopped walnuts will have you rethinking standard mashed potatoes. Click here to print the recipe.

Sweet & Spicy Nuts

Holiday Side Dishes

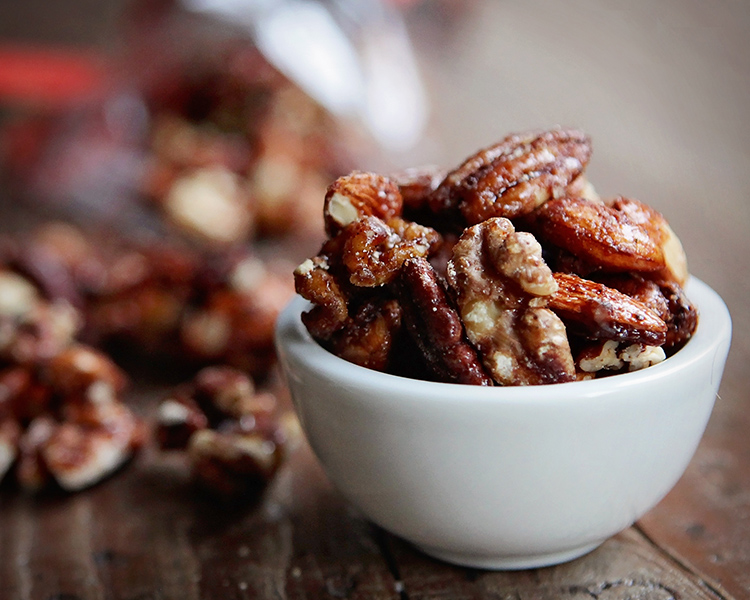
Sure, our Sweet & Spicy Nuts are irresistible right out of the bag, but they are even better chopped and added to a salad of fresh greens and dried cranberries, a roasted mix of winter root vegetables, or as a topping for sweet potato soufflé. Find our signature blend in our cafés.

Dinner Rolls

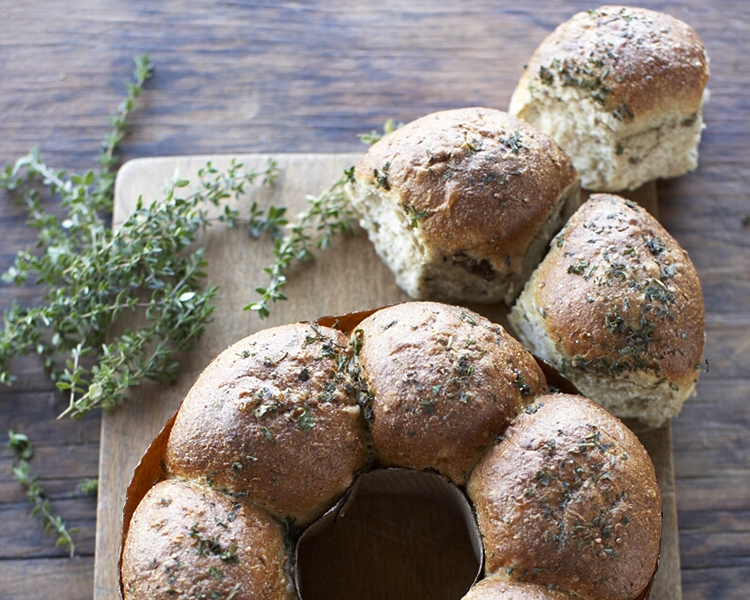
Holiday Side DishesWhile we have plenty of loaves to choose from, our pillowy soft, full-flavored dinner rolls are an easy way to wow your guests. Choose from Porcini Harvest, Buttermilk, Rustic Potato, Olivetta or Whole Wheat Cider Rolls or mix and match a couple of trays to suit your guests’ tastes. Leftover rolls will come in handy for making those day-after-Thanksgiving turkey sliders. Find our dinner roll trays in our cafés.

Berry Crisp

Leslie’s go-to summer dessert is a freshly baked fruit crisp. While grilling dinner outdoors, this dish can be baking and perfuming your kitchen. Leslie’s Berry Crisp pairs sweet farmers market berries with a no-fuss topping of oats, flour, almonds, brown sugar and butter, baked until golden brown and bubbling. You can put your own twist on this recipe by using your favorite combination of berries and nuts. Served while it’s warm with a scoop homemade vanilla ice cream or a dollop of sweetened whipped cream, it’s the perfect ending to a relaxed alfresco summer dinner.

Berry Crisp
Click here to print this recipe!

Ingredients

For the topping:
1/3 cup unbleached all-purpose flour
1/4 cup thick-cut oats
1/2 cup coarsely chopped almonds (Leslie uses a combination of almonds and pine nuts in the video)
1/8 teaspoon ground cinnamon
1/3 cup packed light brown sugar
1/4 cup (1/2 stick) chilled unsalted butter, cut into 1/4-inch pieces

For the fruit:
1/2 cup sugar
2 tablespoons light brown sugar
2 tablespoons unbleached all-purpose flour
1/4 teaspoon lemon zest
7 cups of mixed berries (Leslie uses strawberries, raspberries and blueberries in video)

Makes one 9-inch baking dish

1. Position a rack in the center of the oven and preheat to 375° F. Lightly grease a 9-inch glass baking dish with canola oil.

2. To make the topping, whisk together the flour, oats, almonds, cinnamon, and brown sugar in a medium bowl. Scatter the butter pieces on top, and using a pastry cutter or two forks, cut the butter into the flour mixture until it is coarse and crumbly. Set aside.

3. To prepare the fruit, toss the sugars, flour, and lemon zest in a large bowl. Add the berries and toss well. Let sit for 10 minutes to macerate (soften and absorb the flavors).

4. Using a slotted spoon, transfer the berry mixture to the prepared baking dish. Discard the remaining juice. Dot the topping evenly over the berry mixture.

5. Bake for 45 to 60 minutes. The topping will be golden brown and the juices will be bubbling around the edges. To set the crisp, cool for 30 minutes.

Enjoy with vanilla ice cream and a dusting of powdered sugar!

Grilled Halibut on Brioche Burger Buns

Our Brioche Burger Buns are the stuff of legend, if we do say so ourselves. Not only do they fly off our shelves, lickety-split, but our wholesale partners (Hello, SkilletThe Swinery, and Re:Public!) can’t get enough of them either. Plush and buttery with just a hint of sweetness, they are profoundly delicious when toasted to a caramelized crisp. Is your mouth watering yet?

Brioche has inspired masterpieces, a knitter’s stitch, and even a font. But ours incite great works of the edible variety. We joined Leslie at her barn to see how she uses these buns to create summer sandwich perfection. With grilled halibut, spicy harissa aioli, and preserved lemons, it’s sure to be a hit at your next barbecue!

Grilled Halibut on Brioche Burger Buns
Click here to print this recipe!

Ingredients

1 pound fresh halibut
2 tablespoons coarsely chopped fresh oregano
1/2 teaspoon kosher salt
Ground black pepper to taste
1 1/4 cups pure olive oil, divided
1 1/2 cups cherry tomatoes
2 egg yolks
2 teaspoons Dijon mustard
2 tablespoons lemon juice
1 teaspoon finely chopped garlic
1 1/2 teaspoons ground harissa
*1/4 cup preserved lemons
**1 package Brioche Burger Buns

*Leslie uses the Quick Pickled Lemons recipe from Jerusalem: A Cookbook.
**Available in our cafés.

Makes 4 sandwiches

1. Preheat a grill to 500°F. Brush grill grate to remove any debris.

2. Cut halibut horizontally to create an even thickness. Sprinkle with oregano, salt and pepper, and drizzle with a little olive oil. Set aside.

3. Preheat oven to 375°F. Line a baking sheet with parchment paper, add tomatoes, and drizzle them with olive oil and season with salt. Bake for 10 to 20 minutes or until edges are golden brown. Set aside to cool.

4. In a medium bowl, add the egg yolks, Dijon, lemon juice and garlic, and whisk well to combine. While continuing to whisk, add 1 cup of olive oil in a slow, steady stream. The aioli mixture should thicken slightly but should not resemble processed mayonnaise. Stir in harissa and salt to taste.

5. Brush a little olive oil on the preheated grill grate and cook the halibut for 2 to 3 minutes on each side. While the fish is cooking, slice the buns in half and brush the cut side with remaining oil. On the coolest part of the grill, toast the buns cut side down for 1 to 2 minutes.

6. Spread 1 tablespoon of aioli on the inside of each toasted bun half. Then layer 1 tablespoon of preserved lemons on each bottom bun, followed by a piece of halibut, and a quarter of the tomatoes. Sandwich with the top buns and slice each sandwich in half for ease of eating.

Enjoy with a fresh garden salad, roasted potatoes or potato chips. Happy grilling!

Francese Crostini: Our Favorite Summer Appetizer

Since we’re all spending more time outside soaking up this gorgeous weather, we thought you would enjoy seeing what Leslie has on the grill this summer. This rustic yet elegant Francese Crostini appetizer using our Pane Francese bread toasted right on the grill and topped with fresh, local ingredients is hard to beat. You can make the Fig & Olive Tapenade at home using the recipe below, but we also sell this delicious spread in our cafés. Check out the video to learn about Leslie’s inspiration for this recipe and stop by for a freshly baked loaf of Pane Francese for your next dinner party!

Francese Crostini
Click here to print this recipe!

Ingredients

For the tapenade:
1 cup dried Black Mission figs (about 18), trimmed and quartered
1 1/2 cups water
2 tablespoons balsamic vinegar
2 cups pitted Kalamata olives, rinsed
1 tablespoon capers
1 tablespoon Dijon mustard
2 medium cloves garlic
1 1/2 teaspoons chopped fresh rosemary
1 1/2 teaspoons chopped fresh thyme
3/4 cup extravirgin olive oil, divided

For the crostini:
*1 loaf Pane Francese
2 fresh Black Mission figs, trimmed and sliced lengthwise into 12 pieces
2 tablespoons chopped Marcona almonds
1 tablespoon chopped fresh oregano
**4 ounces of Camembert, Brie or Cambozola, sliced into 12 pieces

*Available in our cafés.
** Leslie uses Dinah’s Cheese from Kurtwood Farms.

Makes 12 servings

1. In a medium saucepan over medium heat, bring the dried figs, water and balsamic vinegar to a simmer and cook until the figs are soft and the liquid has reduced to about 2 tablespoons, about 20 minutes. Cool for 10 minutes.

2. Pour the warm figs and cooking liquid into the bowl of a food processor or a blender. Pulse several times to break down the figs; scrape the bowl and purée to a smooth texture. Add the olives, capers, mustard, garlic, rosemary, thyme and 1/4 cup of olive oil. Pulse the mixture until it is spreadable and has a uniform texture. With the machine running, add another 1/4 cup olive oil in a slow stream until the mixture is smooth and easy to spread.

3. Reserve 1 cup of tapenade for the crostini. The remainder can be stored in the refrigerator for up to one week for future use.

4. Slice the bread lengthwise and brush each cut side with the remaining olive oil. Toast the bread cut side down on a grill until golden brown. Alternatively, the loaf can be toasted cut side up in the broiler until golden brown.

5. Divide the reserved tapenade in half and spread evenly on each side of the loaf. Layer each side with 6 slices of cheese and 6 slices of fig, evenly spaced. Sprinkle both sides with almonds and oregano.

6. Slice each length of bread into six pieces, making 12 pieces total. Enjoy!

Mother’s Day Brunch

Mother's Day

There is no one more deserving of a home-cooked meal than Mom. We would readily spring to the kitchen and whip up something for her any day of the year, but definitely always on Mother’s Day. While our bakery is filled with delicious things already prepared to dazzle (Cinnamon Rolls drenched in cream cheese frosting! Cloud-like Coconut Cream Tartlets!), you can never go wrong with the DIY route.

Our Mini Macrina Casera loaves are meant to spark creativity in the kitchen this Mother’s Day. We’ve packaged this miniature version of our popular house bread with a card filled with ideas on how to enjoy it. One of our favorites is sliced, toasted and topped with poached eggs and our savory Fennel-Sausage Gravy. We guarantee it will get Mom’s stamp of approval!

Fennel-Sausage Gravy
Click here to print this recipe!

Ingredients

1 medium fennel bulb with fronds
1 tablespoon pure olive oil
Kosher salt and freshly ground pepper
1 tablespoon canola oil
8 ounces (1 cup) bulk Italian chicken sausage
3 tablespoons unsalted butter
1/2 teaspoon whole fennel seeds, finely ground
1/4 teaspoon dry mustard powder
1/4 teaspoon freshly grated nutmeg
1/4 teaspoon cayenne pepper
3 tablespoons unbleached all-purpose flour
2 cups whole milk
1 1/2 cups heavy cream

Makes 4 Servings

1. Position a rack in the center of the oven and preheat to 375°F. Line a rimmed baking sheet with parchment paper and set aside.

2. Trim, halve and core the fennel bulb. Chop enough fronds to measure 2 teaspoons and set aside. Placing the halves cut side down on a cutting board, slice them vertically, then slice in the opposite direction, creating a 1/2-inch dice.

3. Toss the diced fennel with the olive oil, season to taste with salt and pepper, and transfer to the prepared baking sheet, spreading the pieces so they roast evenly. Bake for 15 minutes, or until the fennel is golden brown on the edges. Set aside to cool.

4. Place a large sauté pan over medium heat. Add the canola oil, coating the bottom of the pan. After about 1 minute when the pan is quite hot, add the sausage. Using a spoon, break the sausage into small pieces, tossing to cook thoroughly. When the sausage is completely cooked (about 4 minutes), pour it into a strainer fitted over a medium bowl to catch the rendered fat. (Often with chicken sausage there is little or no excess fat, but with pork varieties you may see more. You can substitute the rendered sausage fat for the butter called for in this recipe, if you like.) Set aside.

5. Return the sauté pan to medium heat. Add the butter and melt completely. Add the fennel seed, mustard powder, nutmeg, 1/2 teaspoon salt, and cayenne pepper. Sprinkle in the flour and, using a whisk, combine the dry ingredients with the fat to create a roux (cooked flour and fat that will thicken into the gravy). Cook for 1 to 2 minutes, whisking, until the roux is a deep golden color. Reduce the heat to low and add the milk in a slow stream. Whisk the milk into the roux as you go, combining it completely (almost making a paste) before adding more milk – if you add the milk too quickly, you’ll end up with those dreaded lumps! Add the heavy cream and reserved fennel and sausage. Cook for 20 to 25 minutes – you want to cook out the raw flour taste and all the gravy to thicken. Check the seasoning, adding additional salt and pepper to taste.

6. Ladle about 3/4 cup of warm gravy over toasted bread and poached eggs. Garnish with a sprinkle of parsley and reserved fennel fronds.

If you don’t use all of the gravy, it freezes well for up to 2 weeks. To reheat, simply warm it in a sauce pan over medium heat with a bit more cream or milk, stirring until smooth. You can find this recipe along with many more brunch favorites in our latest cookbook, More from Macrina.

Flour 101: Artisan No-Knead Bread

Artisan No-Knead Bread

If you’re a proper breadhead, you’ve probably taken a stab at Jim Lahey’s no-knead bread by now. It seems like every baker has their own rendition of this simple recipe, but ours stands out from the crowd with its extra dimension of flavor and texture from stone-ground flour. Agave nectar lends a subtle sweetness and rich color, making this loaf a beautiful addition to any meal. The best part of all? Time does most of the work for you. Start it in the morning and you’ll be wowing your dinner guests with freshly baked bread without breaking a sweat. It’s so good it happens to be Leslie’s favorite go-to bread recipe when she doesn’t have time to swing by the bakery. Now you have to try it!

The recipe below is meant to be baked in a standard dutch oven. Pick up our cookbook, More from Macrina, for modifications using a double dutch oven.

One-Day Artisan Whole Grain Loaf
Click here to print this recipe!

Ingredients

1 3/4 cups lukewarm filtered water (about 80°F)
2 tablespoons amber agave syrup
2 teaspoons active dry yeast
1 1/4 cups (5 1/2 ounces) unbleached all-purpose flour
1 cup (4 1/2 ounces) stone-ground whole wheat flour
1/2 cup (2 ounces) stone-ground rye flour
2 teaspoons kosher salt

Preparation
Makes One 9-Inch Round Loaf

1. Line a medium bowl with a clean cotton flour sack towel and sprinkle it heavily with flour. Set aside.

2. Combine the water and agave syrup in a large bowl. Sprinkle the yeast over the surface of the liquid and whisk gently until it has dissolved. Let the mixture sit for about 3 minutes to activate the yeast.

3. Add the flours and salt. Using a rubber spatula, mix the ingredients for 2 to 3 minutes by pulling the spatula through the dough and flipping it over to simulate a kneading motion. The dough will have no more flour pockets and will be quite wet. Cover the bowl with plastic wrap and let the dough rise for 2 hours at warm room temperature (75 to 80°F) or until the dough has doubled in size.

4. Lightly sprinkle the top of the dough with flour and do a baker’s turn. Cover the bowl with plastic wrap and let the dough rise again at room temperature for another 2 hours.

5. When the dough has risen, do a second baker’s turn. Again, cover the bowl with plastic wrap and let the dough rise at room temperature for another hour.

6. Transfer the dough onto a floured work surface and do a third baker’s turn – this time on your work surface rather than in the bowl. Invert the loaf so that it is seam side down, then cup your hands around the dough ball, resting the outer portion of your hands on the work surface. Move the ball in a circular motion to tighten it at the base. Invert the rounded loaf again and place it seam side up in the towel-lined bowl; lightly cover the top with the overhanging towel. Let it rise at room temperature until it is about 1 1/2 times its original size, about 1 hour. This dough should have a texture like Jell-O, slightly under-proofed. If it has risen too much at this stage, it will collapse when you place it in the dutch oven.

7. One hour before baking, preheat the oven to 450°F. Place the cast iron dutch oven and its lid inside to preheat. Flip the dough onto your floured work surface and slowly remove the cloth. With a sharp paring knife or razor blade, cut a 1/8-inch-deep, 4-inch square on the top of the dough. Using oven mitts, quickly retrieve the dutch oven and remove the lid. Gently drop the dough into the dutch oven, replace the lid and slide into the oven.

8. Bake for 30 minutes, then remove the lid. Continue baking until the loaf is deep brown and very crusty, about another 20 minutes.

9. Flip the loaf out onto a wire rack (the loaf should release easily from the pan) and let cool completely before cutting.

Glazed to Perfection: How to Make Chocolate Ganache

Chocolate Orange Coffee Cake glazed with chocolate ganache

Our Mini Chocolate Orange Coffee Cake drizzled with rich chocolate ganache.

Chocolate ganache is rainbow sprinkle frosting all grown up. It’s patent leather shoes and sequin sparkles. It’s velvety smooth and seductive. Go ahead. We dare you to whip up an easy batch and not dip a finger into the decadent gloss.

We use chocolate ganache in many of our recipes, from Cocoa Puffs to Chocolate Orange Coffee Cake. Since it brings a full-bodied thrum of chocolate flavor to everything it touches – and you can’t have Valentine’s Day without chocolate – we decided to share our signature chocolate ganache recipe.

Chocolate Ganache
Click here to print this recipe!

Ingredients

1/2 cup heavy cream
1 cup good-quality semisweet chocolate chips

Instructions

Pour the heavy cream into a small saucepan and place over medium heat. Bring the cream to a froth just before it boils. Turn off the heat and add the chocolate chips. Using a rubber spatula, stir constantly until the chocolate has completely melted. Set the pan aside and let the ganache cool to the desired consistency. The ganache will thicken as it cools.

How to Use Chocolate Ganache

  • Pour warm ganache over ice cream for an off-the-charts delicious sundae.
  • Dip your favorite fruits (dried or fresh), nuts (raw or roasted) and candies.
  • Drizzle warm ganache over a bundt cake for a dramatic effect that’s impossible to mess up.
  • Top cupcakes in lieu of traditional frosting.
  • Spread a layer over a pan of brownies for death-by-chocolate decadence.