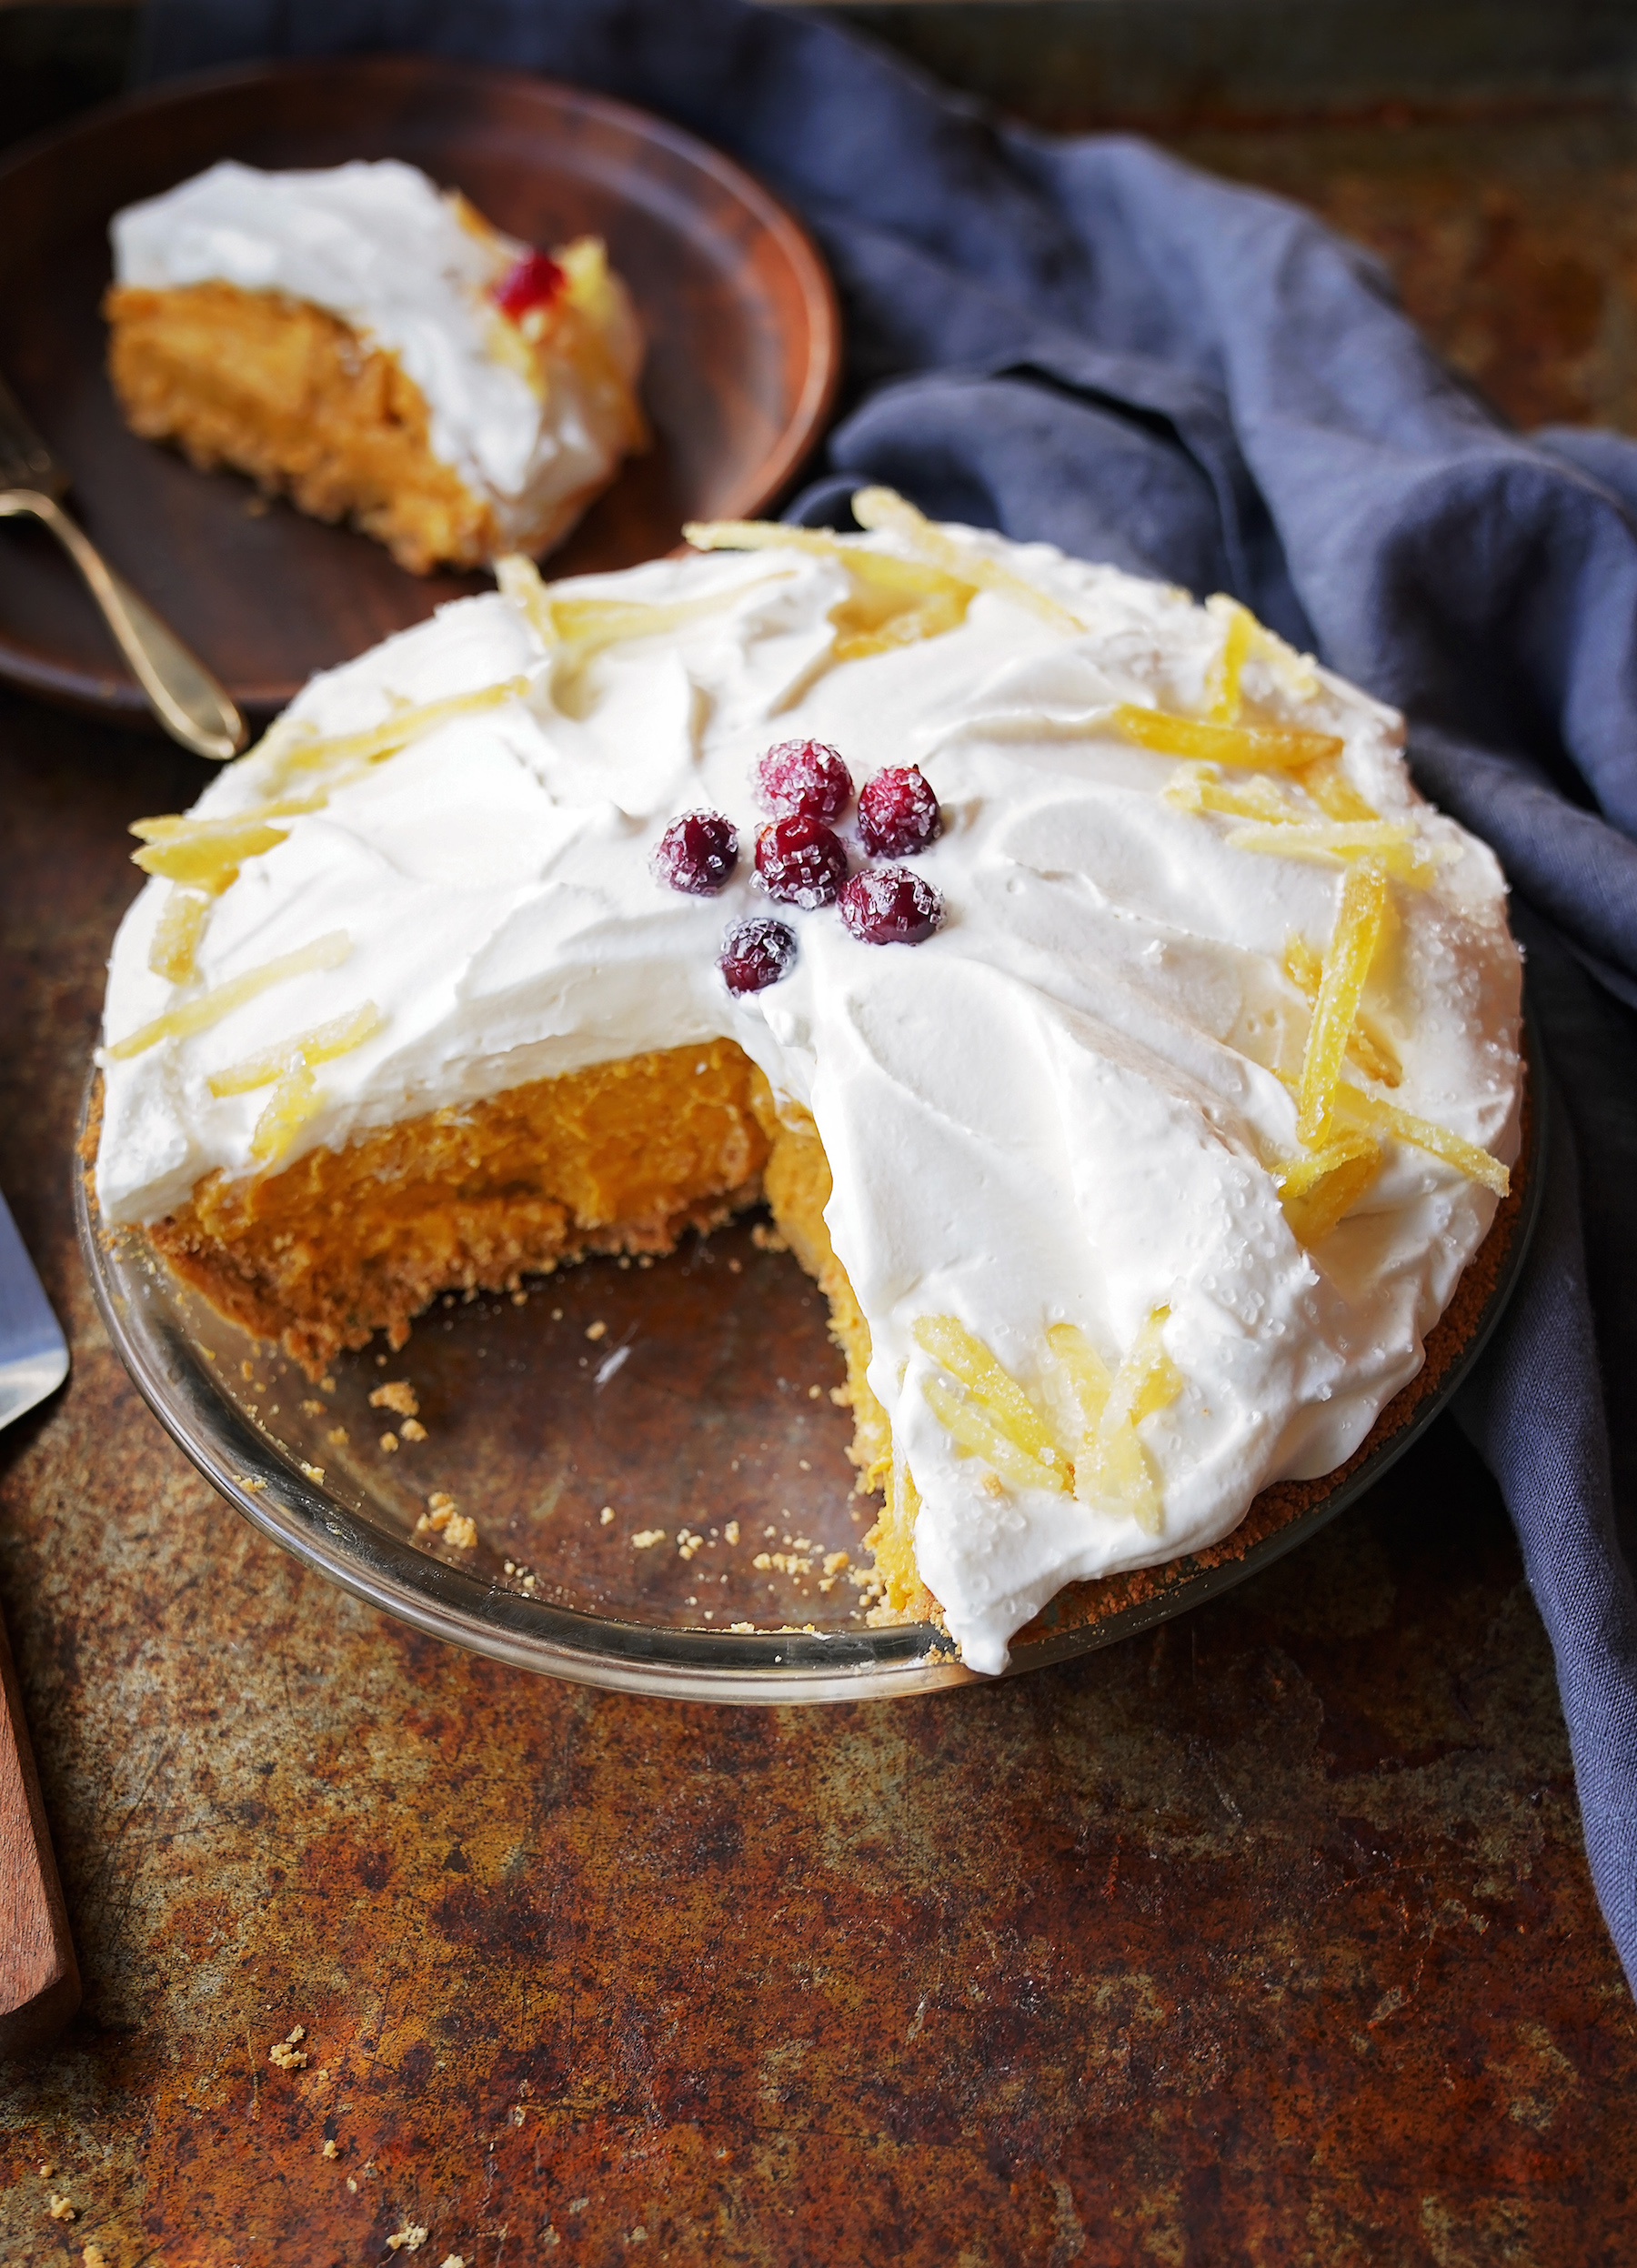
May Recipe of the Month: Mother’s Day Cake

This simple chocolate cake is my favorite. The base layers are our moist Mom’s Chocolate Cake. The right balance of espresso and chocolate make the mocha mousse unforgettable, and the dark chocolate ganache adds flavor and elegance. Garnish it with raspberries or chocolate shavings and you’ll have a beautiful homemade cake to surprise your mother with at her celebration.

Ingredients

Makes one 9-inch cake

Cake

2 eggs

¾ cup whole milk

⅓ cup canola oil

2 tsp pure vanilla extract

1¾ cups granulated sugar

1½ cups all-purpose flour

¼ cup cocoa powder

1 tsp baking soda

¾ tsp salt

¾ cup boiling water

9-inch cardboard cake circle

Mocha Mousse

¾ cup semisweet chocolate chips

¼ cup brewed espresso (or very strong coffee)

4 Tbsp unsalted butter

2 cups whipping cream

½ cup powdered sugar, sifted

Ganache Glaze

2 cups whipping cream

1 cup bittersweet chocolate chips

1 cup semisweet chocolate chips

Directions

Cake

Preheat the oven to 325°F. Brush the sides and bottom of a 9-inch round cake pan with canola oil. Line the base with a parchment circle. Dust the oiled edges with flour to prevent sticking.

In a medium bowl, whisk the eggs, milk, canola oil and vanilla. Set aside.

Sift the sugar, flour, cocoa powder, baking powder, baking soda and salt into a stand mixer bowl. Using the paddle attachment, mix on low speed for 1 minute to combine the ingredients. Add the egg mixture in three additions, scraping the bottom and sides of the bowl between. After the third addition, the mixture should be smooth.

With the mixer on low speed, add the boiling water in a slow stream, taking approximately 30 seconds. Increase speed to medium and mix for an additional minute.

Pour the batter into the prepared cake pan.

Bake on the center rack for 30 to 35 minutes. When finished, the top will be set and the sides should pull slightly away from the edges. Let cool for 1 hour.

To remove the cake, run a knife around the edge of the pan, then invert it gently onto a piece of parchment. After the cake has completely cooled, cut it horizontally into three equal layers. Set aside.

Mocha Mousse

In a medium saucepan, melt the semisweet chocolate chips, espresso and unsalted butter. Remove from the heat. Let cool to room temperature.

In a stand mixer bowl, whip the cream to a soft peak using the whisk attachment. Add the sifted powdered sugar. Continue whipping until the mixture forms medium firm peaks.

Remove the bowl. In three additions, fold in the cooled chocolate mixture. Set aside.

Ganache Glaze

In a medium saucepan, bring the whipping cream to a boil. Turn off the heat and add the chocolate chips. Whisk to make a smooth glaze. Let cool to room temperature (it will thicken slightly).

Assembly

Sprinkle a little sugar onto the 9-inch cake circle (or cardboard cut to size and covered with aluminum foil). Top with the first cake layer and spread with one third of the mousse. Repeat this process with the second layer. Then cover with the last layer of cake. Make sure the sides line up and the top layer is flat. Adjust if needed. Then spread the last third of the mousse evenly over the top and sides until it is smooth. Chill the cake for 30 minutes.

Place a 9-inch cake pan upside down on a rimmed baking sheet. Center your chilled cake on the inverted cake pan. Pour half the ganache over the top of the cake so that it is covered evenly. Allow the excess to spill over the sides. Add remaining glaze to the sides and smooth for a nice presentation. The chilled cake should allow you to model the glaze to a smooth surface.

Garnish as you like. Sugar sprinkles, flowers, fresh fruits, berries and chocolate shavings are some of our favorites. Enjoy!


Bread Baking Made Easy

Our organic whole wheat bread kit makes two excellent homemade pan loaves, one for now, and one to share with a lucky neighbor. 

Do you love homemade bread but have always been too intimidated to try baking it yourself? Our organic whole wheat bread kit allows you to make amazingly easy, excellent bread at home without fancy equipment or any special bread-making skills. You’ll get all the smells, two flavorful, nicely-textured loaves, and the sweet reward of having made it yourself. For those of you with kids, this is also a great project to undertake with them.

We chose this loaf for our first-ever bread making kit because it’s one of Leslie’s favorites to make at home. “To me, this pan loaf is the perfect comfort food,” Leslie says. “It smells so good while it’s baking, and the organic whole wheat flour we include gives the bread an excellent texture and flavor.”

Our kit includes everything you need but a standard bread loaf pan, oil for brushing the pan, and honey (or agave or maple syrup). Our recipe has two options: A no-knead version, and a stand-mixer version. The no-knead method takes a little longer (an extra 90 minutes) but turns out a loaf equally as good as the one from the stand mixer. If you don’t have a mixer, this is the path for you—or if you just want to save yourself some extra cleanup.

From start to finish, you’ll need to allow for three hours of combined proofing time (four and a half for the no-knead method) and about 45 minutes of baking time. The active time—mixing the dough and shaping the loaf—won’t account for more than 20 minutes of your time.

If you’re tired of being confined to your home and want to try something new, this kit gives you the chance to turn out professional loaves without the stress. You’ll enjoy the rewards, one slice at a time, for days. 


April Recipe of the Month: Roasted Steak Crostini with Arugula and Lemon Aioli

This recipe makes a great appetizer or can be enjoyed as an open-faced sandwich with a green salad for a light meal. Flat iron steak is nearly as tender as tenderloin but is more economical. The marbling in this cut adds flavor, and the meat grills beautifully. If you can’t find it, try substituting hanger steak or tenderloin. Seasoning with black pepper adds a piquant roundness to the meat. Vibrant lemon aioli and crisp arugula enhance each bite with flavor and texture. The crostini pair well with red wine.

Ingredients

Makes 12 crostini

1½ lbs flat iron steak

3 Tbsp cracked black pepper

2 Tbsp kosher salt

¼ cup aceto balsamico (balsamic vinegar from Modena), divided

Macrina Baguette

1 cup extra virgin olive oil, divided

3 bunches fresh arugula

1 lemon (zest and juice)

2 egg yolks

1½ tsp Dijon mustard

1½ tsp chopped garlic

1½ cups canola or sunflower oil

Directions:

Season both sides of the flat iron steak with the cracked black pepper and kosher salt. Drizzle 2 Tbsp of aceto balsamico over the steak and let it marinate for at least 30 minutes.

Cut the baguette on the bias (diagonal cuts) into slices measuring roughly a ½-inch thick. Slices should be about 4 inches long. Preheat a grill pan or outdoor grill to medium-high heat. Brush both sides of the baguette with olive oil and grill until crisp and marked by the grill. Set aside.

Wash and remove the fibrous stems from the arugula. Set aside in paper towels to dry. Zest the lemon and set aside.

To make the aioli, whisk the yolks, 1 Tbsp + 1 tsp fresh lemon juice, mustard and garlic in a medium bowl until combined. Continuing to whisk vigorously, add the canola oil in a slow stream until it’s fully incorporated. Season with salt and pepper to taste. Refrigerate the aioli until you’re ready to use it.

Preheat oven to 400°F.

Preheat the grill pan or your grill to medium-high and sear each side of the steak with grill marks, about 3 minutes per side. Transfer the pan to the oven (or place the steaks to the side of the flame on your outdoor grill and cover) for 6 to 8 minutes. For medium-rare steaks, the internal temperature should be 135°F. Let the steak rest for 10 minutes.

Spread the grilled crostini out on a platter and top each with 1 tsp of aioli. In a medium bowl, toss the arugula leaves with the lemon zest, the remaining lemon juice, 2 Tbsp olive oil, and salt and pepper to taste. Divide the arugula between the crostini.

Thinly slice the steak and place 2 to 3 slices on each crostini. Finish the crostini with a dollop of aioli and a drizzle of aceto balsamico. Enjoy!

Printable PDF.

A Savory Soup from Seasons, Our New Cookbook

Stuck at home and wondering how to fill the time? When we have the time, we love to cook. And in times like these, our thoughts turn to comfort food. The Lentil Bacon soup from Seasons, the new Macrina Cookbook, is one of our favorites. It’s hearty and simple to prepare. Of course, we recommend serving it with a fresh baguette, which, if you don’t want to go out, can be ordered through DoorDash. (Pro tip: use code MACRINA10 for 10% off your first order during the month of March.)

Our cookbook as available at the cafés or you can order it delivered through our website.

LENTIL BACON SOUP

This lentil soup is simple to prepare and provides nourishing warmth—perfect for a winter lunch or light dinner. It has layers of flavor: the smokiness of the bacon, an aromatic base of onions and carrots, and the acidity of the tomatoes. The savory lentils absorb all the flavors and thicken the soup. As it simmers, the fragrance of garlic and fresh thyme fills the kitchen. Leftovers are even better the next day.

¼ cup olive oil

1 medium onion, diced

4 Roma tomatoes, diced

2 medium carrots, diced

2 stalks celery, diced

1 medium fennel bulb, diced

4 cloves garlic, finely chopped

2 Tbsp fresh thyme, chopped

5 slices of bacon, cooked and chopped

½ cup white wine

1 cup dried lentils

6 to 8 cups chicken or vegetable stock

Salt and freshly ground pepper

In a medium soup pot or deep saucepan, combine the olive oil, onions, tomatoes, carrots, celery and fennel. Cook over medium heat with the lid partially on to steam the vegetables. Cook until the vegetables are translucent and smell sweet, about 5 to 10 minutes. Add the garlic, thyme and bacon. Cook for 3 minutes until the garlic smells sweet but is not dark or burnt. Add the white wine and reduce by half. With a wooden spoon, scrape up any caramelized bits on the bottom and stir into the mix. Add the lentils and stock. Cook for 45 minutes to 1 hour in order to concentrate and develop the flavors. Lentils should still hold their shape. Season with salt and pepper. This is delicious topped with sour cream and served with warm crusty bread.

January Recipe of the Month: Almond Raspberry Cornetto

The quintessential Italian breakfast pastry is the cornetto (singular form of the plural cornetti), a pastry similar to its French cousin the croissant. A bit more rustic than a croissant, they are light and airy and a little sweet with a hint of salt. This simple recipe elevates the cornetti for a lovely brunch treat. You can buy the cornetti the day before—traditionally bakeries use their day-old croissants for these—and you can prepare the almond cream and quick raspberry jam before your guests arrive. Then all you need to do before serving is to assemble and pop them in the oven! These twice baked treats are beautiful, especially dusted with powdered sugar and garnished with a few fresh raspberries. This recipe calls for plain cornetti, but chocolate cornetti also work and add another dimension of flavor.

INGREDIENTS:

Serves 4

1/2 cup whole raw almonds

4 tablespoons unsalted butter

1/2 cup granulated sugar, divided

1 egg

3/4 tablespoon pure vanilla extract

3/4 tablespoon unbleached all-purpose flour

3/4 cup fresh or frozen raspberries

1 tablespoon water

1 tablespoon cornstarch

4 Macrina Cornetti

1/2 cup sliced almonds

DIRECTIONS:

Preheat oven to 375°F and line a rimmed baking sheet with parchment paper.

Roast the whole almonds on the baking sheet for 12 to 15 minutes until they are golden brown and fragrant. Let cool.

In a food processor, blend the whole almonds, butter, 1/4 cup sugar, egg, vanilla and all-purpose our until smooth. Set aside.

In a small saucepan, over medium heat, add the raspberries and 1/4 cup sugar. Bring mixture to a boil, dissolving the sugar and releasing the juices from the berries. Combine the water and cornstarch and add the mix to the berries. Once it has thickened, remove from the heat and pour into a small bowl to cool.

Cut each cornetto horizontally, leaving a hinge. On the lined baking sheet, place the 4 open-faced cornetti. Spread half the almond mixture on the bottom half of each cornetto. Save the remainder of the mix for later.

Place in the oven for 3 to 4 minutes to melt the almond mixture. Add 1 tablespoon of the raspberry jam onto the almond mixture and ip the top of each cornetto closed. Spread the remaining almond mixture over the tops of the cornetti and sprinkle with the sliced almonds (the almonds should stick to the almond mixture). Return the baking sheet pan to the oven for 3 more minutes to toast the almonds and warm the cornetti.

Serve them for brunch, or simply with a hot cup of coffee, tea or a frothy cappuccino. Enjoy!

Printable PDF

Baking Holiday Cookies with Friends

At Macrina, we love baking and we love community. The annual holiday cookie exchange is a great example of this—each cookie a story, each an act of love. It’s a time to visit your neighbors and share good tidings. Not much tops baking family recipes with friends, but when you don’t have the time, Macrina has you covered. Our collection of 20 holiday cookies, sold in a reusable Panibois wooden baking box, will bring joy to your friends and neighbors. Each of the six delicious types of cookie has a story and a distinct flavor.

Read our blog to hear how one of Macrina’s partners, Michelle Galvin, has rekindled and nurtured dear friendships through an annual holiday cookie baking gathering and to learn more about our Holiday Cookie Box.

A few years after college, newly married and busy establishing a career, finding time to visit with dear friends was a challenge. In high school, Trina, Kerri and I would spend whole days together, talking every day. But now, despite the desire, we barely saw each other.

With Christmas approaching, we made a promise we’d start a new tradition: a holiday cookie party. We all loved baking and revered the neighborly tradition of the cookie exchange. What better way to reconnect than spending an afternoon sharing and baking family recipes together?

At the first gathering, Trina brought a vintage pizzelle maker. The family heirloom looked, uh, well-loved. It was easy to imagine the hundreds or thousands of thin wafer-like cookies it had produced over the years. Making 200 pizzelles alone would be a monotonous task, but the repetitive task of spooning dollop after dollop of dough into the rustic pizzelle iron with friends made it fun.  We laughed a lot and had plenty of time to catch up.

Next, Trina taught us her Nonna’s biscotti recipe, the best in all of Montecatini she’d claimed. Her “trick” was to toast the almonds before adding them to the dough. Nothing satisfies the need for crunch like biscotti do, and I loved hearing the stories of Trina’s grandmother.

Since only two baking sheets could fit in the oven at a time, we spent an entire Saturday baking. It was like old times, talking of matters big and small, remembering old stories and sharing new ones. And at the end of it, we each had a large box of cookies to share with our friends, neighbors and family.

We promised we’d do it again the next year. And we did. And the year after that, too. Sometime in the early aughts, one of us showed up with a special holiday cookie edition of Martha Stewart’s Living magazine. We tried making her Chocolate Crackle Cookies. Soon our hands were sticky with chocolate dough. But they were so delicious straight from the oven—chocolate crack-le!—I worried we wouldn’t have enough to give away. Of course, they got added to the yearly event. Even after all these years, Kerri and Trina still debate whether they should be crisp or chewy and how long to bake them. I love them both ways—and both of them—so I sit back and enjoy the playful debate.


As we added cookies, we also added kids. Gingerbread cookies with bright white royal frosting and decorated sugar cookies made their way onto our cookie trays. With the many small helping hands, the mess grew exponentially. The number of hands helping clean up did not! But the kids were thrilled to help. Though some of them struggled just a little to part with the cookies, they were all proud to present their teachers with plates of cookies they’d helped make.

Not only did I catch up with my friends, but now we also traded parenting secrets and potty training strategies. Later those stories included the challenges of starting new schools, puberty and middle school, sharing the car keys with new drivers, and college tours.

Not that it was all free of tragedy. At one gathering, midway through the pizzelle making, Trina dropped the heirloom iron and it broke. (Thank goodness, it was her—not me!) We raced out to a fancy kitchen store for a replacement. It sufficed but didn’t make cookies anywhere nearly as good, or as beautiful. So, we took to eBay for a replacement, carefully inspecting images and bidding patiently. Three years later, we had not one but two vintage pizzelle makers—exact replicas—safe cover if the dropsies came over us again.

With more kids and more plates of cookies to assemble, the single oven was a bottleneck. So, we ventured down to the Macrina test kitchen in Kent. The kitchen had so much space and fancy ovens galore. We were like pros in there. In just three hours, we had plates and plates of cookies, and we’d barely broken a sweat! We realized that the point of the gathering wasn’t about speed and efficiency (although the convection oven with rotating racks that baked all our cookies evenly was amazing), but nurturing friendships of more than 40 years. We’re back to the two cookie sheets oven.

Fortunately, it is the exception when time and circumstance doesn’t allow for our annual event. The few times it has happened, all three of us were very grateful that we could count on the fabulous bakers at Macrina. Sure, we missed the time together. But we were still able to bring our friends, family and neighbors lovely gift boxes of homemade holiday cookies we could be proud of.

Macrina Holiday Cookie box is an assortment of 20 cookies bundled in a reusable Panibois wooden baking box. It contains:

2 Gingerbread

3 Chocolate Crinkle

3 Mexican Wedding Balls

4 Cranberry Orange Almond Biscotti

4 Pecan Rosemary Shortbread

4 Rugelach

December Recipe of the Month: Pumpkin Chiffon Pie

This lighter variation of our pumpkin pie practically floats. The fluffy texture comes from separating the eggs and folding the stiff whites into the batter. A topping of whipped cream adds to the feeling that you’re lifting an airy pumpkin dream to your mouth. At Macrina, butternut squash is the not-so-secret ingredient in our pumpkin pies. Simply put, we think pumpkin pies taste better with a dollop of roasted butternut squash. In this recipe however, butternut squash can replace the pumpkin altogether. We hope the cloud-like combination of sweetened squash, crystalized ginger and buttery graham cracker crust becomes an annual holiday tradition.

INGREDIENTS

Serves 8-10

6 ounces graham crackers (2 cups), crushed in food processor

1/2 cup coconut our

5 tablespoons unsalted butter, melted

3 cups roasted butternut squash, puréed (or substitute a 15-ounce can of pumpkin purée)

2 tablespoons maple syrup

1 tablespoon + 1-1/2 teaspoons vanilla extract

3 eggs

1 cup whole milk

3/4 cup brown sugar

1 teaspoon ground cinnamon

2 tablespoons crystalized ginger, medium dice

1/4 teaspoon ground nutmeg

1/2 teaspoon salt

1 packet powdered gelatin (1/4 ounce)

1/2 cup granulated sugar, divided

1-1/2 cups heavy cream

Garnish

1 tablespoon crystalized ginger, thinly sliced

Sugared cranberries or pomegranate seeds

DIRECTIONS

Preheat oven to 350°F and center the oven rack.

In a medium bowl, add the crushed graham crackers, coconut flour and melted butter. Mix well with a spoon. Press the mixture into a 9″ pie pan so that the edges and base have a uniform thickness. Bake for 5-10 minutes until edges are golden brown. Set aside.

In a medium bowl, combine the puréed butternut squash (or pumpkin), maple syrup and vanilla extract. Set aside.

Separate the eggs, placing the yolks in a medium bowl and the whites in the bowl of a stand mixer.

Place a medium bowl over a saucepan filled with 2″ of water (or use a double boiler). Add the milk, brown sugar, cinnamon, crystalized ginger, nutmeg and salt. Bring the mixture to a boil, then reduce the heat and simmer. Whisk until the sugar has dissolved. Add the powdered gelatin and whisk to combine.

Add 1/4 cup of the hot milk mixture to the egg yolks, whisking constantly. Continue adding the milk mixture in 1/4 cup increments until it’s all added. Return the incorporated mixture to the double boiler over medium heat and whisk for 3 minutes to thicken the custard. Stir in the squash purée and cook for another 3 minutes to evaporate any excess water from the squash.

Transfer the pie filling to a clean bowl and refrigerate for 20 minutes, giving it an occasional stir.

Whip the egg whites in a stand mixer until they look foamy. Gradually add 1/4 cup of the granulated sugar and whip until the whites are gently firm.

Fold the egg white mixture into the cooled pie filling. Ensure that it’s uniformly combined before pouring the mixture into the prepared graham cracker shell. Refrigerate for 4 hours.

In the bowl of a stand mixer, whip the heavy cream. As the mixture starts to firm up, add the remaining 1/4 cup of sugar.

Top the pie with the sweetened heavy cream. It is best if you chill the pie for another 2 hours before serving to let the whipped cream set up. For a festive presentation, garnish with crystalized ginger and sugared cranberries or pomegranate seeds. Enjoy!


Macrina Bakery’s New Cookbook: Seasons

With two beloved cookbooks covering many of our most popular breads and pastries, why did we produce a third? Well, after 25 years of creating impassioned dishes—savory and sweet—for customers at our five Seattle area cafés, we kept hearing, Can I get the recipe for that?

This compilation of customers’ favorite new dishes and desserts from the Macrina kitchen is organized around the many seasonal delicacies of the Puget Sound. The easy-to-follow recipes feature big flavors and beautiful food. Local photographer Jim Henkens spent many days at Leslie Mackie’s farm on Vashon Island capturing the spirit and flair of these well-tested recipes and the rural beauty that serves as Leslie’s inspiration.

Leslie Mackie opened Macrina Bakery in 1993 to share her joy of artisan baking. Her passion shined through the hand-formed breads and pastries, and when she opened the cafe shortly after that, it shined in the soups, sandwiches and other savories.

A decade later, when she moved to a rustic farm on Vashon Island, a short ferry ride away from Seattle, her connection to sustainable farming and seasonal produce deepened. Vashon is a lightly populated island of hills, twisty backwoods roads, forests and sprawling meadows. Free-range eggs, berries and freshly picked produce beckon passersby from roadside self-serve farm stands. Payment is frequently on the honor system. During the growing season, a bustling farmers market in the small town overflows with some of the best food grown in the Pacific Northwest.

Leslie enthusiastically gathers friends around great food. Most of the cookbook recipes first debuted at meals with the farmers, chefs, bakers, teachers and food lovers who make up Leslie’s community. When one of the new dishes hit a particularly high note, Leslie added the recipe to her notebook. After they were refined and tested, they were shared through Macrina’s recipe-of-the-month newsletter.

Macrina Bakery’s Seasons is a compilation of the best. Each recipe is rooted in the distinctive foods of spring, summer, fall and winter in the Pacific Northwest. Leslie designed the recipes for the home cook. Most use easy-to-find ingredients, and for rarer items, she has provided suggestions for substitutions. Except for a few, you should be able to prepare the recipes in less than an hour so that you can spend time with your guests enjoying a taste of the good life.

November Recipe of the Month: Autumn Breakfast Stew

Vegetable stew for breakfast? This flavorful dish will help power you through the day. Chickpeas and lentils meld with fall vegetables in a garlicky za’atar-flavored tomato sauce. A healthy dash of olive oil, fresh avocado and eggs add protein and nourishment. Mama Lil’s peppers add some zip. No wonder this is such a popular brunch item at our cafés. You can adjust the legumes and vegetables as the seasons change. Serve it with a piece of crusty bread and enjoy a healthy start to your day.

INGREDIENTS

Serves 4

½ medium-sized Delicata squash

1 medium zucchini squash

2 red bell peppers

½ cup olive oil, divided

4 tsp za’atar spice, divided

1 tsp kosher salt, divided

1 large leek, thinly sliced

2 tsp garlic, finely chopped

2 medium tomatoes, medium dice

1 cup dried lentils

2½ cups water

1 cup chickpeas, canned or precooked

1 cup apple cider

¼ cup Italian parsley, coarsely chopped

½ cup extra virgin olive oil

8 eggs

1 avocado, peeled and quartered

16 slices Mama Lil’s Sweet Hot Pickled Peppers

Preheat the oven to 375°F. Line a baking sheet with parchment paper, set aside.

Remove the stem and base of the Delicata squash, then halve the squash and scoop out the seeds (refrigerate one half to use for another dish). Cut the squash into ¾” squares and toss with 2 Tbsp of olive oil, ¼ tsp salt and 2 tsp of za’atar. Spread the seasoned squash on one-third of the prepared baking sheet.

Cut the zucchini into ¾” squares and toss with 2 Tbsp of olive oil, ¼ tsp salt and the final 2 tsp of za’atar. Place on the middle third of the baking sheet.

On the final third of the baking sheet, place the 2 red bell peppers. Brush the exterior with 2 Tbsp of olive oil and season with salt.

Roast the squash, zucchini and bell peppers for 30 minutes, or until the squash is tender and golden brown. Allow the vegetables to cool for 20 minutes, then peel the bell peppers. Cut the peppers in half, remove the seeds, then coarsely dice them. Set aside

In a large saucepan, place the final 2 Tbsp of olive oil and sauté the leeks over medium-high heat. Cover to sweat the leeks. Cook for 3 to 5 minutes.

Add the diced tomatoes and garlic, simmer for another 3 minutes. Add the lentils, water and ½ tsp salt. Simmer for 30 minutes to cook the lentils.

Add the roasted peppers, delicata squash, zucchini, chickpeas and apple cider to the large saucepan. Simmer for another 8 to 10 minutes to marry the flavors. Add the Italian parsley and stir to combine.

Divide the stew between 4 plates and start preparing the eggs.

Warm a small sauté pan over medium-low heat. Add 2 Tbsp extra virgin olive oil and crack 2 eggs into the pan. Season with salt and pepper and cook to your doneness preference. Top the stew with the eggs and any extra olive oil in the pan. Garnish the plate with a quarter of the sliced avocado and 4 slices of Mama Lil’s Peppers. Repeat for the other 3 plates. The eggs cook quickly, and the stew holds its heat, so all 4 plates will come out warm.

Serve with a slice of Macrina’s Skagit Sourdough toast (our preference), or another hearty loaf.

October Recipe of the Month: Creamy Mushroom & Chicken Bread Soup

It’s high time to bring this retro favorite back into style! Our Mini Macrina Casera Loaf is the perfect size for making bread bowls and is crusty enough to contain the soup. The lovely texture of this creamy chicken and mushroom soup is created by puréeing the broth with some of the bread you remove to make the bowls. Homemade stock makes this crowd-pleaser even more flavorful.

INGREDIENTS

Serves 4

4 Mini Macrina Casera loaves (8 ounces each)

1/2 cup olive oil, divided

4 cremini mushrooms, thinly sliced

1/4 teaspoon kosher salt

1/8 teaspoon freshly ground black pepper

2 teaspoons fresh thyme, finely chopped, divided

8 ounces chicken breast

3/4 cup yellow onion, finely chopped

3/4 cup carrots, peeled and finely chopped

3/4 cup celery, finely chopped

3 cloves garlic, finely chopped

2 teaspoons fresh rosemary, finely chopped

1/2 cup white wine

8 cups chicken stock

1/2 cup heavy cream

1 cup (2 ounces) Gruyère cheese, grated

DIRECTIONS

Cut a 1″ deep circle, about 4″ to 5″ in diameter, across the top of each Mini Macrina Casera loaf. Then cut beneath each circle to create a lid for the soup bowls. Using your fingers or a spoon, carve out the center of the loaves, leaving the edges about 1/2″ thick. Measure out 1-1/2 cups of the bread you’ve removed, and reserve it for adding to the soup. Brush approximately 1 tablespoon of olive oil inside each bread bowl and on the underside of the lids. Set the bowls aside.

In a medium sauté pan over medium-high heat, warm 2 tablespoons of olive oil. Add the mushrooms, salt, pepper and 1 teaspoon of thyme. Brown the mushrooms then remove and set aside. In this same pan over medium-high heat, brown the chicken breast on each side for 2 minutes and then set aside. It will finish cooking in the soup base, so the browning here is just to develop flavor.

In a medium saucepan over medium heat, warm the remaining 2 tablespoons of olive oil. Add the onions, carrots and celery. Cover the pan and sweat the vegetables for 2-4 minutes until the onions are translucent. Add the garlic, rosemary and remaining teaspoon of thyme. Continue to cook for 1-2 minutes.

Add the white wine and simmer until the wine is reduced by half. Add the chicken breast, chicken stock and the reserved bread. Simmer for 30 minutes.

Remove the chicken breast and let cool for 10 minutes.

Preheat oven to 350°F and line a rimmed baking pan with parchment paper.

Pour the soup mixture into a food processor. Do not fill it higher than the top of the blade. Secure the lid and purée the soup. Repeat in batches until you’ve puréed all the soup. Alternatively, if you have an immersion blender that works as well.

Over medium heat, return the soup to the saucepan and add the heavy cream.

Coarsely chop the chicken breast and sautéed mushrooms. Add them to the soup and let cook for another 2 minutes. Season to taste with salt and pepper.

Place the oiled bread bowls and lids on the prepared baking pan and bake for 5 minutes.

Fill the bowls with soup and top with Gruyère. Carefully return the baking sheet to the oven for 3 minutes to melt the cheese. Serve each bread soup bowl topped with its lid. The crispy lid makes for a great soup dipper and don’t forget to enjoy the bowl itself once you’ve spooned out all the soup. It’s delicious!

Printable PDF