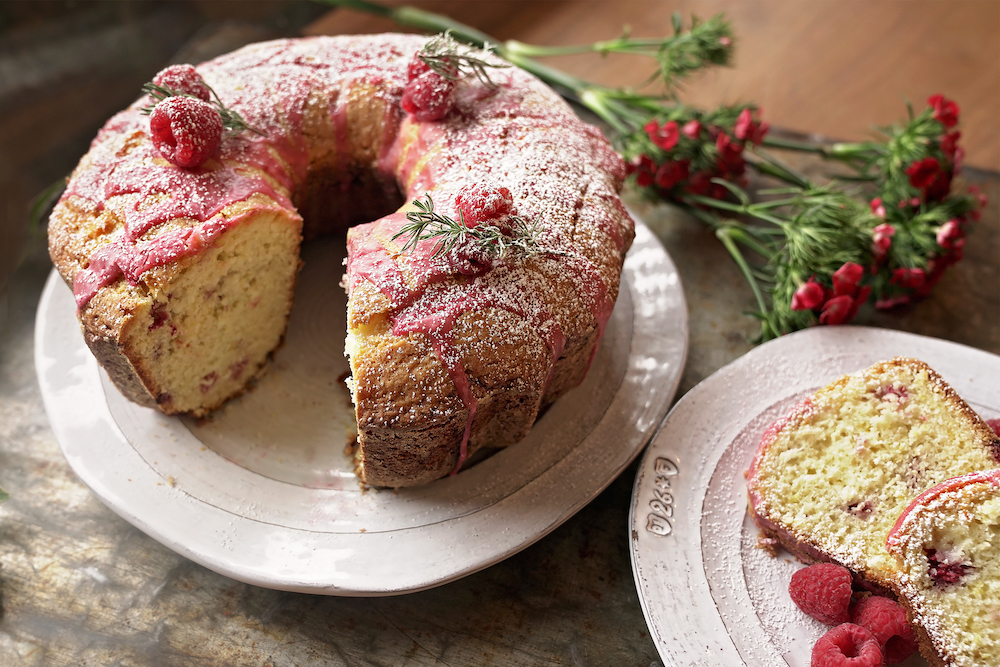
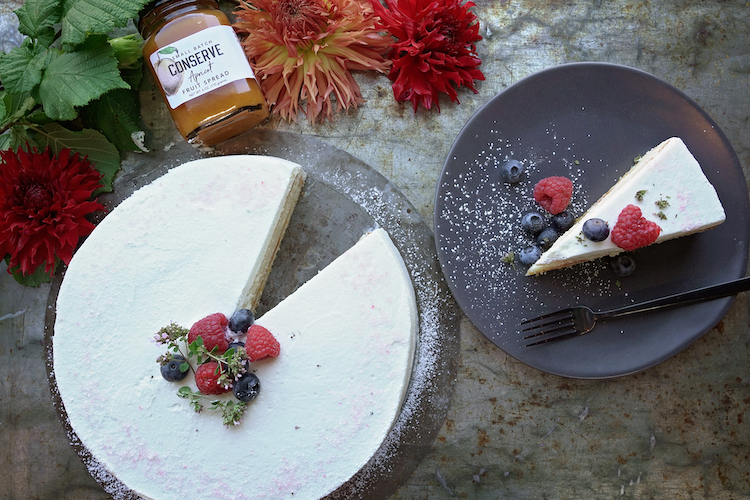
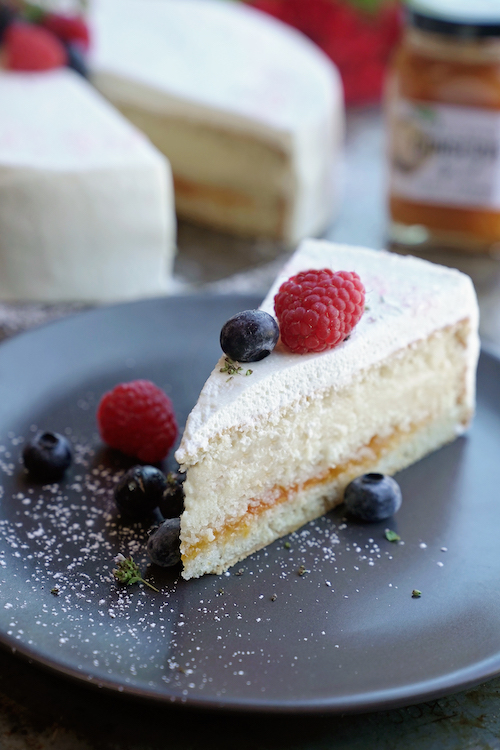
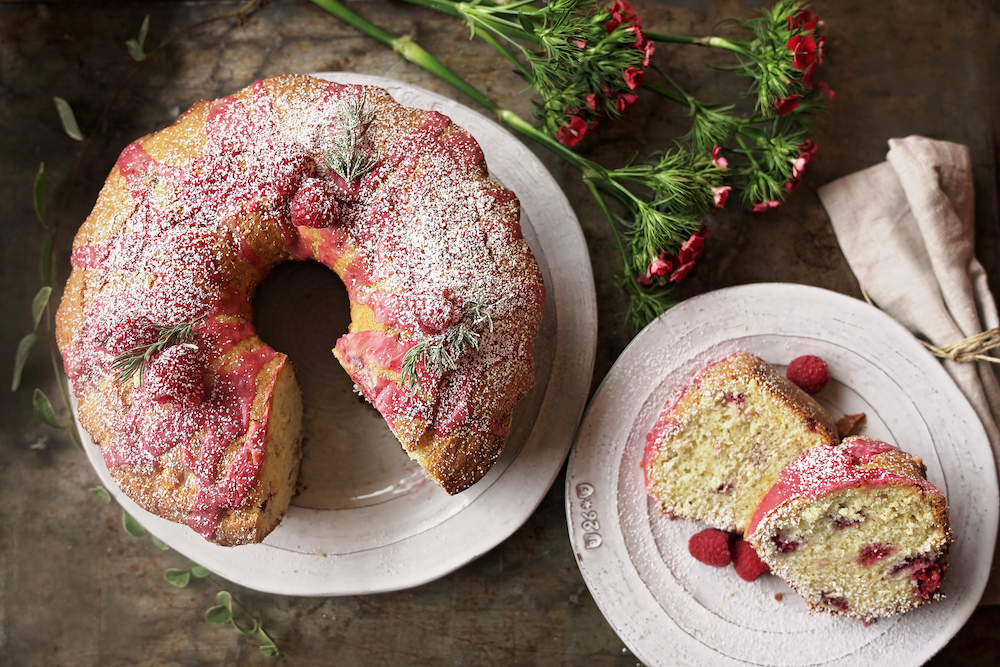
September Recipe of the Month – Yogurt Honey Fig & Raspberry Tart

This is a version of the wonderful yogurt tart that we’ve served in our retail cafés for years. The creamy yogurt custard, sweetened with honey, rivals any rich pastry cream or sweet cream filling. The slight tartness of the yogurt harmonizes the fresh fruit and honey.

– Leslie Mackie

Ingredients:

Makes one 10-inch tart

1 batch Flaky Pie Dough
3 whole eggs
½ cup honey
2 cups non-fat plain yogurt
1 Tbsp pure vanilla extract
½ cup + 2 Tbsp all-purpose flour
8 fresh figs, sliced ½-inch thick
2 pints fresh raspberries
1 Tbsp turbinado sugar (raw sugar)
2 Tbsp granulated sugar
1 Tbsp water

Directions:

Make one batch of Flaky Pie Dough. Alternatively, ready-to- bake disks are available for purchase at your neighborhood Macrina. If you choose to make the Flaky Pie Dough recipe, divide the recipe in half to make two disks. Use one for this recipe and freeze the extra for later use. Keep the disk for this recipe refrigerated until you are ready to use it.

On a floured work surface, roll out the Flaky Pie Dough disk so that its diameter is just under 14 inches and it’s approximately ⅛-inch thick. Fold the dough circle in half and lift it onto the 10-inch tart pan, gently pressing it down and around the sides. Roll the overhanging dough into the pan creating a folded edge about ½ -inch above the pan. Press around the edge to get a uniform thickness for even baking. Chill for at least 30 minutes before baking.

Preheat oven to 350°F. Fill the chilled tart shell with a parchment paper liner and pie weights (or dried beans). Bake on the center rack for 35 to 45 minutes. When it’s finished, the sides should be golden brown. Remove the parchment paper and pie weights and let cool.

In the bowl of a stand mixer fitted with the whisk attachment, cream the eggs and honey together on medium speed for 3 to 5 minutes. Add the yogurt and vanilla and continue to mix for 1 minute.

Sift the all-purpose flour onto a sheet of parchment paper. With the mixer on medium speed, slowly shake the flour into the custard mixture (lift two edges of the parchment sheet so it dips in the middle to transport it to the mixer), allowing it to incorporate without forming lumps. Once all the flour is added, scrape down the sides and the bottom of bowl to ensure all the flour has been incorporated.

Pour the custard into the pre-baked tart shell. Top with two concentric circles of sliced figs and dot with a handful of raspberries. Sprinkle the turbinado sugar over the fruit.

Reduce oven temperature to 325°F. Place the tart on a rimmed baking sheet and place on the center rack. Bake for 50 to 55 minutes or until the custard is set. Let cool for 1 hour.

For the raspberry sauce, place the remaining raspberries in a medium saucepan. Add the granulated sugar and water and bring to a boil. Cook for 2 to 3 minutes, slightly breaking up the berries. Let cool.

The tart is best at room temperature topped with a spoonful of raspberry sauce. If needed, you can hold it overnight in the refrigerator and allow it come to room temperature before serving. Enjoy!

Printable PDF here.

August Recipe of the Month: Cottage Cheese Pancakes with Fresh Berries and Syrup

Sometimes friends come to visit and leave more than just good memories—sometimes they leave recipes. And sometimes those recipes become family favorites. A friend from England gifted me this recipe, and when fresh berries are in season, these cottage cheese pancakes are always in my thoughts. The crisp golden brown edges, the light, tender interior and the savory flavor make them a divine weekend breakfast. Serve them with tart berries and a drizzle of maple syrup and soon you’ll find yourself passing the recipe on to a friend.

– Leslie Mackie

Ingredients:

Serves 6-8

6 Tbsp unsalted butter, divided
1¼ cup all-purpose flour
2 tsp baking powder
2 Tbsp granulated sugar
¼ tsp kosher salt
3 eggs, separated
1 cup cottage cheese
1 cup whole milk
1 tsp pure vanilla extract
⅓ cup canola oil (or sunflower oil)
2 pints fresh berries
1 cup maple syrup

Directions:

Melt 3 Tbsp of butter in a small saucepan. Set aside to cool.

In a medium bowl, sift the flour, baking powder, sugar and salt. Set aside.

Separate the eggs, putting the whites into a stand mixer bowl and the yolks into another medium bowl. Add the cottage cheese, milk and vanilla to the yolks and mix well.

With a whisk attachment, use the stand mixer to whip the whites to a medium-soft texture.

Fold the flour mixture into the yolk mixture in 2 additions. Add the melted butter. Fold in the whipped egg whites, also in 2 additions.

Heat a cast iron pan or skillet over medium heat. Coat the bottom of the pan with oil and scoop in ¼ cup portions of the pancake batter, each spaced about 2 inches apart. Cook for 2 minutes (edges should be deep golden brown), flip and cook for another 1 to 2 minutes.

Keep the finished pancakes warm in a preheated oven while you finish the remaining pancakes.

Serve the pancakes topped with the remaining butter, fresh berries and maple syrup. Enjoy!

Our New Make-at-Home Kits 

Turn your kitchen into a professional bakery with our new make-at-home kits.

One silver lining of the quarantine is the perfect environment it has created for a surge in home cooking, bread making, and baking. Stores have been running short of flour and yeast. Newly minted bakers proudly fill their Instagram feeds with drool-worthy photos of crackly sourdough loaves, glistening muffins, and elegant cakes.

But not everyone has the skills or time to produce pastry-chef quality loaves and pastries. A month ago, to help those who wanted to bake professional-grade loaves, we created a kit for an organic whole wheat loaf. The response has been overwhelmingly favorable. Some people make them with their kids; others have sent beautiful photos of their masterpieces. And many have requested kits for more items.

So we’ve come up with three more make-at-home kits for some of our café favorites: Fresh Fruit Gluten-Free Muffins, Fresh Fruit Coffee Cake and Squash Harvest Bread.

Each kit comes with baking molds (or muffin liners), with all dry ingredients pre-measured and ready to go, and easy-to-follow instructions. You choose your favorite seasonal fruits and supply common wet ingredients like milk, butter, and eggs.

We love to see you in our cafés, but during these coronavirus times, we understand the desire to stay at home. The smell of your favorite breakfast treats baking might even drag your teenagers out of bed early. Enjoy!

Fresh Fruit Gluten-Free Muffin Kit

We started offering these in the cafés about five years ago, and even wheat lovers have become devotees. Our gluten-free dry mix takes the guesswork out of baking. Choose your favorite seasonal fruits, and we’ll help turn your kitchen into a high-end bakery.

Fresh Fruit Coffee Cake Kit

This coffee cake is one of our most requested recipes. The natural sweetness of the fruit permeates the cake and keeps it moist. Choose your favorite seasonal fruits, and we provide nearly everything else, including the baking molds.

Squash Harvest Bread Kit

Our most popular breakfast bread has been on our menu since the day we opened in 1993. The list of ingredients is long, but our kit includes most of them pre-measured and ready to go. You provide the wet ingredients; we do the rest.

The coronavirus has created the perfect environment for a surge in bread-baking. People suddenly have time around the house to do fiddly things they wouldn’t normally, like proofing yeast and monitoring rising dough. Some are looking for a fulfilling hobby, or for sustenance for their families, or just something to do with the home-schooled kids that’s not another video game. Measuring, kneading and shaping dough can be a balm for the anxiety that has accompanied the virus. And some people, faced with the prospect of the conveniences of modern life being upended, are feeling the need to be self-reliant, even in small ways.

Project Barnstorm: Leslie Mackie’s Fruit Spreads 

When I started Macrina Bakery, I had every intention of making homemade fruit spread for our pastries but simply got too busy. Instead, I found an excellent freezer jam made from local berries. I’d been making jam and fruit spread ever since I was in my early twenties. My mother taught me how. Every year, in berry season, she’d get as many of those mouth-watering native strawberries, raspberries and blueberries and set about making jam, fruit spread, and conserves. Most of her jam was freezer jam, but I took to sealing it in jars since it keeps longer and you can store it in the larder.

Now all these years later, I’m finally starting to make fruit spread in quantities large enough I can sell some commercially. The fruit spread business is called Project Barnstorm. Most of the spreads are made from fruit grown on my Vashon Island farm such as Concorde grapes, blackberries and Montgomery cherries. I’m also making apricot, raspberry and blueberry spreads with fruit from a local organic farm.

Project Barnstorm is a celebration of the seasons. By picking the fruit at its peak, or buying it straight from some of the best local farmers, the fruit spreads capture the natural essence of the fruit. Because fruit spreads have less sugar than jam, the natural sweetness of the ripe fruit shines through.

To get the right consistency, I make all the spreads in small batches and cook the fruit until I’ve reduced its water content enough that it will set with just a little pectin. The ratio of fruit to sugar in my spreads is much higher than commercial jams. A full, fresh fruit flavor is the result. A single spoonful in winter will bring you back to summer, if only for a moment. Fortunately, there is the rest of the jar to enjoy!

The fruits spreads are delicious with our toasted artisan breads but are also a great accompaniment with cheese on our flatbread or crostini. My latest indulgence is a spoonful or two over ice cream in the evenings or yogurt in the morning.

If you haven’t made fruit spreads before, take advantage of Washington’s bountiful blackberry crop starting in late July. Often you can find them, purple and bursting with juice, along roadsides throughout the area. Enjoy!

~ Leslie

Leslie’s Blackberry Jam 

Ingredients:

8 canning jars and lids (6-8 oz in size)

8 cups ripe blackberries

¼ cup fresh lemon juice

1½ cups sugar

3 tsp Pectin (Pomona’s Universal Pectin)

Directions:

Fill a canning pot with water and bring it to a boil. Submerge jars and lids in boiling water to sterilize for 5 minutes. Remove and let dry at room temperature.

Gently rinse off the blackberries and pat dry. In a medium saucepan place the berries and mash with a potato masher. Add the lemon juice and half the sugar (¾ cup). Bring the mixture to a boil and simmer for about 5 minutes. Skim any foam that might form on the surface of the mixture and discard. Combine the remaining sugar with the pectin and whisk into the simmering jam mixture. Simmer for another 2 to 3 minutes. Turn off heat.

Taste the jam for sweetness. You can add a bit more sugar or lemon juice at this point to accommodate for the natural sweetness of your berries (they do vary).

Bring the canning pot water up to a boil again. Ladle the hot jam into the sterilized jars, filling to ¼ inch of the top.

Place the metal top and rim over the jar and tighten rim to seal. Gently place the covered jars into the boiling water. Be sure the water is covering the jar. Boil for 10 to 15 minutes to seal.

Remove the jars from the boiling water and let cool at room temperature. Ensure that all the jars are tightly sealed. A good test is to remove the rings and lift the jar by its lid. If it releases, the seal is no good; refrigerate and use within a month (or freeze for up to 6 months). Well-sealed jars will hold at room temperature for 1 year.

July Recipe of the Month: Blueberry Nectarine Pie

One of my pinch-me-I’m-dreaming moments was in 1996 when the incomparable Julia Childs invited me to appear on the seminal food series Baking with Julia. A version of this fruit-filled pie was included in the Baking with Julia cookbook, edited by Dorie Greenspan. Over the years, we’ve tweaked this recipe, always wanting to improve on one of our all-time favorite pies. Throughout the seasons, you should play around with the fruit combinations, using what’s fresh at your local farmers market. This time of year, it’s hard to beat fresh nectarines with plump blueberries!

– Leslie Mackie

Ingredients
Makes one 9-inch pie

1 batch Macrina’s Flaky Pie Dough
2 pints fresh blueberries, rinsed and air-dried
4 ripe nectarines, rinsed and cut into ½-inch wedges
¾ cup + 1 Tbsp granulated sugar, divided
¼ cup light brown sugar
1 tsp pure vanilla extract
1 tsp fresh lemon zest
4 Tbsp unbleached all-purpose flour
1 Tbsp unsalted butter
1 egg beaten with 1 tsp water for egg wash

Directions

Make one batch of Flaky Pie Dough. Keep discs refrigerated until you’re ready to use them.

In a medium bowl, combine the blueberries, nectarine wedges, ¾ cup sugar, brown sugar, vanilla, lemon zest and flour. Toss to coat the fruit with the other ingredients.

On a floured work surface, roll out the larger disc of Flaky Pie Dough so that its diameter is 14 inches and it’s approximately ⅛-inch thick. Fold the flattened disc in half and lift it onto your pie pan. Unfold the disc and gently press it down and around the sides. There should be a 1 to 1 ½-inch overhang for sealing and crimping at the finish.

Pour the fruit filling into the raw pie shell. Use a spoon to press gently on the fruit smoothing the surface so the filling doesn’t have gaps that would settle when baking. Break up the 1 Tbsp of unsalted butter and dot the top of the filling. Paint the rim of the pie dough with egg wash.

On a floured work surface, roll out the smaller disc of Flaky Pie Dough so that its diameter is just under 10 inches and it’s approximately ⅛-inch thick. While it’s flat, cut vents in the disc in a decorative design. We often cut two 2-inch slits (across from each other) and four 1-inch slits to the left and right of the larger slits. Be creative; the main thing is to have steam vents so the crust doesn’t balloon.

Gently fold the disc in half and lift it onto the pie. Unfold it and match the perimeter to the egg-washed rim of the bottom dough. Brush the top of the pie with egg wash, then fold the lower dough’s overhang up around the entire pie.

Once it’s sealed, crimp the edge with a decorative design. You can flatten and use fork tongs for design or use your fingertips to form a waving edge. Again, be creative. Brush the crimped edge with egg wash and sprinkle 1 Tbsp sugar over the top of the pie. Refrigerate the pie for 30 minutes before baking.

Position a rack in the middle of the oven and preheat it to 400°F.

Place the chilled pie on a rimmed baking sheet and bake for 20 minutes, then reduce the temperature to 350°F and bake for another 40 to 45 minutes. The top crust should be golden brown with bubbling fruit juices visible.

Let the pie cool for 90 minutes before serving. Serve it with your favorite ice cream or sweetened whipped cream.

June Recipe of the Month: Apricot Almond Upside-Down Cake

Apricots are the first stone fruit of the season. Their tartness balances well with caramelized brown sugar and butter, enhanced with the sweet bite of Heritage Distillery’s Brown Sugar Bourbon (or similar). This delicate cake has the crunch of roasted almonds, the earthiness of buckwheat flour and the joy of juicy apricots.

Ingredients
Makes one 9-inch cake

¾ cup whole almonds
16 Tbsp unsalted butter (2 sticks), room temperature, divided
1¾ cup light brown sugar, divided
4 tsp Heritage Distillery Brown Sugar Bourbon, divided (or other bourbon)
½ tsp pure vanilla extract
7 fresh apricots, halved and pits removed
1 ¼ cup unbleached all-purpose flour
½ cup buckwheat flour
½ tsp baking powder
½ tsp baking soda
½ tsp salt
⅓ cup granulated sugar
3 eggs
½ tsp almond extract
1 cup low-fat buttermilk

Directions

Preheat the oven to 350°F. Trace the outline of a 9-inch round cake pan on a sheet of parchment and cut a ring one half-inch larger than your marking. Cut 2-inch strips of parchment to line the sides. Lightly brush oil on the base and sides of the cake pan. Place the parchment strips onto the oiled sides, then insert the parchment circle and press the overlapping paper flush against the edge. Set aside.

Place the almonds on a rimmed baking sheet and roast for 10 minutes. Let cool for 15 minutes, then pulse in a food processor to a medium-fine texture.

In a small saucepan, slowly melt 4 Tbsp butter. Add ½ cup brown sugar, 2 tsp Brown Sugar Bourbon and vanilla. Whisk it all together, then pour it into the lined cake pan. Use a spatula to spread the sugar mixture evenly over the base of the pan. Sprinkle the ground almonds over the sugar mixture, then place the apricot halves, cut side down, around the edge of the pan. For the center circle, cut the apricots into quarters and place in a spiral to create a flower-like design.

In a medium bowl, sift the all-purpose and buckwheat flours, baking powder, baking soda and salt.

In the bowl of a stand mixer, place the remaining 12 Tbsp butter, ¾ cup of brown sugar and the granulated sugar. Using a paddle attachment, cream the mixture on medium speed for 5 to 8 minutes, or until the mixture is light and pale in texture.

Add the eggs one at a time, waiting until each is incorporated before adding the next. Then add the remaining bourbon and almond extract and mix for 30 seconds to evenly distribute. Scrape the bowl frequently with a spatula to ensure everything is mixed in.

Remove the bowl from the stand mixer. Stirring by hand with a spatula, add a third of the flour mixture and a third of the buttermilk. Continue alternating until the flour has absorbed the buttermilk. Do not overmix.

Pour the batter over the apricots and level with a spatula. Bake for 45 to 50 minutes, or until a toothpick comes out clean.

Let cool for 20 minutes. To serve, cover pan with the plate you want to present it on and invert. Carefully lift the cake pan and remove the parchment paper. It’s best to let it cool for another 20 minutes and serve the cake while it’s still slightly warm.

Enjoy with your favorite vanilla ice cream or sweetened whipped cream.

How to Make a Natural Starter 

Many of us have been spending a lot more time at home lately. Some of us are looking to distract and engage in crafts to take breaks from the anxiety of the outside world.

Kneading and baking homemade bread is one way. It is tactile, rhythmic, and delivers great rewards along with its calming properties. If you’ve already started exploring baking bread, how about taking your bread to the next level by making your own natural starter? You may not keep the starter up forever, but it will make some of the best homemade loaves you’ve ever tasted.

Of course, you can make bread using a packet of dried yeast, but harnessing the power of a natural starter is a transformative experience. In fact, it was a natural starter that helped transform Macrina from a dream into bakery. No exaggeration. In 1991, Leslie Mackie was preparing for her annual harvest party, an autumn gathering of food lovers in which everyone brought food made from their gardens. Leslie decided she’d bake bread for the event with a natural starter made from grapes grown in her garden. She crushed the plump red grapes and added them to a mix of flour and water. After several days of love and regular feeding, the starter was alive and kicking. The loaf that she developed for that party was a hit and ultimately became our house bread, Macrina Casera. Now, more than 25 years later, we are still feeding that same starter every day and baking hundreds of loaves. Casera’s mild sour flavor is derivative of those grapes, that fortuitous backyard fermentation.

It was this loaf that helped Leslie decide to open Macrina Bakery in 1993 and the same loaf that put Macrina on the regional map in 1994 when the Casera won second place in a Sunset Magazine sourdough competition.

We now have several other starters that we use for various breads, like the starter we developed from grapes from Hightower Cellars Vineyard Cabernet Sauvignon that we use in our Pane Francese. When we were collaborating with PCC on a whole wheat baguette, Scott Owen, PCC Markets Grocery Merchandiser, said, “Macrina’s collection of sourdough starters is incredible.” We like to think so and carefully feed and nurture them daily to keep them vigorous—they’re the heart of our naturally-leavened breads.

There are many ways to make a natural starter. Here’s our favorite way:

Start with fresh grapes. Discard any unfavorable grapes. Wash to remove any debris. Weigh out 1½ lbs and wrap them in cheesecloth.

Weigh out 2 lbs of all-purpose flour and 3 lbs water at 75°F. Combine the water and flour and mix until smooth.

Squeeze the wrapped grapes over the bowl to release their juice into the flour mixture. Submerge the grape sachet in the bowl. Let the bowl sit uncovered at room temperature for a full day. After 24 hours have elapsed, discard the grape sachet.

Your starter will now have life. The natural yeasts from the grapes are doing their work. Stir the starter at least once a day for a few days until you see bubbles on the surface. Once this happens, you need to begin feeding it. Mix another 2 lbs of flour and 3 lbs of water together and then add it to your starter. Mix well and allow it to sit out another full day.

You should have a vigorous starter. Choose a recipe for naturally leavened bread (you can find the recipe for our Macrina Casera in the Macrina Bakery and Café Cookbook) and taste the magic you’ve created!

From this point on, you’ll need to feed your starter like a pet. Feed it with a mix of equal parts flour and water. Hopefully, you’ll be using it frequently, so it’s easy to remember. If the starter gets too large, discard half of it. If liquid begins gathering on top, you can move it into the refrigerator to slow the fermentation.

Enjoy!


May Recipe of the Month: Mother’s Day Cake

This simple chocolate cake is my favorite. The base layers are our moist Mom’s Chocolate Cake. The right balance of espresso and chocolate make the mocha mousse unforgettable, and the dark chocolate ganache adds flavor and elegance. Garnish it with raspberries or chocolate shavings and you’ll have a beautiful homemade cake to surprise your mother with at her celebration.

Ingredients

Makes one 9-inch cake

Cake

2 eggs

¾ cup whole milk

⅓ cup canola oil

2 tsp pure vanilla extract

1¾ cups granulated sugar

1½ cups all-purpose flour

¼ cup cocoa powder

1 tsp baking soda

¾ tsp salt

¾ cup boiling water

9-inch cardboard cake circle

Mocha Mousse

¾ cup semisweet chocolate chips

¼ cup brewed espresso (or very strong coffee)

4 Tbsp unsalted butter

2 cups whipping cream

½ cup powdered sugar, sifted

Ganache Glaze

2 cups whipping cream

1 cup bittersweet chocolate chips

1 cup semisweet chocolate chips

Directions

Cake

Preheat the oven to 325°F. Brush the sides and bottom of a 9-inch round cake pan with canola oil. Line the base with a parchment circle. Dust the oiled edges with flour to prevent sticking.

In a medium bowl, whisk the eggs, milk, canola oil and vanilla. Set aside.

Sift the sugar, flour, cocoa powder, baking powder, baking soda and salt into a stand mixer bowl. Using the paddle attachment, mix on low speed for 1 minute to combine the ingredients. Add the egg mixture in three additions, scraping the bottom and sides of the bowl between. After the third addition, the mixture should be smooth.

With the mixer on low speed, add the boiling water in a slow stream, taking approximately 30 seconds. Increase speed to medium and mix for an additional minute.

Pour the batter into the prepared cake pan.

Bake on the center rack for 30 to 35 minutes. When finished, the top will be set and the sides should pull slightly away from the edges. Let cool for 1 hour.

To remove the cake, run a knife around the edge of the pan, then invert it gently onto a piece of parchment. After the cake has completely cooled, cut it horizontally into three equal layers. Set aside.

Mocha Mousse

In a medium saucepan, melt the semisweet chocolate chips, espresso and unsalted butter. Remove from the heat. Let cool to room temperature.

In a stand mixer bowl, whip the cream to a soft peak using the whisk attachment. Add the sifted powdered sugar. Continue whipping until the mixture forms medium firm peaks.

Remove the bowl. In three additions, fold in the cooled chocolate mixture. Set aside.

Ganache Glaze

In a medium saucepan, bring the whipping cream to a boil. Turn off the heat and add the chocolate chips. Whisk to make a smooth glaze. Let cool to room temperature (it will thicken slightly).

Assembly

Sprinkle a little sugar onto the 9-inch cake circle (or cardboard cut to size and covered with aluminum foil). Top with the first cake layer and spread with one third of the mousse. Repeat this process with the second layer. Then cover with the last layer of cake. Make sure the sides line up and the top layer is flat. Adjust if needed. Then spread the last third of the mousse evenly over the top and sides until it is smooth. Chill the cake for 30 minutes.

Place a 9-inch cake pan upside down on a rimmed baking sheet. Center your chilled cake on the inverted cake pan. Pour half the ganache over the top of the cake so that it is covered evenly. Allow the excess to spill over the sides. Add remaining glaze to the sides and smooth for a nice presentation. The chilled cake should allow you to model the glaze to a smooth surface.

Garnish as you like. Sugar sprinkles, flowers, fresh fruits, berries and chocolate shavings are some of our favorites. Enjoy!


Bread Baking Made Easy

Our organic whole wheat bread kit makes two excellent homemade pan loaves, one for now, and one to share with a lucky neighbor. 

Do you love homemade bread but have always been too intimidated to try baking it yourself? Our organic whole wheat bread kit allows you to make amazingly easy, excellent bread at home without fancy equipment or any special bread-making skills. You’ll get all the smells, two flavorful, nicely-textured loaves, and the sweet reward of having made it yourself. For those of you with kids, this is also a great project to undertake with them.

We chose this loaf for our first-ever bread making kit because it’s one of Leslie’s favorites to make at home. “To me, this pan loaf is the perfect comfort food,” Leslie says. “It smells so good while it’s baking, and the organic whole wheat flour we include gives the bread an excellent texture and flavor.”

Our kit includes everything you need but a standard bread loaf pan, oil for brushing the pan, and honey (or agave or maple syrup). Our recipe has two options: A no-knead version, and a stand-mixer version. The no-knead method takes a little longer (an extra 90 minutes) but turns out a loaf equally as good as the one from the stand mixer. If you don’t have a mixer, this is the path for you—or if you just want to save yourself some extra cleanup.

From start to finish, you’ll need to allow for three hours of combined proofing time (four and a half for the no-knead method) and about 45 minutes of baking time. The active time—mixing the dough and shaping the loaf—won’t account for more than 20 minutes of your time.

If you’re tired of being confined to your home and want to try something new, this kit gives you the chance to turn out professional loaves without the stress. You’ll enjoy the rewards, one slice at a time, for days. 


April Recipe of the Month: Roasted Steak Crostini with Arugula and Lemon Aioli

This recipe makes a great appetizer or can be enjoyed as an open-faced sandwich with a green salad for a light meal. Flat iron steak is nearly as tender as tenderloin but is more economical. The marbling in this cut adds flavor, and the meat grills beautifully. If you can’t find it, try substituting hanger steak or tenderloin. Seasoning with black pepper adds a piquant roundness to the meat. Vibrant lemon aioli and crisp arugula enhance each bite with flavor and texture. The crostini pair well with red wine.

Ingredients

Makes 12 crostini

1½ lbs flat iron steak

3 Tbsp cracked black pepper

2 Tbsp kosher salt

¼ cup aceto balsamico (balsamic vinegar from Modena), divided

Macrina Baguette

1 cup extra virgin olive oil, divided

3 bunches fresh arugula

1 lemon (zest and juice)

2 egg yolks

1½ tsp Dijon mustard

1½ tsp chopped garlic

1½ cups canola or sunflower oil

Directions:

Season both sides of the flat iron steak with the cracked black pepper and kosher salt. Drizzle 2 Tbsp of aceto balsamico over the steak and let it marinate for at least 30 minutes.

Cut the baguette on the bias (diagonal cuts) into slices measuring roughly a ½-inch thick. Slices should be about 4 inches long. Preheat a grill pan or outdoor grill to medium-high heat. Brush both sides of the baguette with olive oil and grill until crisp and marked by the grill. Set aside.

Wash and remove the fibrous stems from the arugula. Set aside in paper towels to dry. Zest the lemon and set aside.

To make the aioli, whisk the yolks, 1 Tbsp + 1 tsp fresh lemon juice, mustard and garlic in a medium bowl until combined. Continuing to whisk vigorously, add the canola oil in a slow stream until it’s fully incorporated. Season with salt and pepper to taste. Refrigerate the aioli until you’re ready to use it.

Preheat oven to 400°F.

Preheat the grill pan or your grill to medium-high and sear each side of the steak with grill marks, about 3 minutes per side. Transfer the pan to the oven (or place the steaks to the side of the flame on your outdoor grill and cover) for 6 to 8 minutes. For medium-rare steaks, the internal temperature should be 135°F. Let the steak rest for 10 minutes.

Spread the grilled crostini out on a platter and top each with 1 tsp of aioli. In a medium bowl, toss the arugula leaves with the lemon zest, the remaining lemon juice, 2 Tbsp olive oil, and salt and pepper to taste. Divide the arugula between the crostini.

Thinly slice the steak and place 2 to 3 slices on each crostini. Finish the crostini with a dollop of aioli and a drizzle of aceto balsamico. Enjoy!

Printable PDF.